The largest gold nugget ever found with a metal detector was called the “Hand of Faith” [1]. It weighed 875 troy ounces and was sitting just 12 inches below the surface in Victoria, Australia. That single find sold for over $1 million.
Twelve inches down. That’s it.
Think about that next time someone tells you all the easy gold is gone.
- My First Gold Prospecting Adventure Was a Complete Disaster
- Why Gold Detecting Is Harder Than Other Metal Detecting (What You're Up Against)
- Best Metal Detector Settings for Gold (Settings That Actually Find Nuggets)
- Where to Find Gold with a Metal Detector (Best Locations for Gold Detecting)
- Gold Prospecting Techniques for Beginners (Field Methods That Actually Work)
- How to Start Gold Prospecting: Your Complete Action Plan
- References
My First Gold Prospecting Adventure Was a Complete Disaster
I’ve been swinging metal detectors for eight years now. I’ll tell you straight up – gold prospecting is the hardest thing I’ve ever tackled in this hobby. It’s also the most addicting.
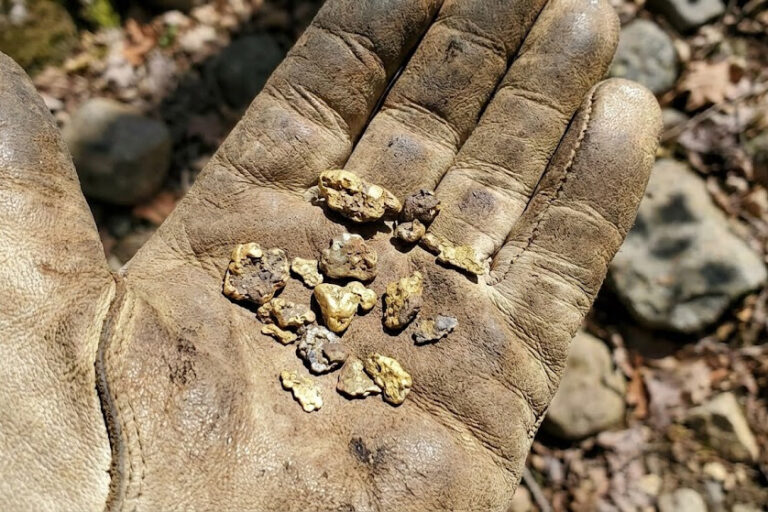
When I pulled my first nugget, my hands shook so bad I could barely take a photo. It was tiny – just half a gram. Barely showed up on my screen. But finding it felt better than pulling a silver dollar from a park. Way better.
My buddy Marcus thought I’d lost my mind. “You already know how to find silver quarters,” he said. “Why start over from scratch?”
Here’s the thing. Everything that works for coins will fail you when you’re hunting gold. The ground fights your detector. The settings that find silver will miss gold completely. And that discrimination feature you count on? It’s your worst enemy now.
But modern detectors are changing what’s possible. New machines bridge the gap between cheap units and professional gear. Gold detecting is more doable than ever for regular people like us.
This guide pulls together manufacturer specs, geological data, expert tips, and real field experience. No hype. No get-rich-quick promises. Just what actually works when you’re learning how to find gold with a metal detector.
Why Gold Detecting Is Harder Than Other Metal Detecting (What You’re Up Against)
Let me paint you a picture. Second gold hunt. Nevada desert. Four hours of swinging my detector in known gold country.
My machine screamed constantly. False signals everywhere. Hot rocks that sounded exactly like nuggets. The ground itself seemed to hate my detector.
I dug 47 targets that day. Found exactly zero gold.
Welcome to what prospectors call “mineralization hell.”
Three Challenges Every Gold Prospector Faces
Challenge #1: Mineralized Ground Creates Constant Interference
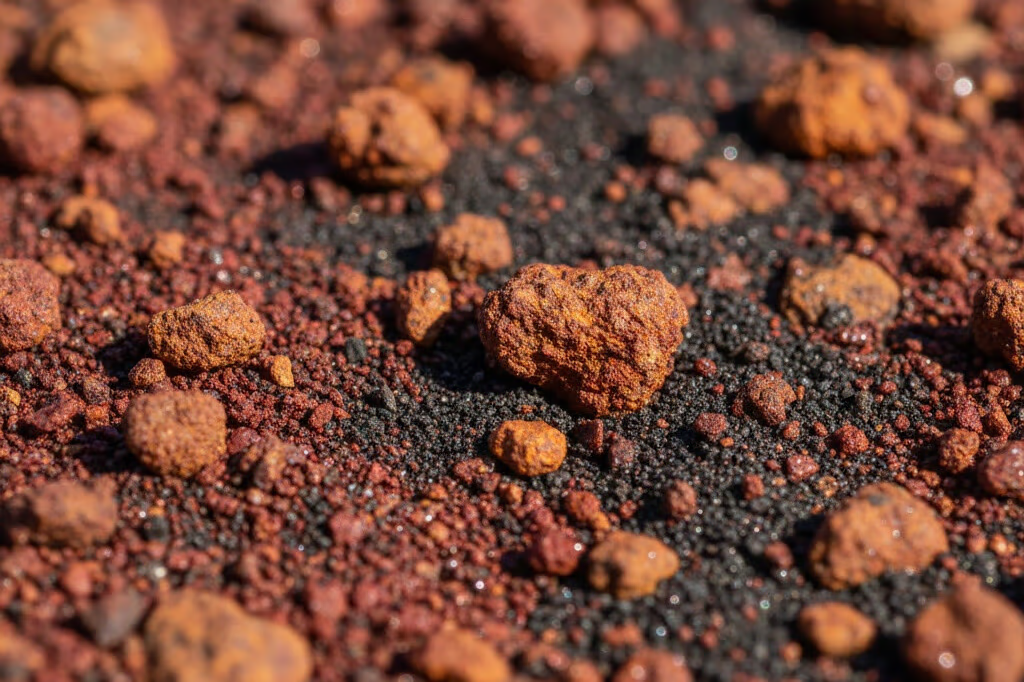
Gold doesn’t hide in nice, clean dirt. It shows up in highly mineralized soil. The same forces that brought gold to the surface also left behind tons of iron minerals like magnetite and hematite. These create constant false signals that hide the real targets.
Look for these signs you’re in gold country: blood-red soil, visible ironstone, black sand, and “hot rocks” that make your detector go crazy.
Here’s how I explain it to new prospectors. Imagine trying to hear someone whisper in a packed stadium. Everyone’s screaming. That’s the ground. The whisper is your tiny gold nugget.
For the tech folks: The mineralized ground creates electromagnetic interference. It messes with your detector’s magnetic field. You’re trying to pick up a faint signal from a low-conductivity target while the soil throws noise at you constantly.
Challenge #2: How to Identify Gold with a Metal Detector (Spoiler: You Can’t by Sound Alone)
Here’s what nobody mentions when you’re learning. Your machine can’t tell one metal from another. Not really.
Small gold nuggets sound exactly like aluminum foil. Medium nuggets read like pull tabs. Larger pieces mimic coins. On my Garrett AT Pro, small 14K gold rings register at 41-57 on the VDI scale. Pull tabs? They hit 52-53.
That’s basically identical.
This is why using discrimination when you’re metal detecting for gold nuggets is a terrible idea. You’ll filter out the exact targets you’re hunting.
Challenge #3: Gold Prospecting Tips for Beginners – Understanding the Rarity Factor
Even experienced prospectors dig 50 or more trash targets for every piece of gold they find [2]. Most gold areas got worked over by previous generations. What’s left tends to be small (smaller than a pinhead), deep, or buried in ground so mineralized that old equipment couldn’t handle it.
The USGS puts it simply. Focus on areas that already produced gold. Don’t waste time in random spots [3].
Translation for beginners: Research matters more than equipment. Way more.
Best Metal Detector Settings for Gold (Settings That Actually Find Nuggets)
After my 47-hole Nevada disaster, I spent a whole weekend studying detector settings. Next trip out? Same location, different settings. Found three small nuggets in five hours.
Here’s what changed everything about how I read signals.
How to Use a Metal Detector for Gold: Start with All-Metal Mode
Run your detector in All-Metal mode. Set discrimination to zero. This is the most important tip I can give beginners.
Why? Gold reads like trash. Any discrimination will filter it out. You’ll dig lots of junk. That’s just part of the deal. Accept it now or stick to coin hunting.
The good news? Modern multi-frequency detectors can find gold smaller than a pinhead in conditions that were impossible ten years ago [4].
Best Frequency Settings for Finding Small Gold Nuggets
Higher frequencies pick up smaller targets. Lower frequencies go deeper but miss fine gold.
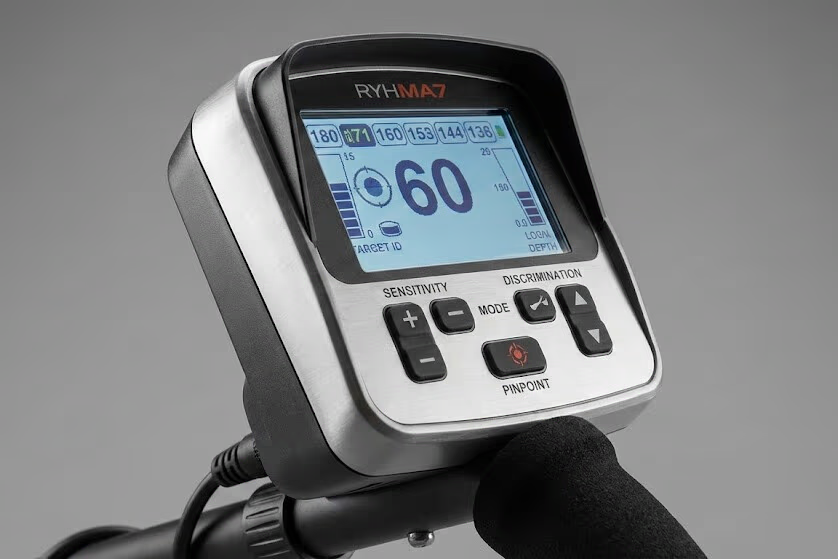
According to detector expert Steve Herschbach’s guide, the sweet spot is 18-71 kHz for VLF (Very Low Frequency) machines [4]. For maximum sensitivity to tiny gold, you want 45-71 kHz.
For beginners: The Fisher Gold Bug 2 runs at 71 kHz. That’s the highest single-frequency VLF you can buy. It’ll detect pinhead-sized gold at 2 inches deep. It’s one of the best detectors for finding small gold.
For experienced folks: Multi-frequency machines like the Minelab Gold Monster 2000 (12-76 kHz) and XP Deus II (4-45 kHz) process several frequencies at once. They combine depth with sensitivity. These machines handle bad ground while still picking up sub-gram targets.
Ground Balance Techniques for Gold Prospecting: The Make-or-Break Skill
This is the most critical technical skill in gold prospecting. Get it wrong and real targets disappear into noise.
You’ve got three options:
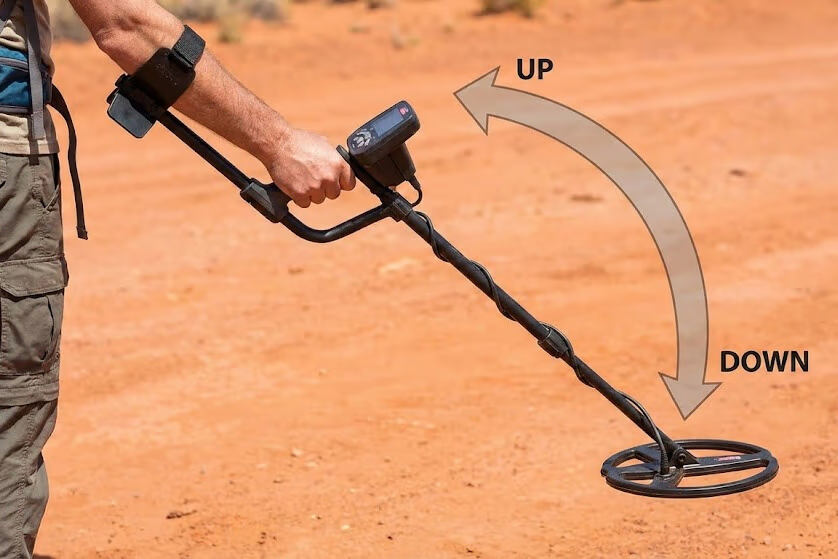
Manual ground balance gives you maximum control. You pump your coil up and down (from 12 inches to 1-2 inches above ground) while adjusting the setting. Keep going until the detector stays quiet over bare ground. Big advantage: it won’t accidentally tune out small nuggets.
Automatic or tracking ground balance adjusts as you move. Much easier for beginners. But here’s the problem – it can tune out small nuggets by mistake. The detector thinks they’re hot rocks.
Best approach: Use the auto ground grab to get close, then lock it and switch to manual. That’s what I do now. It’s one of those gold prospecting techniques that pays off immediately.
How to Read a Metal Detector for Gold: Sensitivity and Threshold Settings
Start your sensitivity at medium. Bump it up slowly until you start getting false signals. Then back it off a notch.
As Herschbach warns, beginners tend to crank sensitivity too high [4]. That creates more problems than it solves.
Keep your threshold audible. That’s the faint background hum. This matters more than you’d think. The threshold lets you hear subtle changes from small or deep targets. When it gets brighter, you might have a good target. When it blanks out, probably iron.
I’ve found gold through threshold changes that never showed up on my screen at all.
Gold Detecting Tips and Tricks: Reading Target Signals

Real gold gives you a solid, smooth, repeatable sound from every direction you swing. Always check from multiple angles – sweep at 90 degrees to your first pass. Gold sounds the same every time.
Iron and trash? They give broken, scratchy sounds that change when you swing from different directions. Most gold nuggets sound faint and subtle. Not loud and screaming.
Training tip: Spend time practicing with small test nuggets or aluminum bits in your yard. Bury them. Find them. Over and over. I did this for two weeks before I felt confident. It’s one of those tips that makes all the difference.
Where to Find Gold with a Metal Detector (Best Locations for Gold Detecting)
Why Geology Determines Your Success in Gold Prospecting
The best equipment in the world won’t help if you’re hunting in ground with no gold. Zero. None.
Good news? USGS data tells you where to look before you leave your house.
The United States has over 30,000 documented gold locations [5]. California leads with 10,373 sites at a density of 66.59 per 1,000 square miles. Washington (34.17), Oregon (31.41), Nevada (30.91), and Idaho (28.44) round out the top five.
Tips for Finding Gold in Creeks and Streams with Your Metal Detector

Even in known gold areas, some spots produce way better than others.
Creek and stream banks work best where bedrock shows through or near natural riffles. After big rains, check gravel bars where lighter stuff washed away and exposed heavier gold. Inside bends where current slows are gold traps.
Old mining areas from the gold rush era still produce. Dredge tailings, abandoned mine dumps, areas around old workings – previous miners left gold behind. Their equipment couldn’t recover everything. These spots are gold detecting gold mines because someone already did the hard work of finding gold country.
Ironstone outcrops are visual clues. When you see rust-colored, weathered quartz with iron staining, slow way down and grid carefully. You’re standing in productive ground.
Black sand deposits matter. Magnetite (black sand) and gold separate from lighter sediments the same way. See black sand buildup? Gold might be there too.
Finding Gold in Your Backyard with a Metal Detector: Is It Possible?
Probably not. Unless you live in historic gold country. But your backyard is perfect for practice before heading to real sites.
Best Time of Year for Gold Prospecting Adventures
Spring (March-May) rocks after snowmelt exposes new areas. Recent erosion uncovers gold. Creeks run high, which makes water detecting tougher but creates fresh deposits.
Fall (September-November) gives you mild weather and lower water. Creeks and streams open up. This is my favorite season for finding nuggets.
Summer works at higher elevations but gets brutal in desert gold country. Winter prospecting works in southern states and low elevations. Northern areas freeze solid.
Gold Prospecting Techniques for Beginners (Field Methods That Actually Work)
The Overlap Swing Method for Metal Detecting Gold Nuggets
Swing in straight lines. Overlap each pass by 50%. Cover half the area of your previous swing every time.
This is boring work. It’s also the difference between finding gold and walking right over it.
I grid 10×10 foot sections methodically instead of wandering around randomly. That’s beginner gold prospecting 101.
Best Gold Detector Coil Size for Different Conditions
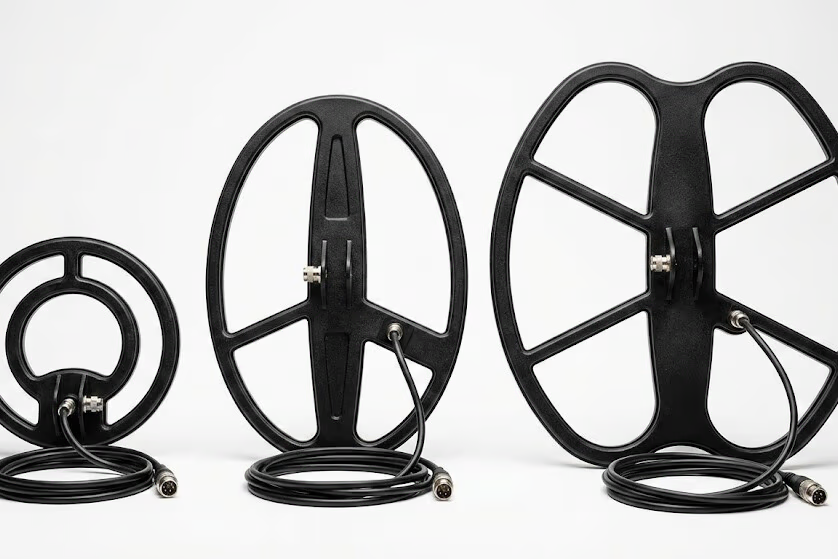
Larger coils (14-18 inches) detect deeper but miss small targets. They’re clumsy in trash or brush too. Smaller coils (6-10 inches) nail tiny gold and work great in tight spaces. Trade-off? Less depth.
For gold prospecting, an 11-inch DD (Double-D) coil gives you the best all-around performance in mineralized ground.
Gold Detecting Equipment for Beginners: Audio Tips
Skip the headphone volume limiter. You need to hear faint threshold changes. Quality headphones with good bass help you tell target tones from ground noise apart.
I use wired headphones. No wireless lag. In gold detecting, timing matters.
Advanced Gold Hunting Tips: Pattern Recognition and Patience
My best patches came from spending hours in 50-foot squares. Not covering miles.
When you find one nugget, stop moving around. Grid that area hard. Gold rarely sits alone. It concentrates in patches. Some prospectors work one productive patch for entire seasons.
This patience separates successful gold hunting from random treasure hunting.
How to Start Gold Prospecting: Your Complete Action Plan
Gold prospecting with a metal detector isn’t quick money. It’s research-heavy work that rewards preparation, patience, and technical skill.
That 50 to 1 trash-to-gold ratio is real. The ground interference is legit. The learning curve is steep.
But here’s the thing. When you hear that faint signal, dig down through six inches of desert dirt, and see that first yellow glimmer in your scoop? Nothing in treasure hunting compares. Nothing.
Getting Started with Metal Detecting for Gold
Start with solid research on known productive areas. Check USGS data for your state. Join local prospecting clubs. The knowledge from experienced prospectors beats expensive equipment every time.
Spend real time learning your detector’s settings. Practice ground balancing in your yard until it’s automatic. Master how to read signals before you hit the field.
Accept that you’ll dig tons of trash when hunting gold nuggets. I’m serious about this. Make peace with it right now. Every pull tab and aluminum scrap teaches you what gold doesn’t sound like.
Keep notes on what works in your specific areas. Write down your settings, ground conditions, and where you found targets. Build your own treasure hunting database.
Best Metal Detectors for Finding Gold: The Technology Keeps Improving
Modern detectors keep getting better. They find pieces that previous generations missed completely. New technology is opening this up for regular people.
Whether you want weekend fun or serious prospecting, it’s never been easier to start.
My biggest tip for beginners? Start small. Learn the basics. Practice the techniques. The gold rush ended, but the gold finding opportunities sure didn’t.
Now get out there and prove the next Hand of Faith is waiting twelve inches down.
Happy hunting, prospectors!
References
[1] Goldfields Guide Australia. “Gold Prospecting in the Victorian Goldfields.” https://www.goldfieldsguide.com.au/blog/22/gold-prospecting-in-the-victorian-goldfields
[2] Gold Rush Nuggets. “Metal Detecting for Gold Nuggets — Complete Guide.” https://goldrushnuggets.com/medeforgonup1.html
[3] USGS. “Prospecting for Gold in the United States.” https://pubs.usgs.gov/gip/prospect2/prospectgip.html
[4] Steve Herschbach. “Steve’s Guide to Metal Detecting for Gold Nuggets.” DetectorProspector.com. https://www.detectorprospector.com/magazine/steves-guides/steves-guide-metal-detecting-gold-nuggets/
[5] SD Bullion. “Gold Locations by State — Analysis of USGS Data.” https://sdbullion.com/blog

My name is Paul and I am the founder of Detector For Metal, a dedicated resource for metal detecting enthusiasts seeking to uncover historical treasures and connect with the past using the latest technology. As a stay-at-home dad and family man, I’ve found metal detecting to be the perfect hobby that combines family adventure with historical learnings for the whole family.
As a father, I’m deeply committed to passing on this hobby to the next generation of detectorists, starting with my own children. I share advice on everything from metal detecting with kids to exploring the top 10 metal detecting sites you never thought about. My methodical approach to the hobby goes beyond the thrill of discovery—it’s about creating family traditions while preserving history and sharing the stories of those who came before us.

