Table of Contents
Here’s your map for our backyard time machine. This isn’t a craft list. It’s a real curriculum based on archaeological methods and storytelling. I built it from my own wins and failures while metal detecting with kids. We’ll go from the big idea to hands-on digging. Then we’ll turn finds into stories that stick.
First, Forget the Sandbox: Your Backyard is a Time Machine hooks you with a simple find. It sparks a real connection to the past. Then, What Exactly is a “Family Dig Box”? defines it as a simulation tool. It’s not a toy. I got this idea from a chat with my buddy Tom.
The practical core is The Gear List: What You Need (and What You Don’t). It includes the crucial step of baking your soil for safety. Building Your Dig Site: Layers, Grids, and the “Story” is where we get strategic. I’ll show you how to create meaningful layers. You’ll also learn to use a grid for mapping.
The Main Event: Guiding the Dig from Discovery to Story gives you a script for the big day. It focuses on observation. It also focuses on asking the right questions. Finally, Beyond the Box: Connecting to Real History and Ethics ties it all together. We’ll discuss how to research your property’s past. We’ll also discuss the stewardship we owe to real sites.
By the end, you’ll have a complete plan. This activity is more than a day’s fun. It’s a foundation for lifelong curiosity. It’s the perfect primer for metal detecting with kids.
How Can a Backyard Dig Box Teach Kids History?

My time metal detecting taught me something. Digging in your backyard isn’t just about getting dirty. Done right, it’s a hands-on history lesson. It teaches real methods. It turns a simple find into a tangible link to the past. That spark of “awe” can kickstart a kid’s curiosity. It can spark an interest in history or science.
I’ll be honest. Most “kids’ archaeology kits” are just messy fun. You bury plastic dinosaurs in sand. Kids dig them up with cheap tools. It’s over when the last toy is found. That’s fine for an afternoon. But what if the fun didn’t stop there? What if the digging was just the beginning?
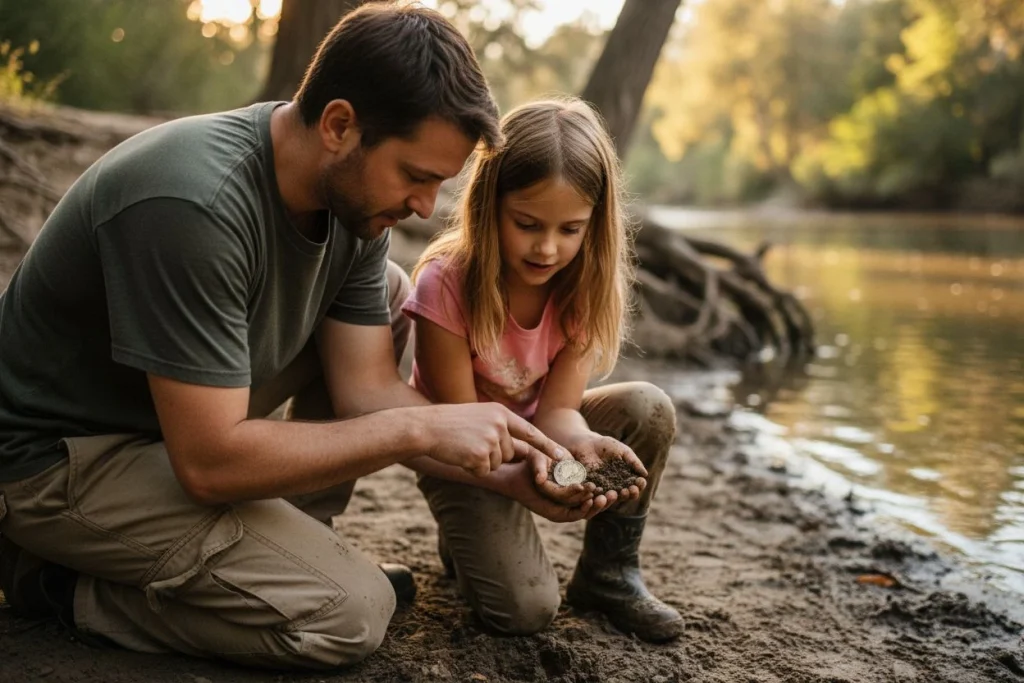
The shift happened in my own Sacramento yard. My daughter, then 7, was helping me sift garden dirt. She pulled out a small, painted pottery shard. It was probably from a 1940s teacup. She brushed it off and looked at me. She asked, “Did a kid like me break this a hundred years ago?”
That was the moment. She wasn’t just digging; she was connecting. She was imagining another child in that same spot decades ago. That’s the magic we’re after. Studies show this kind of simulation sparks genuine career curiosity. It also sparks deep wonder in kids.
So, let’s forget the sandbox. I’ll show you how to build a “Family Dig Box.” This isn’t a one-time craft. It’s a hands-on history lesson. I’ll cover how to build a realistic dig site. You’ll learn to use proper layers and grids. I’ll show you how to create a believable story for your artifacts. We’ll discuss the simple tools that matter. Finally, I’ll share my step-by-step method. It guides your kids from discovery to storytelling. This is the best first step before metal detecting with kids.
Creating Your First Family Dig Box
Simply put, it’s a contained, layered excavation site. It can be a shoebox or a kiddie pool. Here, kids learn the process of real archaeology. They learn careful digging. They learn systematic recording. They learn to interpret objects in context. It’s not a toy. It’s a simulation tool. It turns dirt into detective work. It builds skills for metal detecting with kids.
My first try was a bust. I filled a bin with play sand. I buried toy dinosaurs. I handed my kids garden trowels and called it a day. It was fun for ten minutes. Once the last stegosaurus was out, the activity was over. The connection to any real skill or story was zero.

The “Aha!” moment came later. I was talking to my buddy Tom. His dad was a surveyor. Tom grew up knowing a single object is just a curiosity. Its real story is in its context. Where was it found? How deep? What was next to it?
That’s the core of a true Family Dig Box. It’s a controlled dig that mimics professional work. You build stratigraphy. These are different soil layers where deeper means older. You use a grid system to map finds. The goal isn’t just to get trinkets. It’s to reconstruct a mini-history from the clues.
So, it’s less about the container. It’s more about the method it teaches. This controlled simulation is the perfect first step. It’s also the safest step before using a real metal detector. It builds patience, observation, and respect for context. These skills separate a mindful detectorist from someone who just digs holes.
Essential Gear for a Kid-Friendly Dig Site

Skip the fancy kits. A successful dig box needs simple, durable tools. They should encourage careful work. The right gear teaches precision. It also teaches respect for the process. Here’s what actually matters.
The Essential Kit This isn’t a construction site. Forget full-size shovels. You want tools that promote control. Get a small hand trowel for each digger. Get soft-bristle brushes for cleaning finds. A sieve or colander is great for sifting. Small containers are great for holding artifacts. Pro-tip: Kid-sized gardening tools are cheap and tough. They are just the right size.
The Pro Add-Ons To boost the educational value, add a measuring tape. It’s for recording depth. Use a few golf tees or craft sticks with flags. They mark finds in situ before removal. This introduces real archaeological mapping.
The Critical Safety Step Read this before you grab garden dirt. This is the most important step. If you’re using backyard soil, you must bake it. Heating outdoor soil kills potential microorganisms. It’s non-negotiable for a safe, kid-friendly dig site. This safety habit translates directly to metal detecting with kids.
Planning Dig Layers That Tell a Historical Story
The magic of a real dig site isn’t the individual find. It’s the story the layers tell. We’re moving beyond a sandbox of random toys. We’re building a miniature historical landscape. Here, depth equals time. It’s about creating a puzzle. Every piece has context.

Understanding Archaeological Stratigraphy
Here’s the single most important concept: deeper = older. Archaeologists call this the Law of Superposition. I tell my kids it’s like a birthday cake. The frosting is today. The cake below is from grandma’s time. The crumbs at the bottom are “ancient history.” When you dig, you travel back in time.
To make this clear, follow a proven method. Use different materials for each layer. Use topsoil from your yard. Use a middle layer of play sand. Use a bottom layer of sand mixed with small pebbles. This creates distinct strata. Kids see the change as they dig. It physically reinforces the lesson.
Selecting Artifacts from a Specific Era
This is where you build your history lesson. Pick a theme. Choose artifacts that fit. Think in categories. Consider material remains like bits of leather. Consider points like a carved stick “arrowhead.” Consider shards like broken pottery.
- “1920s Homestead”: Bury a ceramic button. Bury a clay marble piece. Bury a modern wheat-back penny. Tell the story of a family living on that land.
- “Ancient Campsite”: Use broken terracotta pot shards. Use smooth river stones as “tools.” Maybe use a replica animal tooth. This opens talks about how people lived off the land.
How to Bury Clues for Your Dig Box
Now, place your items strategically. Create a mini-narrative. This is the detective work. For a 1920s theme, I might put a small toy horse in the middle “farm” layer. Deeper down, I’d place a sharp stone flake as a primitive tool.
The goal is for your young archaeologists to ask a question. They should ask, “Why was this here with that?” Maybe the stone flake is near a cluster of “bone.” That tells a story of cooking and tool use. The narrative you bury is the history they’ll uncover.
Why a Grid System Matters for Metal Detecting with Kids
This is where play becomes method. The difference is a simple system. Use a coordinate grid for mapping. Use a field journal for context. It teaches kids an important lesson. Where and how you find something is just as important as the find itself. This is a core principle of metal detecting with kids.
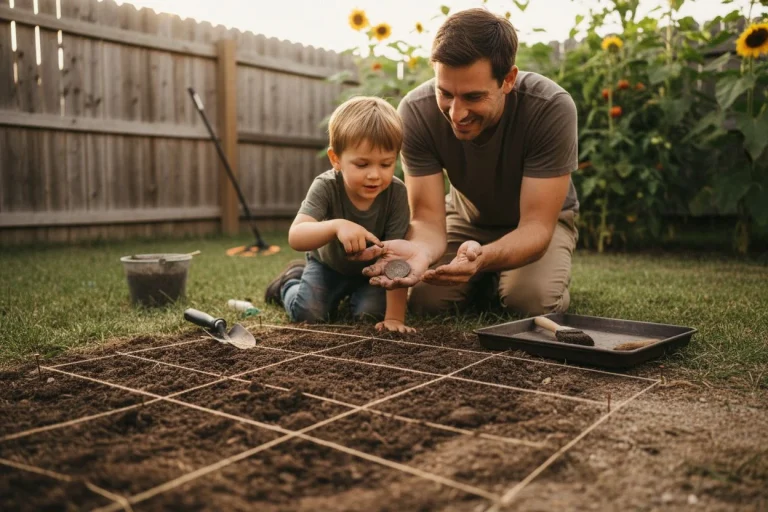
I learned this the hard way. My kids’ first “dig” was chaos. “I found a coin!” one would yell. We’d have no idea where it came from. The magic moment came when we taped a yarn grid over the box. We created squares labeled A1, B2, C3.
Suddenly, a find wasn’t just a button. It was “the button from grid square B3.” It was found six inches down. It was next to a pottery shard. They weren’t just digging; they were surveying.
This grid is a simple coordinate system. It introduces real map-making. It forces slow, careful work. You dig one square at a time with a hand trowel. Then you switch to a soft brush to gently clean the area. This ritual changes their mindset. They move from treasure hunter to investigator.
But the true cornerstone is the field journal. It mirrors the log I keep for metal detecting. We have a “Dig for Records” rule. The journal entry is more important than the object. For every find, they note the grid square and depth. They sketch the item. They write a one-line guess. Was it a tool? A toy? A piece of a dish? This turns a broken bit of pottery into a clue. It’s a clue about the people who used it.
It’s a profound shift. The excitement moves from “got it!” to “what does this mean?” That’s the heart of real archaeology. It’s also the best history lesson you can give.
Ready to set up your dig site the right way? [Download our printable Field Journal template and Grid Map to get started right.]
Guiding Kids Through Their First Excavation
Now the parent’s job changes. You change from director to coach. Your job isn’t to find the artifacts for them. It’s to ask the right questions. Help them find the story. Foster observation. Don’t dictate answers.
I learned this the hard way. On our first dig, I was so excited about the “lesson.” I hovered and narrated. “Notice the stratigraphy! That shard indicates a late-phase dwelling!” My wife finally pulled me aside. She said, “You’re not a museum curator, you’re a dad. Let them get messy.” She was right. The magic happens in their messy, slow discovery.
I now follow a key practice. We dig one grid square at a time. We use an old kitchen spoon for digging. We use a soft paintbrush for cleaning. This builds patience and focus. My script is just three questions: 1. “What layer is that from?” This connects the find to depth and time. 2. “Why do you think it’s broken?” This encourages a guess. 3. “How should we clean it without hurting it?” This teaches preservation.
The goal is silence from me and chatter from them. When they brush dirt off a “pottery” shard, they might say something. They might say, “It’s from the sandy layer… so it’s really old, right?” That’s the win. You’re not giving answers. You’re building a framework. They use it to find their own.
Turning Found Objects into History Lessons

This is where the magic happens. The dig is over. The real work is just starting. The history lesson begins now. Moving from what you found to what it means is key. It transforms a box of dirty objects. They become a portal to the past. It teaches kids that history isn’t just dates in a book. It’s the story behind every broken thing we pull from the ground. This mindset is crucial for metal detecting with kids.
Becoming a History Detective with Your Kids
Once an artifact is brushed off and logged, the interrogation begins. This is my favorite part with my kids. We lay finds on a towel. We play history detective. We ask the same questions I use on my real metal detecting finds.
What is it made of? A porcelain shard suggests a plate or doll. A rusted iron lump could be a tool fragment. This simple question starts a talk. It’s about materials and technology through time.
Was it handmade or machine-made? Look at the edges. Are they uniform? My buddy Tom’s kids found a shard. It had a wobbly, painted line. They guessed it was hand-painted. That led us to talk about life before factories.
What does its condition tell us? Is it worn smooth from use? Is it broken cleanly or shattered? We use the hypothesis method. We make educated guesses. “Maybe this toy car was buried because its wheel broke,” my son once said. That’s critical thinking in action.
Teaching Kids Responsible Metal Detecting
This simulated dig is the perfect moment for a crucial talk. I look my kids in the eye. I say, “This is why we don’t dig up real archaeological sites.”
The dig box teaches the value of context. It also teaches the fragility of history. I explain that real sites are non-renewable. Digging without permission erases the story forever. Our backyard box is where we learn to be respectful stewards. If they ever join me metal detecting with kids, they’ll understand. They’ll know why we always get permission. They’ll know why we fill our holes. They’ll know why we report big finds. It frames ethics not as a rule, but as respect for the story. This mindset is foundational for any family metal detecting adventure.
How to Clean and Display Your Finds
The final act is restoration and curation. We turn clues into a displayed conclusion. We carefully clean finds with dry brushes or a damp cloth. If we have pottery shards, we attempt a “reparation” phase. We try to glue them together. This frustrating process teaches huge respect. It teaches respect for museum conservators. Most attempts fail, and that’s the point. Some history can’t be fully put back together.
Finally, we create a “Home Museum.” Each artifact gets a small label. It has its grid number. It has a hypothesis like “Possible toy fragment, c. ‘mid-20th century’”. It has the discovery date. Seeing their finds displayed formally validates the whole process. They aren’t just kids who played in the dirt. They’re curators of their own small history.
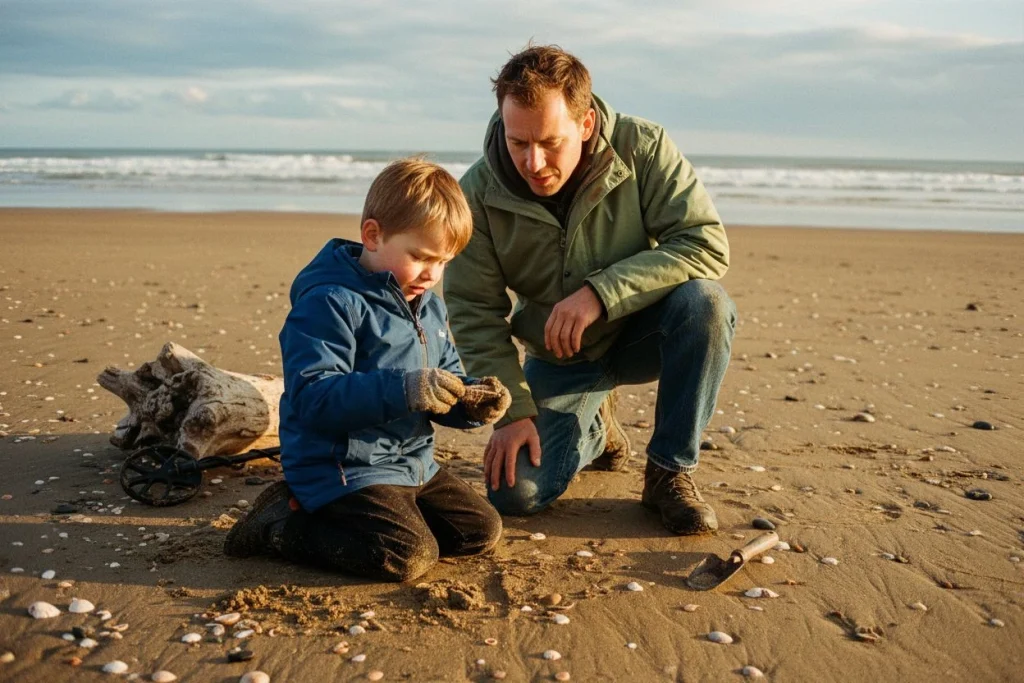
Ready to hunt real history? Our guide to metal detecting with kids is the perfect next step.
Taking Your Family’s Metal Detecting Hobby Outdoors
What if the next artifact your kid finds isn’t one you buried? That’s the goal. The Family Dig Box isn’t just a weekend activity. It’s foundational training. It turns your backyard into a story. It turns your kids into junior historians. They will have the right instincts.
The patience to dig one grid at a time is key. The habit of logging finds is important. Respect for context is essential. These aren’t just play skills. They’re the exact disciplines needed for real-world history hunting. They are vital for metal detecting with kids.
Maybe that means joining you metal detecting at a park. Maybe it’s scanning a beach after a storm. Or maybe it’s just looking at the ground with new, curious eyes. The training is complete. They’ve learned that every patch of dirt has layers. They’ve learned that every object has a tale.
I see it with my own kids now. We’ll be driving. One will point to a roadside cut. They’ll say, “Look at all those layers… I wonder what’s in the dark one.” Or they’ll spot an old, square nail in a fence post. They’ll recognize it as a relic. The Dig Box didn’t just teach them how to dig. It taught them how to see. That is the real treasure.

My name is Paul and I am the founder of Detector For Metal, a dedicated resource for metal detecting enthusiasts seeking to uncover historical treasures and connect with the past using the latest technology. As a stay-at-home dad and family man, I’ve found metal detecting to be the perfect hobby that combines family adventure with historical learnings for the whole family.
As a father, I’m deeply committed to passing on this hobby to the next generation of detectorists, starting with my own children. I share advice on everything from metal detecting with kids to exploring the top 10 metal detecting sites you never thought about. My methodical approach to the hobby goes beyond the thrill of discovery—it’s about creating family traditions while preserving history and sharing the stories of those who came before us.