Table of Contents

What’s more valuable than the 1887 Morgan Dollar you just dug up? The story of why it was there. Your notes are what save that story from being lost forever. This is the core of metal detecting historic site documentation. Here’s the unwritten rule of real historical detecting: a find’s value is locked in its context. That context vanishes the moment you lift it from the ground without a record.
I learned this the hard way. My first big homestead find was a heavy, ornate brass harness buckle. I was ecstatic and cleaned it off right there in the field. But in my excitement, I didn’t note the exact spot relative to the old foundation. Was it near where the barn might have been? By the path to the well? I’ll never know. I have a cool buckle, but I broke the chain of history—its provenience—forever. All I created was a lonely artifact.
So this isn’t just about ethics; it’s about stewardship. Groups like the Society for California Archaeology call this a core professional standard. You have to “maintain provenience records” and have a plan before you start. This isn’t just advice for PhDs. It’s the bedrock of turning a hobbyist’s cool find into a real piece of the historical puzzle. A coin in a drawer is just a curiosity. That same coin, tied to a specific map coordinate, depth, and soil layer next to a hearth? That’s data. It can tell a story about wealth, trade, or daily life in 1880s Placer County.
This guide is the roadmap I wish I’d had. We’ll start where it all must begin—with ethical permission that turns into a real landowner partnership. We’ll walk through the specific California legal landscape so you know what “significant” really means here. Finally, we’ll build your field kit for documentation. This moves you beyond the detector to the tools that create a legacy. Let’s turn your next great find into something that could inform historians a century from now.
Partner with Landowners Through Formal Agreements
Getting a “yes” is just the first step. The real goal is turning that permission into a collaborative partnership for preservation. This means you approach the landowner not as someone asking to take, but as someone offering to document and give back. Shift the conversation from “Can I dig?” to “I want to help you preserve the history under your feet.”
I learned this after a few too many lukewarm receptions. My breakthrough came on a potential 1880s orchard homestead outside Lincoln. The owner, Mr. Jenkins, was rightfully skeptical when I first called. Instead of just showing up with my Equinox 900, I asked for fifteen minutes to show him what I’d found before any digging. I brought a binder with printouts of old Sanborn maps, historical society photos, and a one-page “Documentation & Site Stewardship Proposal.” His skepticism melted into fascination. He said, “You’re not just a treasure hunter, are you?” He became an active partner, pointing out where his grandfather said the old chicken coop was.

This mirrors the professional idea of “good-faith consultation.” It’s not just ethical; it’s smart. Your script is simple: “I don’t just want to dig; I want to help you document the history of this land. Every find gets logged on a map. If we find anything truly significant, my first recommendation will be to preserve it right here. You’ll get a full report of everything we learn.”
This partnership is your strongest tool. It ensures long-term site care and turns a one-time permission into ongoing access. My buddy Mike still calls me “that map guy,” but it’s that binder that opens the most important doors.
What Are California’s Metal Detecting Laws?
Before you swing your coil on a suspected homestead, you need to understand the rules. California law has clear triggers for when a find moves from private hobby to a matter of public historical record. Not knowing isn’t just bad practice—it can inadvertently break the law.
The cornerstone is the “45-year rule.” According to the state’s Office of Historic Preservation, any physical evidence of human activity over 45 years old is a potentially recordable historical resource. This isn’t just about mission sites. That 1950s farmhouse foundation on your potential site qualifies. This low threshold means most homesteads we hunt fall under this umbrella the moment we identify them.
The legal process starts when that >45-year-old site is on public land or a private project needing a permit (like a new well or subdivision). This triggers a review under the California Environmental Quality Act (CEQA). The first step is a “Phase I Cultural Resource Evaluation” to identify what’s there. If a significant site is confirmed, the law’s first goal is to avoid and preserve it in place. Excavation is a last resort.
This is where the California Historical Resources Information System (CHRIS) becomes key. CHRIS is the state’s central archive. It is run through eight regional Information Centers. Before ground is broken on a permitted project, a CHRIS check is required. This is to see if the site is already recorded. As a detectorist, understanding this system is crucial. If you document a homestead thoroughly, that report could be submitted to CHRIS. That permanently preserves its data for future research. It transforms your find from a private collection into a safeguarded piece of California’s history.
Writer’s Notes:
- Flowchart for Visual: Is the site >45 years old? (YES) -> Is it on public land or a private project needing a permit? (YES) -> This triggers a CEQA review & CHRIS check.
Your Essential Documentation Toolkit for Finds

Think of your detector as the discovery tool. Your documentation kit is what turns that discovery into a credible historical record. This is the foundation of all metal detecting historic site documentation. It’s the difference between saying “I found an old button” and giving a landowner—or the CHRIS system—a mapped, measured, and photographed point of data. Here’s what’s in my go-to bag, built from hard-earned lessons.
My guiding principle comes from the National Trust for Historic Preservation: start with the “big picture.” Before you zero in on a tiny artifact, capture the wider context (Source 6). This mindset shapes every item I carry:
- GPS Unit or Smartphone App: Pinpointing exact coordinates is non-negotiable. I use a handheld GPS for reliability, but an app like Gaia GPS works if you have service. This coordinate anchors all your other data.
- Measuring Tape: Distance from a permanent landmark (a corner fence post, a large oak) is your backup location method. It’s also crucial for sketch maps.
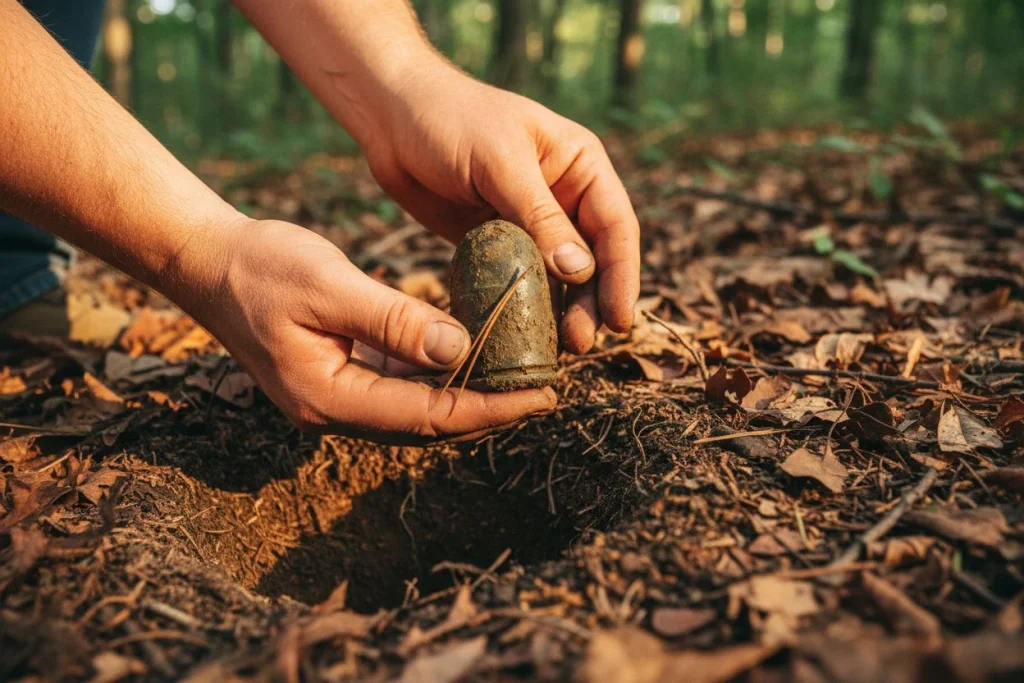
- Small Survey Flags or Pins: Mark the spot the moment you get a signal, before digging. It prevents losing the location and lets you photograph the find in situ.
- Waterproof Notepad & Pencil: Rite in the Rain makes fantastic ones. Log the date, coordinates, detector settings, depth, and a quick sketch right there in the dirt. Pencil won’t smear when your hands are wet.
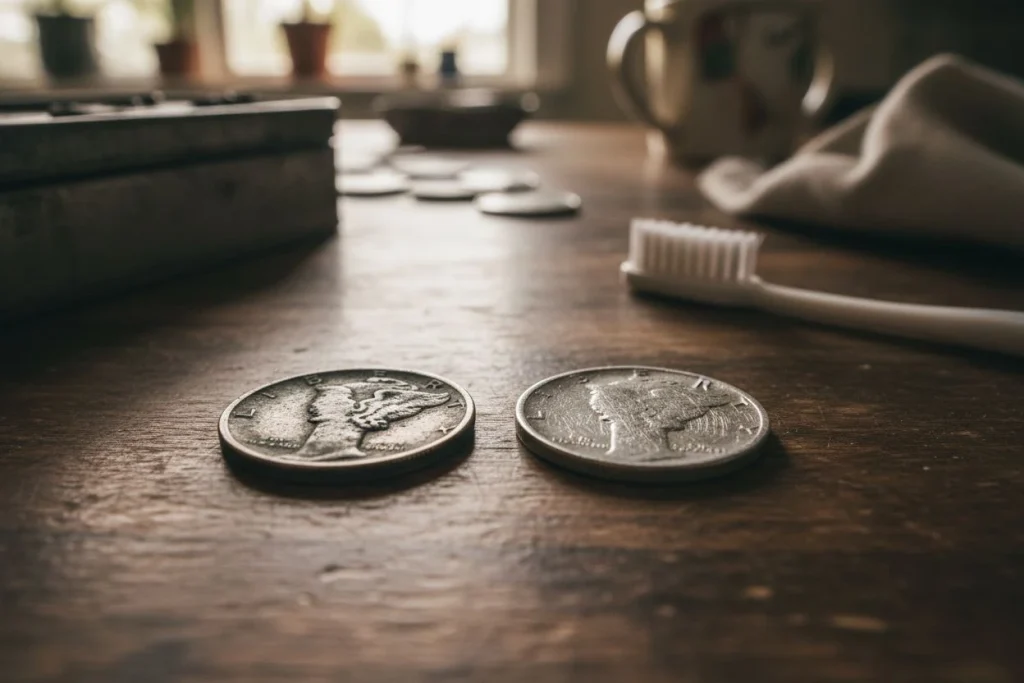
- Reference Scale & Coin Ruler: Place a small ruler or a coin next to your find for every photo. This gives immediate scale for identification.
- Camera (Your Phone is Fine): Follow the “big picture” rule: 1) Wide shot of the area, 2) Medium shot of the flagged hole, 3) Close-up of the artifact in the hole, 4) Close-up of the cleaned artifact with scale.
- Plastic Bags & Permanent Fine-Tip Markers: This is critical. Use bags to keep finds from different areas separate. Label the bag immediately with location, date, and find number. The marker is for the bag, NEVER for writing directly on an artifact.
- Small Digital Scale: For coins and small relics, weight (in grams) is a key identifying detail I log.
This kit works with your detector to create a professional-grade record. For the core tools that get the signal in the first place, my guide on the 8 Must-Have Tools for the Modern Detectorist covers that essential gear.
A Proven 5-Step System to Document Finds
A proper log turns scattered finds into a coherent dataset. My system is adapted from the OHP’s “Primary Record” concept. It uses five simple, linked logs. It preserves the context—the who, what, when, where, and why—of every item. This isn’t just note-taking; it’s building a defensible historical record. It is the practical core of metal detecting historic site documentation.
Start with a Master Site Log
This is your cover sheet. It never leaves the truck and gets filled out once per site visit. It records the essential data for the whole homestead project.
Record Each Discovery in a Find Log
This is your waterproof field notebook. Every target gets a sequential number and a quick entry the moment it comes out of the ground.
Create a Complete Photo Log
A separate list in your notebook that matches photo numbers on your camera to specific finds. This saves hours of confusion later.
| Photo # | Subject | Looking Direction |
|---|---|---|
| IMG_1041 | Wide shot of cellar hole from SE | NW |
| IMG_1042 | Find JH-2024-027 in situ with scale | Down |
| IMG_1043 | Cluster of can fragments before collection | Down |
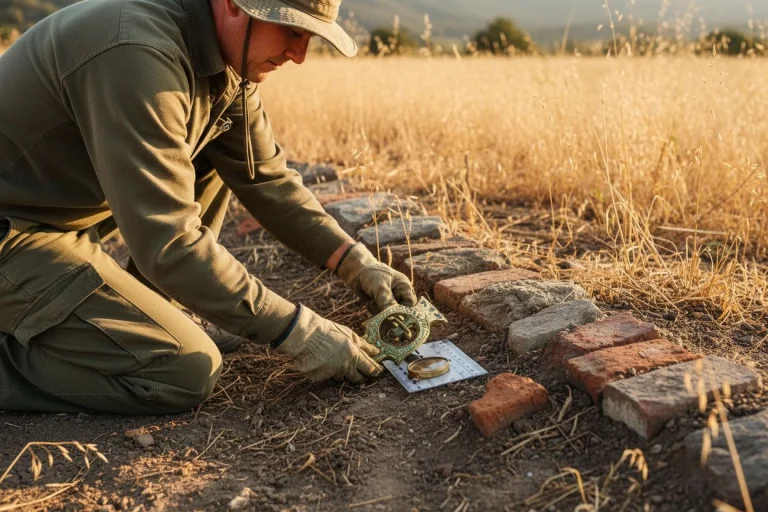
Sketch a Simple Site Map
A rough sketch is enough. Draw the major landmarks (chimney, fence line, tree). Establish a “datum” point (like the NE chimney corner). Mark each find’s number at its measured distance and bearing from that datum. This shows how artifacts are distributed.
Implement a Reliable Bag and Tag System
Every find gets bagged individually. I use coin envelopes for small items and ziplocks for larger ones. A durable tag goes inside the bag with the core log data.
Why this works: On a Placer County cellar hole, this system helped a local museum. My bagged and tagged cans and glass were logged with precise locations. They showed a concentrated pattern of early dairy-related goods. Curators cross-referenced the brands. They confirmed a pre-1900 dairy operation—a fact lost to local memory. The data told the story my single “cool bottle” never could.

When Should You Call an Archaeologist?
The most important tool on any historic site isn’t your detector—it’s your judgment. My moment of truth came when I pulled a thick, silver-plated button from a homestead’s garden. It had a faint “LEVI STRAUSS & CO” imprint. My heart raced. It was incredibly cool, but it also screamed STOP. This was a datable, significant artifact tied to California’s cultural fabric. My next move mattered.
There’s a clear professional threshold. Under California law, a resource is “significant” if it connects to important events or people. It can also be significant if it has distinctive characteristics or can yield important information. This is the gist of criteria professionals use, as in Wolf Creek Archaeology’s CEQA guide. As a responsible detectorist, our job is to spot the red flags. These suggest we’ve hit that threshold. Then, we let the mandated professionals take over. They follow objective standards like those from the Society for California Archaeology.
The Red Flags:
- Human remains or associated burial objects. This is an immediate, full stop. Do not disturb.
- A concentration of structural features: intact foundation lines, a dense midden (trash pit) layer, aligned post molds.
- Artifacts indicating pre-1849 (Gold Rush) occupation. Think certain trade beads, mission-era ceramics, or flaked stone tools.
- A high-density scatter of artifacts that clearly represent a single, historic activity area.
When you see these, your role shifts from recovery to protection. Carefully backfill the area to stabilize it. Then, call your local historical society or the nearest CHRIS Information Center. Your script is simple: “Hi, I was surveying with permission at a historic homestead. I found what might be a significant subsurface deposit. I’ve stopped work and secured the site. Can I email you my documentation and coordinates for review?”
This isn’t a failure; it’s the ultimate success. You’ve preserved the context for experts to interpret properly. (My Levi’s button was from the 1870s. I reported it, and that helped date the homestead’s peak occupation. The button stays with the site record, not my display case). It’s the same ethical need required at high-sensitivity sites. See our guide to documenting Civil War relics. By making the call, you turn a personal find into a permanent page in the homestead’s history book.
Digitize Your Finds for Future Generations

Your meticulous field logs and photos are worthless if they get lost or corrupted. Digital curation is the final, critical step. It transforms your paper notes and camera rolls into an organized, backed-up, permanent record. This record could outlive you. Following OHP guidance for preserving records, this is about creating a “qualified repository” on your own computer. It secures your metal detecting historic site documentation for the long term.
My system is simple and costs almost nothing. First, I scan every page of my field logs as soon as I get home. I save them as PDFs. For photos, I transfer them immediately and rename them with a consistent format: SITECODE_DATE_FIND#_DESCRIPTION.jpg (like JH_102324_F027_BordenCan.jpg). This kills the useless IMG_1041 chaos forever.
All these files go into a master project folder (e.g., “Johnson Homestead 2024”). This folder is then synced to a cloud service like Google Drive or Dropbox. This is my non-negotiable backup. A house fire or spilled coffee can’t erase the history.
Finally, I keep a simple spreadsheet master catalog. Each row is a find. Columns are for Find Number, Description, Location, Date, and—crucially—the file paths to its scanned log and photos. This one document becomes the index to my entire collection. It ensures that in 20 years, I (or a historical society) can find everything in seconds. It’s how a hobbyist’s weekend project meets the professional standard for keeping history safe.
Contribute Your Data to Public Historical Records
Your detailed field log does more than satisfy curiosity. When compiled into a clear packet, it can be formally submitted to California’s official archive. This turns your weekend project into a permanent public record for future researchers.
This is the role of the regional Information Centers (ICs) in the California Historical Resources Information System (CHRIS). Think of these university or museum-based centers as the state’s librarians for cultural history. They store the GIS data, reports, and site records that planners and archaeologists use. When a professional firm finishes a study, their final report goes to the appropriate IC for permanent filing.
Your well-prepared documentation packet can serve a similar, vital purpose. It includes your map, log, photos, and catalog. For many small homesteads, no formal archaeological survey exists. Your work can provide the foundational “Phase I” record for that property in the IC’s files. To submit your findings, first find your regional center via the OHP’s IC directory. Email them. Explain you’ve documented finds (with permission) at a historic homestead. Ask about their process for including amateur documentation in their reference collections.
You’re not just filling a folder on your desk; you’re helping to fill a gap in California’s official story. To make this easy, download my formatted “5-Step Documentation Log”—it’s the exact template I use to organize my finds into a packet worthy of an IC’s archives.
How One Documented Site Reveals Community History
Your work doesn’t end when you leave the site or submit a packet. The true power of good documentation is its ripple effect. A single, well-recorded homestead becomes a key. It can unlock forgotten chapters in a community’s shared story. It connects dots no one knew were there.
I saw this firsthand after documenting the Johnson homestead. I shared a cleaned-up version of my log with our local historical society. It had maps and photos. They published a short piece in their newsletter. A week later, I got an email from a man in his eighties. His grandfather had worked on that very farm as a boy. Attached were scanned photos from the 1920s. They showed the farmhouse with a porch we’d only found the foundation for. They showed the family by an oak tree that’s still there. My harness buckle and broken pocket watch were no longer just isolated finds. They had faces, names, and a sunny afternoon in 1923 attached to them. My documentation provided the “where.” His photos provided the “who.” Together, they created a history richer than either of us had alone.
This is the spirit the state itself supports. As the OHP manual notes, even resources that aren’t individually famous can help us understand California’s history. Your homestead might not be a landmark. But the pattern of nails, the scatter of china, and the lone 1901 Indian Head penny you plot on a map become vital data. They fill in the settlement patterns between the old ranchos and the modern suburbs.
So the final, greatest value isn’t the artifact on your shelf. It’s the story now saved. It lives in your log, a cloud folder, a county archive, and a grandson’s email. You start as a detectorist swinging a coil. If you document with care, you finish as a community historian. You preserve a legacy that ripples far beyond your own backyard.

My name is Paul and I am the founder of Detector For Metal, a dedicated resource for metal detecting enthusiasts seeking to uncover historical treasures and connect with the past using the latest technology. As a stay-at-home dad and family man, I’ve found metal detecting to be the perfect hobby that combines family adventure with historical learnings for the whole family.
As a father, I’m deeply committed to passing on this hobby to the next generation of detectorists, starting with my own children. I share advice on everything from metal detecting with kids to exploring the top 10 metal detecting sites you never thought about. My methodical approach to the hobby goes beyond the thrill of discovery—it’s about creating family traditions while preserving history and sharing the stories of those who came before us.