Table of Contents
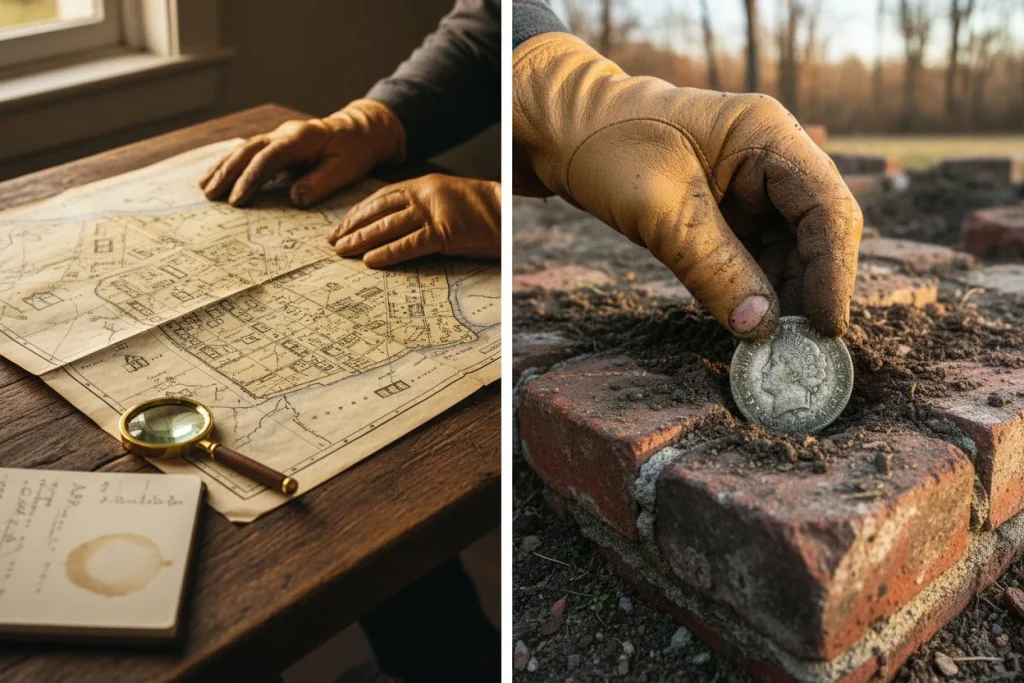
Most detectorists think the hunt starts when you turn on your machine. Here's a secret: that's the last step. The real hunt begins weeks earlier. It starts by researching metal detecting sites in the quietest place you can imagine—a library. I spent my first few years swinging first and asking questions later. I didn't get it until I had a real chat with a local history librarian. The most important tool in your kit isn't a fancy metal detector. It's a librarian who knows their collection. This foundational step of researching metal detecting sites transforms random luck into repeatable success.
Let me tell you about my first big break. I'd been detecting for a few years, hitting parks and schools. I wandered into a county historical society meeting. Honestly, I was after free coffee. But I talked to a retired librarian cataloging old photos. She casually mentioned a community picnic grove from the 1910s. It wasn't on any modern map. "Lotta folks lost stuff in that creek bank," she said. That one offhand comment led me to a great site. It has given up over two dozen Wheat pennies, three silver dimes, and my first Barber quarter. She gave me the map before I even knew I needed it.
This is research-driven detecting. As the pros at the Society of American Archivists point out, you need to know where to look first. You need to know before you know what to look for. Libraries hold the secondary sources—the history books for context. Archives (often in libraries or historical societies) hold the primary-source treasure maps. These include old diaries, property deeds, club minutes, and original photos. Most of us blur these together. Understanding the difference is your first key.
Learning this process turns random dirt into a targeted treasure map. It changes "I hope I find something" to "I know what was here." Next, I'll walk you through my exact three-phase process. We'll cover building a paper trail in the stacks. Then, connecting dots online. Finally, taking your researched map into the field.
Begin Researching Metal Detecting Sites in Library Archives
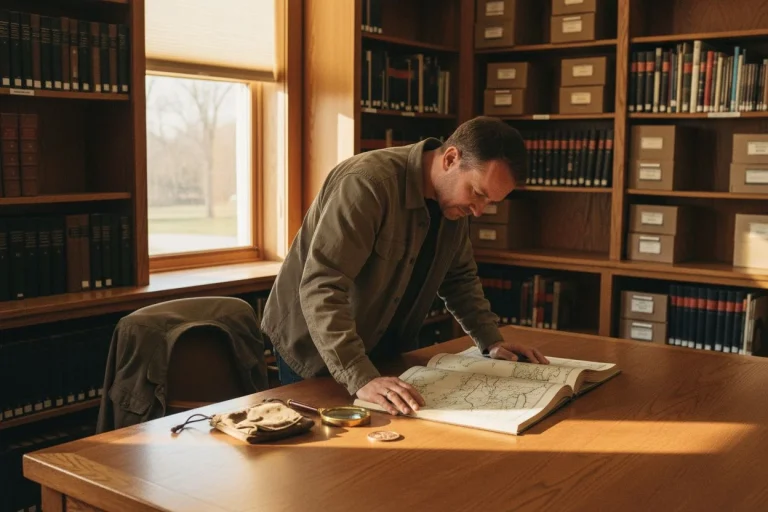
Your first visit isn't about finding the exact spot. It's about building a case file. I walk in with a simple folder. My goal is to leave with a stack of photocopies and notes that tell a story. Forget scrolling aimlessly. This is deliberate, old-school detective work. For a deep dive into this mindset, check out our guide on building a detective's mindset for site research.
How to Start Broad and Narrow Down Research
Never dive straight into archival boxes. You'll drown. I always start in the library's local history section with secondary sources. Look for published county histories, town anniversary books, and historical society journals. These give you the narrative—the why and who. I look for mentions of community events, fairgrounds, swimming holes, or forgotten businesses. One of my best sites started with one paragraph in a 1976 town history. It mentioned a "large picnic grove near the old mill, popular from 1905-1920." That's your lead.
Using Finding Aids in Archives
Once you have a name, date, or event, move to the archives for primary sources. This is where most people get lost. As the pros at Princeton note, you must do your "researching before you research." Your map is the finding aid. This is a document describing what's in a collection. I use tools like WorldCat or ArchiveGrid to find relevant archives. I study their online finding aids before I visit. It tells me exactly where to look. For example, it might say "Maple Grove Picnic Association, 1904-1912, Box 7, Folder 3." I don't waste a minute browsing.
Why Archivists Are Your Secret Weapon

This is the golden rule. Archivists aren't gatekeepers. They're your guide and your best source of "tacit knowledge." I always email ahead or introduce myself at the desk. My script is simple. I say, "Hi, I'm researching early 20th-century social gathering spots in the county. I'm especially interested in areas around the old mill creek. I saw the finding aid for the picnic association papers. Is there anything else in your collections that might not be fully cataloged online?"
This has paid off every single time. Once, an archivist remembered an unprocessed box of glass plate negatives. She brought it out. Inside was a pristine 1908 photo of that exact picnic grove. It showed tables, a bandstand, and a creek. I had my visual proof. I could match landmarks to a modern satellite view. That photo turned a vague "picnic grove" into a targetable 200×300 foot area. The area was on a now-empty lot. The case file was complete. This entire process is the core of effectively researching metal detecting sites.
Mastering Sanborn Fire Insurance Maps
If your case file gives you the story, a good historical map shows you the exact stage. For detectorists, nothing beats the Sanborn Fire Insurance Map. They were published between the 1860s and mid-1900s for thousands of towns. These were made for insurers. For us, they're a crystal-clear snapshot of a community's layout at a specific time.
A standard old map might show streets. Sanborn maps show everything. Using a color and symbol key, they detail building footprints and construction materials. They show if a building was brick, frame, or stone. They note the number of stories. They even show locations of outhouses, wells, and porches. As the guide from the SC Department of Archives and History notes, this detail is indispensable. I'm not just looking for a "house." I'm looking for the wooden dwelling (marked ‘D’) with a back porch added in 1895. That's the exact spot where someone might have lost a coin sitting outside.

The real magic is marrying these old maps with modern geography. This is called georeferencing. Collections like the David Rumsey Map Collection often provide historical maps as layers. You can overlay them in Google Earth. You can literally warp a 1902 Sanborn map onto a modern satellite view. Suddenly, that "ice cream parlor" symbol is pinpointed over what's now a vacant lot behind a strip mall. That's not a random field. That's a target. These maps are the ultimate bridge. They turn names and events from your paper trail into precise, swingable coordinates. This method is central to researching metal detecting sites effectively.
Digital Tools for Researching Metal Detecting Sites
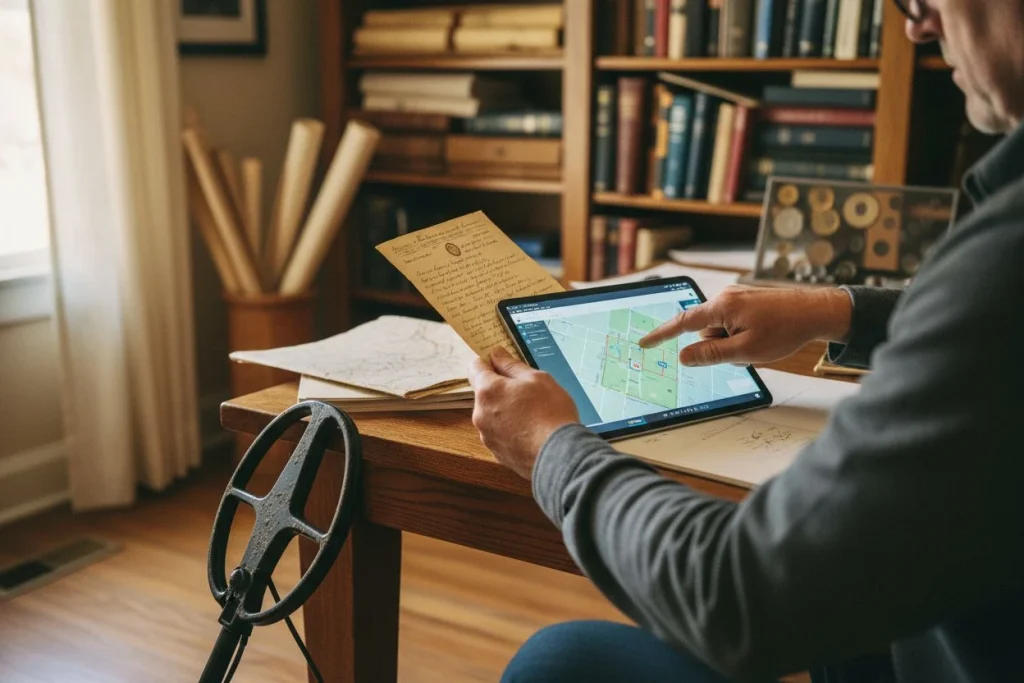
Armed with your case file, the real digital archaeology begins. This is where you connect names, events, and landmarks from old paper to precise spots on today's map. I move from broad repositories to targeted databases. I use the clues I've gathered to warp the past onto the present.
Mining Historical Newspapers for Clues
Your case file should have names and dates. Now, plug them into Chronicling America, the Library of Congress’s free historic newspaper archive. Don't just search for "great fire" headlines. Think like a social historian. Search for announcements, ads, and community bulletins.
I look for notices about church picnics at "Miller’s Grove." I search for ads for traveling carnivals at "the old fairgrounds." I find gossip-column mentions of swimming holes. The iterative search strategies noted by researchers are key here. Try a single keyword like a family name. Then combine it with a place or event. One ad for a 1910 "Labor Day Celebration & Baseball Game at the Driving Park" gave me the exact location. It was a forgotten recreational complex. It's now a city dog run.
Overlaying Historical Maps with Modern Tools
You have a Sanborn map from 1895 showing a blacksmith shop. You have a modern satellite view. The magic is in the overlap. A tool like Allmaps becomes invaluable. As experts at the Leventhal Map & Education Center explain, platforms like this use IIIF technology. It lets you "warp" a digitized historical map to match modern geography in your browser.
I can take a high-resolution 1902 map from a digital collection. I load it into Allmaps and pinpoint landmarks that still exist. I look for a church spire or a major road intersection. The software stretches the old map to fit. Suddenly, I see the 1902 "baseball diamond" symbol. It sits under the overgrown corner of a modern park. You're not just looking at history. You're aligning it.
How Can One Obituary Reveal a Site?

The most powerful connections are often lateral. Once, I researched a local merchant and found his 1923 obituary. It mentioned he was "formerly the manager of the Interurban Picnic Grounds." That was a new name. A search for "Interurban Picnic Grounds" opened a vein of new articles. These led to maps, and then to land near an old trolley line. That site yielded over a dozen Barber dimes. One obscure clue in a digitized document became the key to a whole new location.
This phase is a puzzle. You're not just collecting data. You're following a chain of evidence from one digital record to the next. You follow it until the historical site snaps into focus on your GPS. If you hit a wall, our guide on Secret Site Analysis has more advanced cross-referencing tricks. It's a perfect companion to researching metal detecting sites online.
Securing Permission to Hunt Private Land
In short: Historical research isn't just about finding where to detect. It's about discovering who to ask for permission. By tracing names through old directories and deeds, you can often find a living descendant or the current owner. This transforms a "no-trespassing" zone into a welcomed hunt.
All that brilliant research means nothing if you can't legally swing your coil. This is where the puzzle gets personal. You've found the perfect 1920s picnic grove on a map. Today, it's private farmland. The breakthrough comes when you stop looking at the land. Start following the people.
I once used a 1920s city directory to trace a property owner's family forward. I used phone books and public records. I found his living granddaughter. A polite letter explaining my historical interest in her grandfather's old land got me permission. I cited the directory and Sanborn map in the letter. It also got an invitation for tea and stories. That site yielded my first Barber half dollar.
The process is methodical. Start with the name on the oldest map or tax record for your target parcel. Cross-reference with deed books at the county recorder's office (often online). This helps you follow the chain of title. State archives hold non-current public records like old tax assessments or probate files. These can list heirs. The goal is to connect that historical name to a modern phone number or address.
This is where ethical detecting is non-negotiable. Your approach must be respectful, transparent, and low-pressure. I lead with the history, not the hunting. Offer to share finds. Promise to leave no trace. Always respect a "no." This isn't a loophole. It's building a relationship. Often, you become the person who cares about their family's history as much as they do. That's the best permission of all.
Turning Research into a Successful Hunt
In short: Fieldwork is where your research is validated. You'll use modern satellite tools to pre-scout. Then, you'll physically correlate historical layouts with ground contours on-site. The final, most critical step is interpreting the map. You need to pinpoint where daily life and loss actually happened, not just where buildings were drawn.
You've done the archive deep dive. You've secured permission. Now you're finally standing at the gate. This moment—when paper history meets packed dirt—is the most exhilarating part. Here's how I systematically bring my treasure map to life. To see this process in action with a real-world example, read our case study on turning old maps into modern finds.
Scouting Sites with Satellite Imagery
Before I load my detector, I do a virtual walkthrough. Using Google Earth’s historical imagery slider is my first move. Find it under “View > Historical Imagery”. I can often see the land before a modern subdivision was built. I spot ghostly outlines of old farm lanes. I see the dark soil of a filled-in cellar hole from a 1994 aerial shot.
Next, I scrutinize the current satellite and Street View. I look for subtle tells. These include a line of mature trees that might be a former property boundary. I look for an odd depression in a flat field, or a stony patch. This recon helps me plan parking. It helps identify hazards. It lets me mentally overlay my historical map before my boots hit the ground.

Matching Historical Maps to the Modern Landscape

Map in hand (I print a copy), I start walking. The goal here isn't to detect yet. It's to orient. I look for permanent landscape features that both maps share. As the Library of Congress method advises, I ask what the historical map reveals about the landscape. A 1902 map might show a spring feeding a pond. Today, the pond is gone. But a distinct, damp swale in the grass often marks its old course. A line of willow trees might also mark it. A dashed line for a "footpath to the creek" might align with a barely visible dip.
I use my phone's GPS with an app like Google My Maps to drop pins on these correlated points. I mark "old well location" or "main gate approx." This creates a real-world georeferenced overlay. It confirms my research was correct. It focuses my search area.
Where Did Activity Really Happen on Site?
This is the master skill. A Sanborn map shows a blacksmith shop. But coins weren't lost inside the fiery forge. They were lost in the path to the shop. They were lost in the waiting area outside. They were lost in the grassy spot where he ate lunch.
I mentally reconstruct daily life. Where did kids play? (The shade between the house and barn). Where did people get on/off wagons? (The clear area near the front gate). Where were clothes hung? (Between two trees behind the house). These "activity zones" are your true high-probability grids. The map gives you the stage. Your job is to find where the actors spent their time. This focus turns a 5-acre field into a few 20×20 foot honey holes. This is the practical payoff of researching metal detecting sites.
Your research deserves the right tools. Once your map is aligned, you need gear that can listen to the history you've uncovered. See my list of 8 Must-Have Tools to be fully prepared in the field.
Essential Gear for Research and Detection
In short: My research isn't done when I leave the library. To make it useful in the field, I rely on two simple kits. One is for capturing information in the archives. The other is for translating it onto the actual landscape. Here's exactly what's in my bag.
Let's geek out on gear. This isn't about detectors. It's about the tools that turn a stack of photocopies into a functional treasure map.
Your Detectorist Research Kit for Archives
This is what I bring to the historical society or county records office:
- Digital Camera/My Phone: Non-negotiable. As the Princeton guide advises, I take high-resolution photos of every relevant document page (where permitted). It's faster than notes and preserves context. My phone's scanner app works in a pinch.
- My Notebook System: A simple, durable notebook. I record the collection name, box number, and a brief description of every document I photograph. This creates my "catalog."
- Portable Scanner: For longer maps or documents, a small flatbed scanner gets a perfect, readable copy without glare.
- Power Bank: A day in the archives kills a phone battery. This keeps me shooting.
Your Field Kit for Translating Research
This comes with me on the hunt, born from the research:
- GPS App with Offline Maps: I use an app like Gaia GPS. I drop pins on the satellite view where my historical map shows key features (old well, porch, footpath). I download the map area for offline use.
- Printed Map Overlays: I often print a transparent sheet with old property lines or building footprints from my Sanborn map. Holding this up helps correlate "then" and "now."
- A Sturdy Folder: This holds printed research and, most importantly, the signed permission form from the landowner. It's physical proof this expedition is legit.
It's a simple setup. Each piece has a job. They capture information flawlessly. They put it right in front of my eyes when I'm in the field, ready to swing. For more on organizing your research, see our guide on creating a detectorist's research log.
Your Guide to Library Logistics for Detectorists
Let's tackle the practical hurdles. Here are the questions I get most often from detectorists staring down their first archive visit.
What do I actually need to bring?
Your driver's license or state ID is mandatory for registration. Bring a pencil (no pens allowed near documents), a notebook, and your phone or camera. A portable charger is a lifesaver. Leave your backpack, food, and drinks in the car. Most research rooms have lockers.
How do I handle the documents?
This is where we earn our reputation. Follow the archivist's rules to the letter. As the Society of American Archivists guide notes, handling is everything. Use provided book cradles for fragile texts. Wear gloves if they're offered (usually for photos or certain manuscripts). Never lean on, write on, or fold a document. Your job is to leave zero trace.
Is everything just online now?
I wish. While digitization is amazing, archivists.org stresses it's often just a tiny fraction of a collection. The real gems are almost always physical-only. These include the unique county atlas, the handwritten store ledger, and the un-cataloged photo album. You have to go in.
What if I feel out of my depth or intimidated?
You will. Everyone does. My first time, I was sure I'd break a 200-year-old book by opening it. Just be honest. Tell the archivist, "This is my first time. I'm researching the history of the old Miller farm, and I'm not sure where to start." They live for this. Their entire job is to connect people with history. They are your best ally, not a gatekeeper. Don't let the quiet room scare you off. The treasure is in those boxes.
Why the Real Treasure is Uncovering History
We've covered a lot of ground—from intimidating archives to digital maps and field work. Here's the honest truth: the best find isn't always in the ground. It's the story you piece together. It's the ghost of a place you finally understand. That connection to the past lasts long after a coin gets cataloged.
My abandoned train stop hunt near Auburn is the perfect example. Yes, pulling over 30 Indian Head pennies and my first seated Liberty dime was incredible. But the real victory was standing in that scrubby field. I knew exactly where the ticket booth once stood. An 87-year-old former conductor had pointed it out on my map. I wasn't just finding coins. I was touching a moment when that spot was alive with steam and travelers. That's the treasure. It's why we do this—to be temporary custodians of stories that would otherwise fade.
This process is how we preserve and share history, maybe with our kids in tow. It turns a hobby into a legacy. So, take this guide. Walk into your local history room and start a conversation. The skill of researching metal detecting sites will lead you to your next great hunt. It's waiting in the pages of a ledger or a fold in a map. Now, get out there and turn your local history into your next great hunt.

My name is Paul and I am the founder of Detector For Metal, a dedicated resource for metal detecting enthusiasts seeking to uncover historical treasures and connect with the past using the latest technology. As a stay-at-home dad and family man, I’ve found metal detecting to be the perfect hobby that combines family adventure with historical learnings for the whole family.
As a father, I’m deeply committed to passing on this hobby to the next generation of detectorists, starting with my own children. I share advice on everything from metal detecting with kids to exploring the top 10 metal detecting sites you never thought about. My methodical approach to the hobby goes beyond the thrill of discovery—it’s about creating family traditions while preserving history and sharing the stories of those who came before us.