Table of Contents
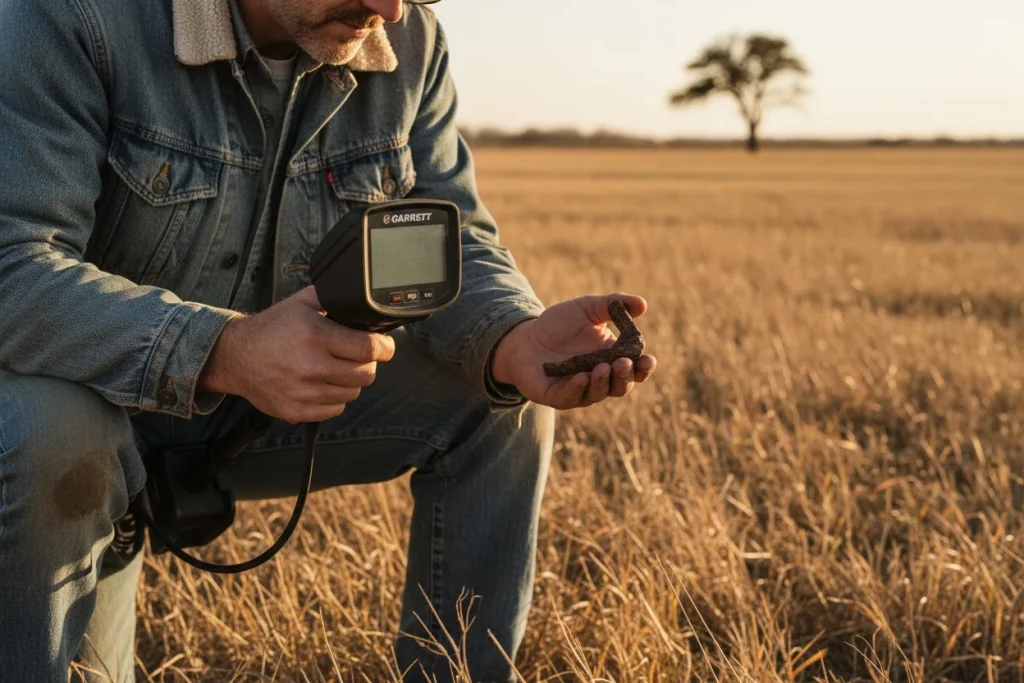
My detector’s screen flashed a perfect “85”—the textbook signal for a silver dime. My heart jumped. Thirty seconds later, I pulled out a rusted soup can. That early lesson taught me the most valuable skill. Your detector’s screen is a map, not an instruction manual. Learning to read its subtleties separates a digger of trash from a finder of history. This skill is called metal detector target identification.
If you’ve ever chased a pristine “78” only to find a mangled pull-tab, I’ve been there. We all have. This guide isn’t just another rehash of basic Target ID charts. As the excellent guide from Joan Allen notes, those 0–99 numbers correspond to conductivity. They are not absolute. Soil, depth, object orientation, and nearby trash all distort the reading. This is your field manual for diagnosis.
I promise you: we’re going to move beyond the frustration. We’ll build a diagnostic checklist for those head-scratching signals. We’ll explore sneaky culprits like the “halo effect.” You’ll learn to distinguish environmental interference from a genuine deep target. You’ll learn to listen to the whole story your detector is telling. Let’s start reading the map.
Decode Your Metal Detector’s Hidden Audio Clues for Accurate Target Identification

If you’re just staring at the screen, you’re missing most of the conversation. A Target ID is a single data point—a headline. The real story is told through tone, depth, and consistency.
My detecting buddy Tom taught me this. He hunts old fairgrounds littered with modern trash. I was chasing every high number on my screen, digging endless bottle caps. Tom was pulling coins. “Stop reading,” he said. “Start listening.” He was hunting by ear. He evaluated the quality of the signal, not just the number. That day, I learned to cross-reference three other clues.
First, and most important, is audio tone consistency. As the guide from Metal Detecting Life perfectly puts it, you must learn your machine’s “symphony of sounds.” A clean, repeatable high tone is a classic sign of a good target like a coin. It sounds the same from every swing direction. A broken, scratchy, or wavering tone suggests iron or trash. Listen for purity and stability.
Second, check the depth indicator. This is a huge clue. A faint, whispery signal reads 8 inches down with a mid-range ID. That is far more intriguing than that same ID screaming at 2 inches. Depth adds credibility. Very deep targets often give fluttering, unstable IDs. The signal is weak. So a deep, faint signal with a questionable number warrants a careful look.
Finally, assess signal repeatability. Does the signal sound identical when you approach from all sides? A true, symmetrical object like a coin will. If the tone or ID fractures from one angle, you’re likely detecting the edge of a larger object. It could be bent sheet metal or a nail. Joan Allen’s advice to “use audio-visual patterns together” is key here. Watch how the ID behaves in relation to the tone as you circle.
That fairground lesson changed my approach. Now, a high, solid “85” gets a pass if it’s shallow and gives a broad, bzzzt-like tone (it’s can slaw). But a faint, warbling “40” that’s deep and repeats from all sides? That’s a dig. Your detector is giving you a full report. The ID is just the subject line.
Identify Mystery Targets with This Diagnostic Chart
When you get a weird signal, you need a quick field diagnosis. I’ve wasted plenty of time chasing ghosts. This table is the cheat sheet I built from those mistakes. Think of it as your first stop for troubleshooting. It will sharpen your metal detector target identification skills.

Common Metal Detector Target Misreadings
| The Symptom (What You See/Hear) | Likely Culprit | The Quick Field Test |
|---|---|---|
| Erratic, Jumping ID (e.g., 12-78-45) | EMI Interference: Power lines, cell phones, WiFi. Loose Hardware: Coil cable connection. Extreme Mineralization: “Hot” soil. | 1. Move 20 feet. If it stabilizes, it was EMI. 2. Check coil connection. Ensure it’s snug. 3. Lower sensitivity 2-3 notches and re-scan. |
| High, Solid ID (e.g., 80-85) That’s Shallow & Broad | Large Modern Trash: Aluminum can, crushed can “slaw,” big foil wrapper. | Use Pinpoint mode. If the signal area is huge (over 6 inches across), it’s almost certainly trash. |
| Faint, Fluttering Low ID (e.g., 08-15) Deep | Small Iron: Nail, rusted bolt fragment. “Halo Effect”: Oxidizing iron creating a false conductive halo. | Check from multiple angles. If the signal disappears when you rotate 90 degrees, it’s irregular iron. |
| Perfect Coin ID (e.g., 78-82) That “Cracks” or “Bursts” | Pull-Tab or Bottle Cap: The classic impostor. | Listen for the “crackle.” A coin tone is clean. Many caps have a slight broken, fizzy edge to the audio. |
| Constant, Random Beeping (No Stable Target) | Sensitivity Too High / Low Battery. Severe Ground Minerals. | 1. Check battery. 2. Lower sensitivity until chatter stops, then raise slowly. 3. Re-ground balance. |
| Good Signal That Disappears When You Dig | “Knife-Blade” Effect: A vertical nail gives a good signal until disturbed. Target Fall-Through: The item fell deeper. | Scan the hole and the pile. The target often moves to the sidewall or into your dirt pile. Use a pinpointer. |
My advice? Bookmark this page or snap a photo of this table. I have a printed copy laminated in my gear bag. It turns five minutes of head-scratching into a 30-second diagnosis. This is core to practical metal detector target identification.
How Rusty Iron Tricks Metal Detectors Every Time

When a high, solid Target ID screams “silver coin,” but your shovel reveals a lump of rust, you’ve met the Great Imposter. This is the “halo effect.” It’s where large, corroding iron objects create a deceptive field. It tricks your detector. It’s one of the most frustrating—and common—reasons a perfect signal goes bad.
I learned this the hard way at an old Central Valley homestead. My Minelab sang a beautiful, repeatable 83 at a clean 8 inches. It was textbook silver dime territory. My heart was pounding. After carefully cutting a plug, I saw a curved, dark shape. A silver bracelet? A large coin? I pulled it out. It was a massive, crumbling horseshoe. My “silver dime” was iron all along.
The science is simple but sneaky. When a large iron object sits in the ground for decades, it rusts. This corrosion leaches into the surrounding soil. It creates a conductive “halo.” Your VLF detector doesn’t just see the inert iron core. It reads this conductive halo as a large, conductive target. The result is a falsely high, surprisingly stable Target ID.
Here’s your field clue. You might get a strong, repeatable signal in the 82-84 range. It seems to cover an area the size of a salad plate at about 6-10 inches. You might be looking at a rusted tool. The halo creates a broad field. It mimics a large, clean target. The giveaway is often in the subtle audio. While the ID is high, the tone might have a faint, fizzy edge. It’s the machine catching the irregular edges of the corrosion field. So next time that “perfect” high tone appears, listen for purity. The halo effect is convincing, but it almost always leaves a tiny crack in its disguise.
Is Your Signal Ground Noise or EMI Interference?
When your detector chatters with unstable, jumping Target IDs, the culprit is usually one of two things. It could be electromagnetic interference (EMI) or natural ground mineralization. Both create frustrating noise. Telling them apart is crucial. One requires you to move, the other requires you to adjust your settings.
My buddy Mike and I faced this at an old park in Roseville. Our detectors went haywire. They bounced from 12 to 78. “Is this black sand or is someone’s WiFi frying us?” he asked. We had to figure it out fast.
Follow this diagnostic flow when you get erratic signals:
Step 1: The Location Test (Check for EMI) First, simply walk 20-30 feet away. As the team at Regton highlights, EMI can create a localized field. If the erratic behavior stops when you move, you’ve found your culprit—man-made noise. Switch your phone to airplane mode.
Step 2: The Sensitivity & Frequency Test If the noise follows you across the entire site, it’s likely ground-based. Before blaming the soil, turn your sensitivity down 2-3 notches. A too-high sensitivity amplifies all background noise. This is noted by Detector Warehouse. If lowering sensitivity smooths the signal, you were just running too hot. On multi-frequency machines, try a single frequency.
Step 3: The Ground Balance Verification If the chatter persists, you’re likely dealing with challenging, mineralized soil. Perform a manual ground balance over clean ground. Listen for the threshold tone. In hot soil, it will sound rough. Your goal is to adjust the balance until that threshold smooths out to a steady hum.
The Quick Summary:
- You moved → noise stopped = EMI. Change location or remove electronic sources.
- You lowered sensitivity → noise stopped = You were overdriving the detector.
- Noise is site-wide = Mineralization. Work slower, balance carefully.
Getting this right saves hours of frustration. It turns a site you’d abandon into one you can work.
How to Identify Difficult Metal Detector Targets
So your detector’s giving you a signal that just doesn’t add up. The ID is weird. The tone is odd. Your gut says “junk.” Let’s decode three of the most common tricksters. Mastering these is key to advanced metal detector target identification.

Why Bottle Caps Fool Metal Detectors
The modern steel bottle cap is the bane of the park hunter. It loves to ring up in the 70-82 range. I’ve dug enough of these to pave a driveway. The trick is in the “double-beep” or tone fracture. As Joan Allen’s field guide advises, a bottle cap often gives a high, inconsistent tone. Swing slowly. You might hear a high tone. It crisply breaks into a lower grunt over the center. If it fractures, it’s probably a cap.
Deep Iron Nails vs. Small Gold Signals
A faint, fluttering signal in the low iron range (0–15) is a classic head-scratcher. It’s deep. It could be a tiny piece of iron or a small gold ring. This is where the depth-size heuristic comes in. Ask yourself: For how deep it is, how large does the target seem? A deep, broad low signal is likely large iron. But a deep, pinpoint low signal is intriguing. It’s just barely there. My first gold men’s wedding band sounded exactly like this. It was a whispery 6-8 at nearly 9 inches. The rule: if you’re in a low-trash area, dig the faint, deep whispers. This is a critical part of gold metal detector target identification.
Distinguishing Foil from Silver with Your Detector
A crumpled piece of aluminum foil and a thin, worn silver dime can share a similar ID. It’s often 50-65. The foil is rarely a single, clean signal. It will often “bloom” as you swing. The ID will jump around (52, 58, 61) because of its crumpled shape. A thin silver coin will usually hold a more stable number. Pinpointing helps. Foil often gives an erratic, “spread out” signal. A coin will be tighter.
The best way to learn this language? Build a test garden. Bury examples of these tricksters. Learn how your machine talks about them. It’s the single most effective practice. This is just as the team at MetalDetector.com recommends. Your confidence will skyrocket. For more on organizing a hunt, see our guide on getting metal detecting permission.
Your Metal Detector Signal Checklist for the Field

When you’re in the field and your machine chirps with a confusing signal, don’t just guess. Run through this mental checklist. I keep a version taped inside my finds pouch. It solidifies your metal detector target identification process.
- Pause and Pinpoint. Hit pinpoint to gauge size. A massive signal is almost always trash. A tight, coin-sized response is promising.
- Check the Consistency. Swing from multiple angles. Does the tone and ID repeat cleanly every time? Consistency is good. A warbling tone is a red flag.
- Listen, Don’t Just Look. Close your eyes. Is the audio high and clear (like a coin) or high but crackly (like a bottle cap)? Your ears are more honest than your screen.
- Assess the Depth-Size Relationship. For a deep, faint signal: Is the target broad? Probably large iron. Is it a pinpoint whisper? Worth investigating for small gold.
- Rule Out Interference. Is the signal erratic everywhere? Walk 20 feet. If it stabilizes, you found EMI. If noise follows you, lower your sensitivity.
- Make the Call. Synthesize the evidence. A high, solid, repeatable, coin-sized signal? Dig. A high, crackly, shallow signal? Probably a cap. Trust the combined story.
Print this checklist or save it on your phone. On your next hunt, force yourself to walk through these steps before you dig. You’ll start bypassing junk and finding keepers, trust me. For more advanced techniques on handling multiple targets, check out our guide on metal detector target separation.
Master Metal Detector Signals and Stop Digging Blindly
The goal isn’t memorizing a chart. It’s learning to see a Target ID as one piece of a larger report. That report includes tone, depth, consistency, and context. Your job is to interpret that report.
This approach saved me hours last fall. I was at a crowded city park. My machine sang a choir of pull-tab signals. Instead of digging each one, I used the diagnostic steps. I dismissed a dozen obvious junk targets in minutes. That let me focus on one iffy, repeating high tone. The ID jumped between 82 and 85. I almost walked away. But the signal was tight and deep. I dug. Eight inches down was a worn 1897 Barber dime. The slight imperfection? A rusty nail lying two inches beside it.
That’s the shift. It moves you from being a digger of every beep to a finder of history. This skill is what consistently puts good finds in your pouch. It takes practice—you’ll still dig bottle caps—but listening to the whole story is the most rewarding part. It’s the heart of true metal detector target identification.
Fixing Common Metal Detector Target ID Confusion
Even with a solid approach, some signals are puzzling. Here are answers to the questions I hear most often.
Q: Why does the same type of coin give me a different ID number sometimes? A Target ID is not a barcode. As Joan Allen’s guide explains, the number reflects conductivity. This changes with condition and environment. A deeply buried, corroded dime will read lower than a shallow, pristine one. Its orientation and nearby trash can also skew the ID. The detector is giving its best estimate.
Q: My detector shows a solid 82-85 (silver range), but I keep digging pull-tabs. What’s going on? Welcome to the club. This is usually one of two things. First, modern pull-tabs are aluminum. When folded into a ball-like shape, they can mimic silver. Second, you might be encountering the “halo effect” from large, rusted iron. The rust tricks the detector. Use your checklist. A tight, repeatable signal is promising. A broad, warbling one is usually trash.
Q: What does a faint, fluttering low tone (like a 10-20 ID) mean when it’s deep? This is where patience pays. It can be tiny gold or large, decaying iron. The key is the size in pinpoint mode. A tiny, whispery pinpoint is gold’s calling card. A broad, groaning whisper is likely iron. When in doubt on a deep low tone, I dig. Some of my best small gold sounded just like that.
Q: Why do modern zinc pennies give such jumpy, unreliable signals? This is target composition at work. A fresh zinc cent might read steady. But they corrode fast in the ground, becoming porous. This creates an inconsistent field. Your detector sees this as a jumpy signal. It often bounces into the iron range. A high-tone that crackles and bounces down? You’ve likely found a rotting zinc cent. My buddy Tom calls them “the tricksters.”

My name is Paul and I am the founder of Detector For Metal, a dedicated resource for metal detecting enthusiasts seeking to uncover historical treasures and connect with the past using the latest technology. As a stay-at-home dad and family man, I’ve found metal detecting to be the perfect hobby that combines family adventure with historical learnings for the whole family.
As a father, I’m deeply committed to passing on this hobby to the next generation of detectorists, starting with my own children. I share advice on everything from metal detecting with kids to exploring the top 10 metal detecting sites you never thought about. My methodical approach to the hobby goes beyond the thrill of discovery—it’s about creating family traditions while preserving history and sharing the stories of those who came before us.