Table of Contents
Your first instinct is to scrub that crusty coin until it shines. Resist it. This guide on how to clean old coins found metal detecting flips the script from aggressive cleaning to thoughtful preservation. You’ll learn the critical “clean or don’t clean” decision. You’ll learn metal-specific techniques that protect value. You’ll learn how to display your finds without causing long-term harm. It’s about becoming a steward of the history you uncover.
The most important step is often to do nothing. I learned this the hard way. I turned a potential key-date Mercury dime into a shiny, worthless slug with a toothpick and impatience. The goal isn’t to make every find look new. It’s to stabilize it and honor its journey. We’ll walk through a conservator’s mindset. We’ll use methods backed by experts. These methods put the coin’s integrity first. Forget harsh chemicals and wire brushes. Your new toolkit includes patience, distilled water, and the wisdom to know when to leave well enough alone.
Your Role as a Coin Steward Begins Now

That moment of discovery is pure electricity. You see a flash of metal in the dirt, and your heart jumps. Your instinct screams to rub it clean right there. Resist it. This guide isn’t about cleaning; it’s about preservation. You’ll learn how to stabilize your finds. You’ll learn to make the critical “clean or don’t” decision. You’ll learn to apply metal-specific techniques and display coins safely. It flips the script from aggressive scrubbing to thoughtful stewardship.
I once ruined a potential key-date Mercury dime. All I saw was a crusty silhouette in the plug. I had to know what it was. I picked at it, scraped it, and “cleaned” it. The features blurred and the mint mark was gone. I’d erased its story and most of its value in five frantic minutes.
A few years later, I tried a “gentle” approach on a crusty Large Cent. I soaked it in olive oil for months. It came out sticky and smelled weird. The green crust was still there. I was learning, but I still missed the point. The goal isn’t to make every find look new. As experts at Minelab stress, commercial cleaners can strip surface metal. They can slash a coin’s value by 50% or more. The real goal is to stabilize the object and honor its journey.
This guide is what I wish I’d had. We’ll start with what you do in the field in the first 60 seconds. That moment determines everything. Then we’ll walk through the conservator’s most important question: to clean or not to clean? We’ll cover safe, metal-specific methods that protect value. Finally, we’ll talk about how to store and display your finds so they last for generations. Let’s begin where all finds do: in the dirt.
Secure Your Coin Find in the First Minute
Your pinpointer screams. You brush away the last soil and see a flash of silver. Your heart’s pounding. Every instinct screams to rub it on your jeans right then. This is the most critical moment for your find’s future. What you do in the next 60 seconds decides everything. It decides if you preserve history or accidentally start destroying it. Following advice from sites like Detector Power, this initial care is about documentation and restraint.
Why You Must Resist the Urge to Rub
Resist the urge to clean or aggressively handle the coin. Your goal is to see its condition, not its details. Look for obvious dates or features by tilting it in the sunlight. The oils and acids on your fingers can etch into the patina over time. They leave permanent fingerprints that devalue the coin. If you must handle it, use clean cotton gloves or hold it by the very edge.
Bagging Your Coins for Safe Transport
Once documented, it needs safe transport. A quick phone photo of it in the hole is gold for your records. Never throw a coin loose into a finds pouch with other targets. The constant clinking causes wear. For individual coins, a small, soft cotton bag or a coin flip is ideal. Avoid plastic bags or film canisters for any damp coin. They trap humidity and speed up corrosion. Tag the spot in your phone’s GPS or notes app. This context is part of the coin’s story.
Never Carry a Raw Find in Your Pocket
It’s tempting to drop a special find into your pants pocket. Don’t. Between lint, moisture, and friction against your leg, it’s a miniature rock tumbler. My buddy Mike used to carry his best finds in a small leather pouch on his belt. It seemed smart. Months later, he pulled out a Barber half dollar. The tannins from the leather had left a permanent, dark stain across Lady Liberty’s face. The coin was stable, but its eye appeal was ruined. Lesson learned.
Your field kit isn’t complete without a few soft cloth bags or paper envelopes. Get the coin into one, note the location, and leave the cleaning for later. You can calmly research what you’ve found then. Your first move should be to identify your coin, not clean it. The cleaning can wait; preserving its integrity cannot.
Should You Clean Your Dug Coins?
Here’s the short answer: if there’s any chance a coin is rare, don’t clean it. Ever. For common dates crusted beyond recognition, gentle cleaning for display is okay. Your goal isn’t to make it look new. It’s to reveal its story without erasing its history or value.
I learned this the hard way with an Indian Head cent. It came out of a farm field black and crusted. I couldn’t see a date. Impatient, I gave it a long soak in lemon juice. The crust vanished. It revealed a beautiful, reddish-brown 1864 coin… with a completely smooth, featureless surface. I’d burned away the delicate copper details with the grime. What could have been a valuable early “Fatty Indian” (my wife’s nickname for me, not the coin) became a shiny, worthless copper disc. I’d prioritized curiosity over conservation.
This is the single most important decision you’ll make. The experts at Regton put it perfectly: if a coin is believed to be rare, do not clean it. Period. Cleaning is often irreversible. It almost always reduces numismatic value. A coin’s “patina” – that stable surface layer of age – is part of its authenticity.
So, how do you decide? Use this simple matrix before any coin touches water.
- IF (The Date/Mint Mark suggests rarity) OR (You are unsure of its identity/condition) → THEN DO NOT CLEAN. Stabilize it in a dry coin flip and get a professional opinion. A muddy 1909-S VDB Lincoln cent is worth thousands. A cleaned one is worth maybe fifty bucks.
- IF (It’s a common date, like a 1940s Wheat cent) AND (It’s heavily crusted, obscuring all detail) AND (It’s solely for your personal display) → THEN you may PROCEED WITH EXTREME CAUTION using the gentle methods we’ll cover next.
This isn’t a suggestion—it’s the hill I’ll die on. The thrill is in the find, not the shine. Your job as a detectorist is to be a steward, not a restorer. When in doubt, and I mean even a flicker of doubt, leave it be. The next section is only for the coins that pass this test.
Essential Tools for Archival Coin Preservation
Forget the harsh chemicals and abrasive pads. The right toolkit isn’t about scrubbing a coin into submission. It’s about having gentle, controlled tools. These tools safely remove decades of soil without removing history. Think of yourself as an archivist, not a janitor.

Must-Have Archival Coin Cleaning Supplies
Your foundation is built on non-invasive, pH-neutral materials. Distilled water is non-negotiable. As Minelab’s guide points out, tap water contains chlorine and minerals. These can stain or corrode delicate surfaces over time. Distilled water hydrates and loosens dirt without adding new contaminants.
Pair it with soft-bristled brushes. Regton specifically recommends soft toothbrushes or nail brushes. For stubborn crust in crevices, wooden toothpicks (a classic tip from Minelab’s resources) allow precise, soft picking. They won’t scratch the metal like a metal tool would. Finally, have plenty of soft, lint-free cloths for patting coins dry.
Advanced Preservation and Handling Tools
Once a coin is clean and completely dry, preservation begins. A micro-thin coat of Renaissance Wax creates a stable, reversible barrier. It protects against moisture and pollutants. For storage, toss a few silica gel packets into your display case or coin box. They passively absorb ambient moisture. This creates a stable micro-climate that slows down chemical reactions.
Banned Substances That Destroy Coin Value
Some tools do more harm than the ground ever did. Wire brushes and steel wool are for scrubbing grills, not history. They will obliterate patina and engrave permanent scratches. Commercial coin dips and acidic cleaners are equally destructive. They aggressively strip surface metal along with the grime. Minelab warns this can slash a coin’s value by 50% or more. If it’s advertised to make metal “shine,” it doesn’t belong near your dug coins.
How to Clean Coins by Metal Type

A one-size-fits-all approach will damage coins. Each metal reacts differently to soil chemistry. Each requires a tailored strategy. The core principle remains: start with the gentlest possible method. Proceed incrementally. Know when to walk away. Your goal is stabilization, not perfection.
Safely Cleaning Copper and Bronze Coins
Copper coins from the ground—Large Cents, Indian Heads, early Wheat cents—often arrive with a hard, green crust of copper carbonate (verdigris). This crust can be tenacious. But the soft metal underneath is easily scarred.
- Gentle Method: A multi-day soak in distilled water is always step one. This slowly hydrates and loosens the crust without any chemical action. Change the water every day or two as it clouds. After the soak, gently brush with a soft toothbrush under a trickle of distilled water.
- Moderate Method: For stubborn crust that water won’t touch, try a long-term olive oil soak. It’s the classic, less-invasive approach championed by resources like Minelab’s guide. Submerge the coin completely in a small container of olive oil. Check it monthly. It can take 3-6 months for the oil to penetrate and weaken the crust. Once the crust is soft, use a wooden toothpick to flake it away. CRITICAL STEP: After the oil bath, you must neutralize any residual acidity. Soak the coin in a mild baking soda and distilled water solution for an hour. Then rinse thoroughly with distilled water and pat completely dry.
- Red Flag: When to Stop: If the surface is rough, pitted, or a brassy pink color after cleaning, you’ve hit active corrosion. Stop all mechanical picking. Further cleaning will only remove more metal. Stabilize it with a micro-thin coat of Renaissance Wax. Accept its “battle-scarred” character. I successfully stabilized a crusty 1857 Large Cent this way. It’s still pitted, but the date is clear, and it’s safe in my display case.
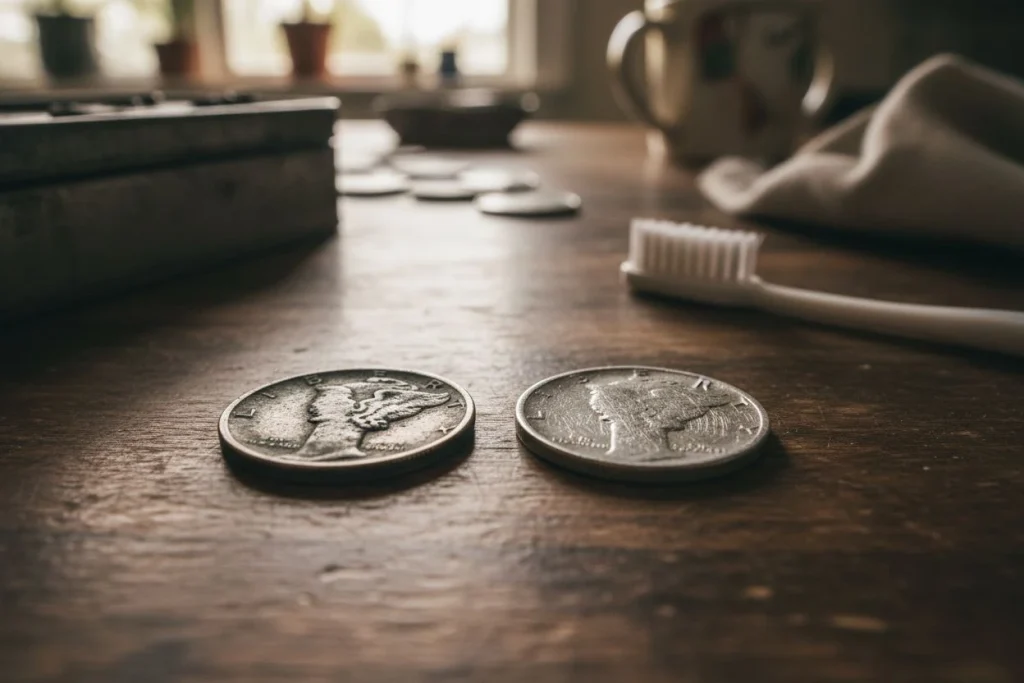
The Right Way to Preserve Silver Coins
Silver coins tarnish black from sulfur in the soil. Unlike copper crust, this tarnish is often a thin surface layer. Aggressive polishing will permanently remove the coin’s original luster and detail. It turns a beautiful Mercury dime into a flat, grey disc.
- Gentle Method: Wash with lukewarm distilled water and a drop of pH-neutral soap. Use your fingers or a very soft brush. Rinse thoroughly and air-dry on a lint-free cloth. This removes soil and chlorides without touching the tarnish or patina.
- Moderate Method & The Controversy: The old-school trick is the “spit and foil” method. You place a silver coin on aluminum foil in a bath of hot water with baking soda. A chemical reaction pulls sulfur from the coin onto the foil. Regton mentions this method, but here’s the controversy: it can leave the silver dull, chalky, or artificially white. Many collectors dislike it. It’s a cleaning method, not a preservation one. If you try it, use a spare common coin first. A safer moderate option is a very brief dip in a commercial silver dip (like Josab). Follow it immediately with a thorough distilled water rinse and drying. Never rub the coin.
- Red Flag: When to Stop: If you see any hint of a copper-orange color bleeding through, stop immediately. You’ve broken through the silver layer. Any further cleaning will accelerate the damage and make the coin appear splotchy.
Gentle Cleaning Methods for Nickel Coins
Pre-1965 Jefferson nickels and Buffalo nickels are notoriously difficult. The metal composition is highly reactive. It often results in severe, crusty corrosion that has already eaten into the surface.
- Gentle Method: A distilled water soak and soft brush is the absolute limit for any nickel you care about. Often, this is all you should do.
- Moderate Method (Use Extreme Caution): Some guides mention very weak acids (like ketchup or vinegar) to dissolve stains. Minelab notes this can reveal pitting, which is exactly the problem. If you attempt this on a common, already-corroded nickel, the process is: 1) Dip for seconds only. 2) Rinse IMMEDIATELY in distilled water. 3) Neutralize in a baking soda/distilled water bath. 4) Rinse again and dry thoroughly. The acid will likely leave the surface pitted and rough.
- Red Flag: When to Stop: If the coin is flaking, has a bubbly surface, or if the date is already unreadable, stop. No cleaning method will restore lost metal. You are only risking exposure to harmful chemicals for no gain. Preserve it as-is.
Have you had a success (or cautionary tale) with a specific metal-cleaning protocol? Share your results in the comments. We can all learn from each other’s field tests.
Why Household Cleaners Ruin Old Coins
It’s tempting to grab something from under the kitchen sink to speed things up. Resist. Common household “solutions” are chemical shortcuts that create long-term damage. I’ve tried them so you don’t have to.
Vinegar, lemon juice, or ketchup are acidic. They will eat away corrosion, but they don’t stop at the grime. As Minelab’s guide notes, they aggressively attack the base metal itself. They leave a coin etched, pitted, and permanently stripped of its stable surface. What looks “cleaner” is often just microscopically scarred.
Ultrasonic cleaners are often recommended for jewelry. They’re too violent for porous, historic metals. The high-frequency cavitation can blast away fragile patina and drive microscopic cracks deeper. A source like Creworks may suggest them for modern coins. For dug coins, the risk isn’t worth it.
Acetone is a powerful solvent some use to remove organic gunk. While it can be useful in professional conservation, Minelab rightly flags the significant fire hazard. It can also dry out and embrittle metal if not used correctly. It’s a pro tool, not a household one.
Finally, any commercial metal or liquid polish is an automatic fail. These are designed to abrade and shine, not preserve. As warned against for copper alloys on MetalDetector.com, they contain chemicals that will start new corrosive reactions over time.
The collective lesson is clear: what makes a spoon shine will make a history lesson disappear. Stick to the gentle, pH-neutral toolkit. Your coins will thank you in another hundred years.
Storing and Displaying Your Preserved Coins
(The 60-second answer) Once a coin is clean and dry, your job shifts from cleaning to curating. The wrong storage can undo all your careful work. Avoid any plastic holder marked “PVC” or “vinyl.” They’ll eventually leach acidic “green slime” that etches coin surfaces. Instead, house coins in inert Mylar (Saflip) flips or archival paper envelopes. For display, slabs, albums, or Riker mounts offer protection. Keep them in a stable, dark environment with silica gel packets to control humidity. It’s about creating a permanent, safe home for history.
I learned this the hard way. I proudly displayed my kids’ first finds in a cheap, decorative frame. A year later, a faint haze had bloomed on the silver dime. I’d ignored the environment, and the coin was paying the price. I still wince thinking about it.

Long-Term Coin Storage to Prevent Damage
Think of storage as a long-term truce with chemistry. The enemy is polyvinyl chloride (PVC), the soft plastic in many cheap coin flips. Over years, it breaks down. It releases hydrochloric acid that shows up as a greasy, green film. This actively corrodes metal. Mylar (a type of polyester) is chemically inert and the professional standard. Brands like Saflip are worth the extra few cents.
The second enemy is humidity. Even in a dry house, microscopic moisture can condense on coins. This starts new corrosion cycles. The fix is simple: toss a few silica gel packets into your storage box. They’re cheap insurance. Regton’s guide notes their use for assisting the drying process. They’re just as crucial for maintaining it.
Choosing Display Holders for Your Collection
For the coins you want to show off, you have three main paths:
- Slabbing (Grading Holders): For a key-date find, professional grading and encapsulation is the ultimate preservation. The coin is sealed in an inert plastic slab. It’s an investment.
- Archival Albums & Pages: For a collection, nothing beats the classic binder with Mylar pages. It lets you organize and view both sides while keeping coins secure. It’s practical and satisfying.
- Riker Mounts: These are shallow, glass-topped display cases with foam inserts. They’re perfect for arranging a thematic hunt’s finds. Ensure the foam is acid-free.
Protecting Coins from Light and Handling
Your display location matters as much as the holder. Direct sunlight will fade toning and increase temperature fluctuations. This stresses the metal. Choose a shaded wall. And always handle display coins by the edges. The oils and acids on your skin will leave permanent fingerprints. They can etch into the surface over time. The goal is for your grandchildren to see the coin exactly as you left it—a piece of history, stable and honored.
Coin Cleaning Questions Answered
Even after going through the steps, a few questions always come up. Here are the short, straight answers I give at club meetings.
Q: Can I use electrolysis on coins?
I’ll level with you: don’t. While electrolysis is powerful for cleaning rusted iron, it’s devastating for coins. The process strips away everything—corrosion, patina, and surface metal. It leaves a pitted, ghostly version of the original. As Minelab’s guide warns, it’s an irreversible, aggressive treatment. For any coin with potential value, it’s a hard no.
Q: How do I remove heavy limestone or concretion?
Patience and picks, not chemicals. For a thick, rocky matrix, use a wooden or plastic dental pick. Gently fracture and pry the material away from the coin’s surface. Work from the edge inward. Avoid metal tools that can scratch. Never soak in acid-based solutions to dissolve the rock. They will attack the coin underneath just as aggressively.
Q: What about iron or colonial relics?
That’s a different game. Iron requires immediate stabilization to halt active rust. This often involves thorough drying, sealing, or specialized treatments. Colonial brass or pewter buttons need gentler care. The principles are similar—prioritize stabilization over cleaning—but the techniques differ. I’ve written a dedicated guide on safely preserving Civil War relics and other historic finds that walks through the metal-specific protocols.
Final Thoughts for the Responsible Detectorist
The goal was never a shiny coin. It was a preserved story. From the moment you spot that glint in the plug, your job shifts from discovery to stewardship. The real treasure isn’t the metal. It’s the tangible connection to the person who last held it. You’ve now safeguarded that for the future.
I still wince thinking about that Mercury dime I ruined years ago. I wasn’t a steward then; I was just a guy with a find. This careful process is how we honor history. It’s field triage, the clean/don’t clean decision, gentle stabilization, and archival display. It’s how we ensure the coins we work so hard to find get the respect they deserve.
The next step? Apply this same thoughtful care to finding them. The best preservation starts with knowing where to look. I’ve put together a complete guide on researching and locating historic sites to build your own list of productive, permission-secured spots. Go be a great steward.

My name is Paul and I am the founder of Detector For Metal, a dedicated resource for metal detecting enthusiasts seeking to uncover historical treasures and connect with the past using the latest technology. As a stay-at-home dad and family man, I’ve found metal detecting to be the perfect hobby that combines family adventure with historical learnings for the whole family.
As a father, I’m deeply committed to passing on this hobby to the next generation of detectorists, starting with my own children. I share advice on everything from metal detecting with kids to exploring the top 10 metal detecting sites you never thought about. My methodical approach to the hobby goes beyond the thrill of discovery—it’s about creating family traditions while preserving history and sharing the stories of those who came before us.