Table of Contents

When a coin’s date wears away, identifying it changes. It goes from a simple lookup to a kind of forensic investigation. You have to become a detective. You examine the clues left behind—size, weight, metal, and any surviving design details—to narrow down what it is and when it’s from.
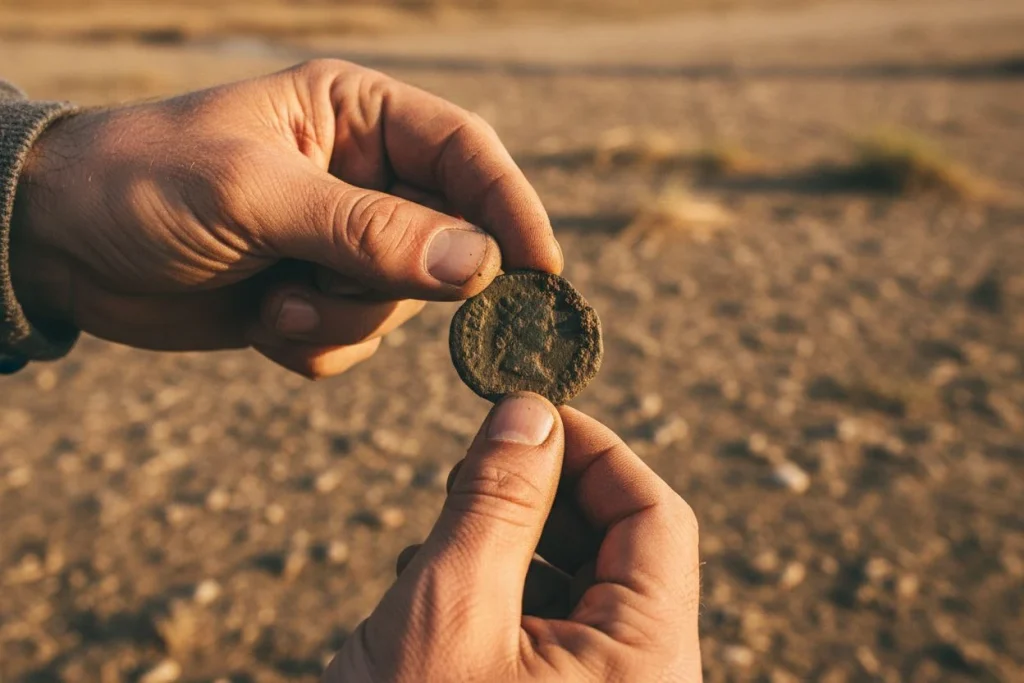
I know that heart-sinking feeling. I felt it on a sweltering afternoon, pulling a tiny, worn silver disc from the dirt near an old orchard. My pulse jumped at the sight of silver, then immediately dropped. The date was a smooth, featureless blank. It was my first Seated Liberty dime, and its most important story was erased.
You know the feeling. That crucial piece of information—the year—is just gone. It happens to the best finds. It’s especially common on high-relief designs like Buffalo nickels and Standing Liberty quarters. The date sits on the highest point, so it’s the first thing to wear flat.
But here’s the good news: that coin is not a lost cause. With a methodical approach, you can almost always identify its series and narrow its date to a specific window. This guide is your manual for that detective work. We’ll start with a simple physical check, move to visual tricks with light, learn to decode design language, and discuss modern tech. We’ll save true restoration as an absolute last resort. Your “blank” coin has a story. Let’s learn how to read it.
How to Identify a Coin Without a Date
When the date is gone, stop thinking of it as just a coin. Start thinking of it as a piece of evidence. Your goal shifts. It’s no longer a simple lookup. Now it’s a process of elimination. You use every surviving clue to narrow down its identity. The aim isn’t always the exact year. It’s about identifying the series and type to lock it into a specific historical window. Preservation is your prime directive. You work from the least invasive observation to the most. You never force a clue.
This mindset clicked for me years ago. It wasn’t with a coin, but with a single, cruddy flat button. It was a complete blank—no design, no text, just a rusted disc. My buddy Tom called it junk. But under a loupe, I spotted the faintest impression of woven fabric on the back. It was a casting mark called a “sprue.” That tiny detail, after hours in a forum deep-dive, identified it as a pre-1830s one-piece civilian button. That button became the key. It confirmed we were detecting a War of 1812 militia campsite, not just a random field. I was probably more excited about that than any sane person should be. But it proved the point: The smallest diagnostic feature can tell the biggest story.
You’ll approach your dateless coin the same way. First, you’ll document its physical facts—weight, size, metal. Then, you’ll interrogate its design under different lights for surviving details. Look for a fraction of a letter, the shape of a leaf, the drapery on a gown. These are your “diagnostic features.” We’ll walk through this structured audit together. That smooth, anonymous disc in your hand is waiting to give up its secrets.
Start With the Coin’s Weight and Size
Your first job, detective, is to gather the non-negotiable physical evidence. When a date is gone, a coin’s weight, diameter, and metallic composition become your foundational facts. These are clues that don’t fade with wear. They will immediately narrow your suspect list.
Essential Tools for Accurate Measurement
You can’t eyeball this. A decent digital caliper and a small jewelry scale are the best $30 you’ll spend for coin ID. I keep mine right on my cleaning desk. Don’t overthink it—a basic model from Amazon works perfectly. This is the core of my “start cheap, learn what you actually need” philosophy. Precise measurements turn guesswork into a process of elimination.
Simple Metal Tests for Coin Identification
Metal type is a massive filter. First, try the magnet test. A strong magnet (like a rare-earth magnet from a hardware store) will cling to modern, post-1965 U.S. clad coins and steel-based foreign issues. It will slide slowly or not stick to pure silver or copper. Next, listen for the “ping.” Gently tap a silver coin on its edge with another coin. It rings with a clear, high-pitched tone that lasts for seconds. Clad or copper sounds duller and shorter. Finally, look at the color under a bright light. Is it the grey-white of silver, the reddish-brown of copper, or the pale yellow of a worn nickel alloy?
Determining Your Coin’s Denomination
Now, combine your clues. This is where your measurements pay off. A silver dime (like a Barber, Mercury, or Seated Liberty) will be about 17.9mm in diameter and weigh roughly 2.5 grams. A Roosevelt dime, made of copper-nickel clad after 1965, is the same size but often feels lighter and won’t “ping.” A copper Large Cent is a beast by comparison—roughly 27-29mm and about 10.89 grams.
Here’s your mini-guide: If it’s ~19mm, copper, and weighs ~3.1g, you’re likely holding an Indian Head cent. If it’s ~24mm, silver, and ~6.25g, you’ve probably got a Washington quarter (pre-1965) or a Standing Liberty quarter. This physical audit won’t give you the year. But it will confidently tell you what you have, locking it into a specific series and century. The rest of the investigation builds from here.
Reveal Hidden Details with Oblique Light
When a coin looks completely smooth, try manipulating light before you give up. Angling a single light source across the surface can cast long shadows. These shadows come from the microscopic relief left by the original stamp. They can reveal outlines of numbers and letters invisible under normal light.
I learned the power of this from my buddy Tom in his garage one night. We were staring at a dateless Buffalo nickel that felt like a total loss. Out of desperation, I killed the overhead light. I put the coin on a black microfiber cloth and hit it with a single LED flashlight from the side. Tom leaned in, skeptical. “You’re wasting your time.”

Then, as I slowly tilted the light to a shallow 15-degree angle, a faint, ghostly curve appeared in the date area. Then another. “Is that… a seven?” Tom muttered. It was. That “slick” nickel still held the barest trace of its 1937 date, a secret only revealed by shadow. (I was way more thrilled about this than any normal person should be.)
This isn’t a magic trick—it’s basic topography. As seasoned numismatists on the CoinTalk forum explain, the coin’s surface is never truly flat. The strike permanently compresses and work-hardens the metal. Even when worn flush, the area where a digit was stamped has a different microstructure. It catches light at an oblique angle, casting a tiny shadow you can see.
Here’s how to set it up:
- Get in the dark: A dark room is non-negotiable.
- Use a point source: A bright, adjustable desk lamp or a strong flashlight is perfect. Avoid diffuse, overhead light.
- Prepare the stage: Place the coin on a non-reflective, dark surface like felt or a black cloth.
- Go slow and low: Start with your light source nearly horizontal (around 5 degrees). Slowly increase the angle up to about 45 degrees. Watch the date area like a hawk.
- Magnify: You absolutely need a jeweler’s loupe or your phone’s macro camera mode to see these micro-shadows.
Fair warning: This won’t resurrect a date that’s been completely polished away to a literal slick surface. But for coins with “ghosts” of detail left, it’s the best, non-invasive first step you can take.
Identifying Coin Series Without Dates
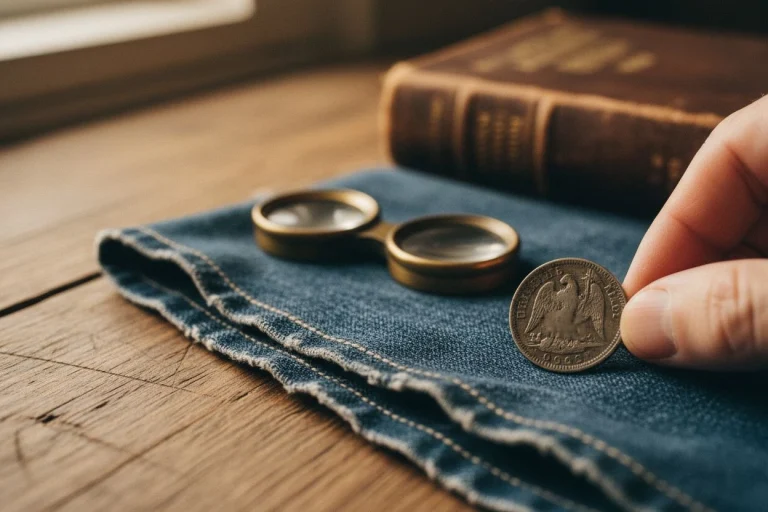
When the date is a smooth blank, your investigation shifts from numbers to art. You’re now a numismatic detective analyzing style, placement, and tiny design elements that changed between series. I once spent an hour comparing the curl of Liberty’s hair on a worn Barber dime to online images. My wife thought I’d lost it. But by matching the wreath details and the shape of the “D” in “UNITED,” I nailed it as a 1901-O. The series itself tells a huge part of the story.
Key Markers for Major Coin Series

Focus on the most dramatic design shifts. For Buffalo Nickels, the ridge line on the buffalo’s back is a master clue. On early strikes (1913-1937), the line is sharply defined. On later strikes (especially mid-1930s), wear on the die made the line almost absent. That’s a sign your slick buffalo is likely from the late ‘20s or ‘30s.
With Seated Liberty coinage, look at the drapery lines. Early dimes and half dimes (1837-1838) have no stars. Stars were added in 1839. Later, arrows were added at the date in 1853 and again in 1873. That immediately narrows your window.
Finding Mint Marks on Worn Coins
Even without a date, a mint mark can lock down a coin’s origin. It can also hint at its era based on when that mint operated or used certain marks. Crucially, where that mint mark is placed changed over time.
On Mercury Dimes, the mint mark is on the reverse, at the bottom near the fasces. On Roosevelt Dimes before 1968, it’s on the reverse too. After 1968, it moved to the obverse. Finding a worn silver dime with no visible mint mark on the reverse might mean it’s a Philadelphia issue. Or, it might mean you’re actually holding a post-1968 coin, which would be clad, not silver. That’s a key physical distinction that circles back to your audit.
Analyzing Fonts and Design Styles
Engravers had distinct styles. The lettering on a Barber coin (1892-1916) is sharp, blocky, and uniform. The “E” in “LIBERTY” on the headband has a distinct middle arm. On a later Walking Liberty Half Dollar, the lettering is more graceful and fluid.
Also, examine the rim. Early 20th-century coins often have a pronounced, rounded “wire” rim. Mid-century coins transition to a flatter, more defined edge. The placement of “E PLURIBUS UNUM” can also be a giveaway. Its location shifted on the reverse of quarters and dimes between the Barber and Standing Liberty series.
My advice? Keep a simple “cheat sheet.” Have a screenshot folder on your phone or a printed page by your cleaning station. Make columns for Barber vs. Mercury Dime reverses, Buffalo nickel ridge lines, and Seated Liberty varieties. When you pull a blank, you’re not starting from zero—you’re matching a pattern. It turns a frustrating mystery into a satisfying puzzle.
Can AI or Apps Help Identify Your Coin?
When the detective work with light and design hits a wall, your pocket computer becomes a powerful ally. Modern apps use pattern recognition. They match a coin’s overall design—Liberty’s profile, the eagle’s stance—against a massive database. They don’t need the date. Pair that with extreme close-up photography to see microscopic tooling marks. You’ve got a formidable one-two tech punch.
I love my reference books. But when I’m staring at a completely slick disc, I’ll snap a pic with an app like Coinoscope. You simply photograph your coin, and its algorithm compares the design to known types. It’s not perfect—it can be tripped up by extreme wear or odd angles. But it’s a fantastic starting point that would’ve blown my mind 10 years ago. It identified a dateless foreign coin for me as a German 2 Pfennig from the 1870s. It did it based solely on the wreath design, sending me down the right research rabbit hole.

For closer inspection, your phone’s macro lens or a cheap clip-on magnifier is key. I’ve spotted the ghost of a “7” in a worn Seated Liberty date field by zooming in on a photo. My naked eye just saw blank metal. This lets you examine the grain and any residual striations from the minting process.
On the extreme end, forums like the Coin Community Forum discuss lab-grade, non-destructive techniques like acoustic microscopy. It images the internal strain from the original strike. It’s fascinating, but it’s for institutional analysis, not the hobbyist’s toolkit.
Here’s my challenge to you: Grab your most puzzling dateless coin and try an app like Coinoscope. See what it suggests. Then, take a macro photo and really study the surface. Share what you find—I’d love to hear about it in the comments. Sometimes, the final clue is just a new way of looking.
The Ethics of Restoring a Dateless Coin
Should you try to restore the date? The short answer is: almost never. Your primary job is to preserve the coin’s story. You shouldn’t risk destroying its integrity just for a number. The only scenario where a chemical assist like Nic-A-Date is even a consideration is on a slick, base-metal nickel (Shield, V, or Buffalo) that’s already considered valueless. For any silver or copper coin where you can still see design details—stop. Your detective work is complete.
Here’s my decision tree, a hill I will absolutely die on: Is the coin a smooth, featureless nickel? If yes, and you must know, Nic-A-Date can etch the work-hardened metal where the date was stamped. This is a destructive, last-resort act. For a worn silver dime or copper large cent with discernible design? Your investigation is over. You’ve identified the series; now preserve the evidence. Applying acid to silver or copper yields spotty results at best. It destroys any remaining numismatic value and surface history.
I learned this the hard way early on. I’d pulled a dateless Seated Liberty quarter from an old stagecoach stop. Frustrated, I tried a “gentle” pencil lead rubbing touted on a forum. In my haste, I pressed too hard. I left fine, permanent graphite scratches across Liberty’s face. I’d traded a 150-year-old, honest surface for a damaged coin and still no date. The impatience wasn’t worth it.
The advanced, non-destructive techniques are for institutional study. For us, the ethics are clear. Once you’ve used light, design, and tech to narrow it down, your duty is to conserve. A dateless coin is a historical artifact first. Finding it is the victory. Identifying its type is the reward. Let it rest.
Preserving Your Newly Identified Coin

At its heart, this process isn’t about assigning a year. It’s about reclaiming a story. You’ve gone from a physical audit to playing with light. You’ve decoded design language and used pocket-sized tech. You’ve learned when to stop—thank god—to preserve the artifact’s integrity. That’s the real victory.
The thrill isn’t in a pristine grade or an exact date. It’s in the connection. My first Mercury dime was special not because it was a 1944. It was special because I held something a swimmer lost at that hole 80 years ago. By identifying the type of your worn coin, you’ve placed a person, a place, and a moment back onto a blank metal disc. You’ve completed the detective’s journey.
Now, your job shifts to conservation. Label it, store it properly, and record its story alongside your other finds. This coin is now part of a larger narrative you’re building with every hunt.
Here’s my ask: Share your dateless coin mysteries with us. Post a clear photo in the comments below or bring it to the DetectorForMetal.com Forum. Let’s solve these puzzles together. After all, the best part of this hobby isn’t what we find in the ground—it’s the community we build above it. Now, get out there and see what history you can uncover next.

My name is Paul and I am the founder of Detector For Metal, a dedicated resource for metal detecting enthusiasts seeking to uncover historical treasures and connect with the past using the latest technology. As a stay-at-home dad and family man, I’ve found metal detecting to be the perfect hobby that combines family adventure with historical learnings for the whole family.
As a father, I’m deeply committed to passing on this hobby to the next generation of detectorists, starting with my own children. I share advice on everything from metal detecting with kids to exploring the top 10 metal detecting sites you never thought about. My methodical approach to the hobby goes beyond the thrill of discovery—it’s about creating family traditions while preserving history and sharing the stories of those who came before us.