Table of Contents
Let’s be honest—we’ve all done it. You get permission for a new field, your heart starts racing, and the first thing you do is flick the power switch and start swinging. I get it. The excitement is real. But what if your most powerful tool isn’t in your hands? What if it’s behind your eyes? Learning to read the land—to spot the subtle clues of past human activity—is what separates a day of pull-tabs from a day of pulling history. This is the core of effective metal detecting site research.
I learned this lesson the hard way. After months of mediocre finds in local parks, my first real success came at a forgotten train stop near Auburn. An 87-year-old former conductor pointed me to a slight widening in an old road. To everyone else, it was just a weedy patch. But by researching old schedules and picturing where passengers would have boarded, I knew where to focus. That spot gave me over 30 Indian Head pennies and my first Seated Liberty dime. I didn’t find it because my detector was better. I found it because I finally learned to look before I listened. This is the essence of smart metal detecting site research.
This isn’t just my story. A study in the BAJR Guide 63 on field survey techniques found that experienced detectorists (folks with over 200 hours in the field) located 95% of test targets in half the time it took beginners. Their secret? They weren’t just better at hearing signals. They were vastly better at choosing where to listen in the first place. Their advantage was built on foundational metal detecting site research.
So, let’s agree: the urge to start swinging is powerful. I promise you this: building the skill of site analysis will transform your success rate more than any gear upgrade ever could. In this guide, we’ll walk through my practical, two-phase process. We’ll start with remote scouting from your kitchen table, then move to physical field analysis. This is how you find the history everyone else walks right over.
How to Start Your Metal Detecting Site Research Online
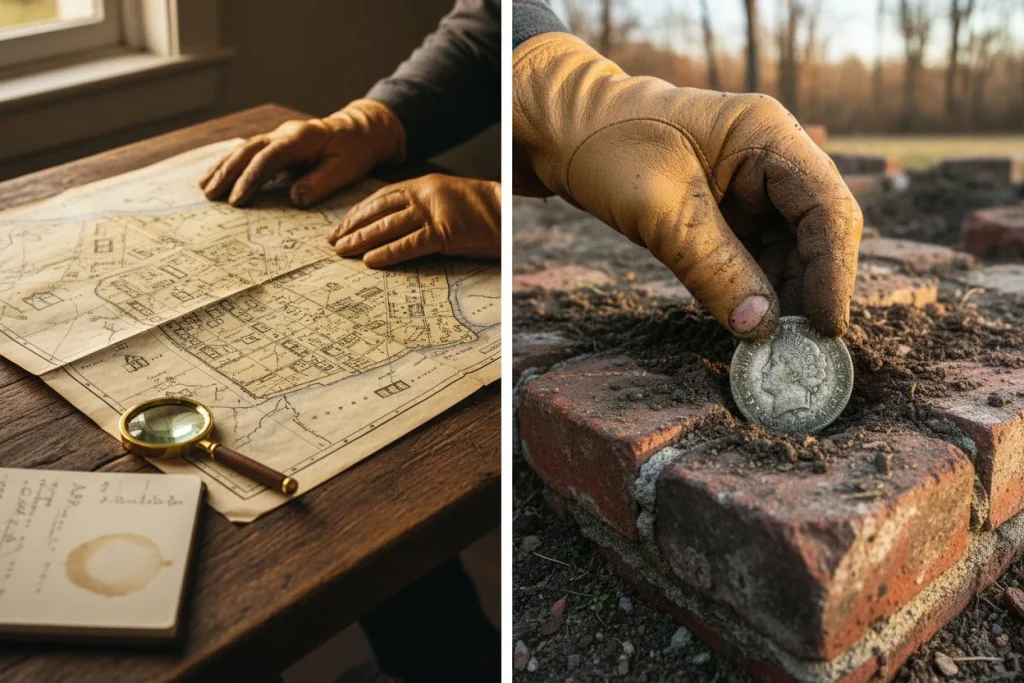
The best detecting starts at your kitchen table, not in the field. This is where you separate history-rich sites from empty lots. By layering historical maps and aerial photos, you can watch the landscape change over decades. You can pinpoint exactly where people lived, worked, and lost things long before you ask for permission. This desk-based metal detecting site research is your most powerful first step.
Layering Historical Maps for Clues

Your first stop should be the USGS TopoView and the Library of Congress. Grab a topographic map from the early 1900s. Look for symbols that scream “people were here.” Search for small squares for buildings, dashed lines for trails or roads, and labels like “School” or “Church.” Then, cross-reference with Sanborn Fire Insurance Maps if you can find them for your area. These are a detectorist’s goldmine. They detail building materials. Knowing if a structure was wood (which decays and leaves a nail-rich footprint) or brick changes your detection strategy completely.
Using Aerial Photos to Spot Changes
This is my favorite part. On Historic Aerials or in Google Earth Pro (use the historical slider tool), you can watch a farm transform from 1950 to the present. I was scouting a wooded area near Lincoln a few years back. I toggled between 1955 and 1970 imagery. A faint tractor track leading into the trees simply vanished between those decades. That track was my clue. I got permission, hunted where it ended, and found the foundation stones and domestic debris of a tenant farmer’s home. Nothing monumental, but consistent late-1800s finds that told a story. You’re looking for these ghosts: old fence lines that have faded, outlines of lost structures, or paths that no longer exist.
Researching Property Ownership Records
Once you’ve identified a promising ghost on the map, you need to know who owns it today. This is where county auditor or GIS websites are indispensable. You can trace the parcel from your historic map to a modern address and owner. This isn’t just about getting permission. It’s about walking up to a landowner and saying, “I was researching the history of this area and I believe there was a home here in the early 1900s. Would you mind if I checked the edges of the tree line?” That informed approach beats a random door-knock every single time. This desk work turns you from a person with a metal detector into a local historian with a very specific interest. For more on this critical step, see our guide on how to find old homesteads.
Reading Topography and Soil for Site Analysis
After you’ve scouted from your desk, the next step is learning the land’s own vocabulary. Topography and soil type aren’t just background. They’re the permanent factors that dictated where every historical person lived, worked, and inevitably, lost things. I became mildly obsessed with USGS topo maps. I started seeing the contour lines not as squiggles, but as a story of human convenience.
The rule is simple: people always took the path of least resistance. That’s why a flat terrace or a gentle bench on a hillside is such a prime target. As noted in our guide on reading land, these unnatural flat spots were the easiest places to build a cabin or barn. On a topo map, you’re looking for wide spacing between contour lines. That indicates a gentle slope. Look for the wide, flat area near the blue line of a water source, not the tightly packed contours of a steep cliff. That’s where you’ll find the homesite.
Soil type gives you two critical clues. It’s often noted on older topo maps as “sandy loam” or “clay.” First, preservation. Sandy soils are kind to metals, often leaving coins in great shape. Heavy clay can corrode finds faster. Second, and more importantly for your swing, depth. Mineralized clay soil will challenge your detector’s depth. It requires careful ground balancing. Drier, sandier soils often allow for deeper, clearer signals. If your map shows a creek bend with sandy soil on a flat terrace, that’s a bullseye.

Your homework tonight? Pull up a USGS TopoView map of your area. Find a creek or old road and trace its path. Look for the wide, flat spaces. That’s where the past is waiting for you to listen.
What Old Trees and Plants Reveal
Before you even look at the dirt, look at what’s growing out of it. The trees and plants on a site are its longest-living witnesses. They hold clues to human activity long after the last nail has rusted away. I’ve found more sites by spotting an odd grouping of flowers or a lonely fruit tree than by any high-tech map alone.

I’ll admit, I entered my “plant detective” phase a few years back. My wife still teases me about it. I was walking a wooded area near an old township line. I spotted a perfect, sunny cluster of bright yellow daffodils deep in the shade of mature pines. Flowers that need full sun, growing where they shouldn’t. That’s not a natural accident. It’s a ghost of a “mother’s garden.” Sure enough, a slow grid around those flowers revealed crumbled foundation stones. My first good signal there was a 1910 Wheat cent, sitting right where a porch might have been.
This is the concept of heirloom plantings. Tough, perennial flowers like daffodils, lilacs, and iris were often planted around homesites. The wood rots. The stones get scattered. But those bulbs and roots can survive for a century, faithfully marking the spot. As noted in our guide on reading land, patches of these non-native plants are a dead giveaway.
Trees tell an even older story. A lone, gnarled apple tree in the middle of a pine forest isn’t just random. It’s a screaming sign of a homestead orchard. Settlers planted what they needed. Geometric patterns in trees are a huge clue. As Minelab’s research points out, lines or squares of trees rarely occur naturally. They mark old property borders, windbreaks, or lanes. Look for rows of mature walnuts or oaks where the surrounding forest is a different species. This often traces a fence line that’s been gone for 80 years.
Your job is to spot the botanical anomaly. Why is that one type of plant here and not over there? The answer is almost always because a person put it there. When you see it, turn your detector on. The history is literally rooted in place.
Taking Your Site Analysis into the Field
This is where your desk research meets reality. You’ve got your maps and historical clues. Now it’s time to visit the site, confirm your theories, and get final permission. This bridge phase ensures you don’t waste a single swing in the wrong spot. Think of it as a detective’s final walk-through before the arrest.
Getting Permission and Assessing Site Safety
Never, ever skip this step. Your first task on-site isn’t to look for clues. It’s to confirm you’re legally allowed to be there and that it’s safe. For private land, this means having a face-to-face chat with the owner, even if you’ve already spoken on the phone. As emphasized in our guide on securing permissions, get written permission. It protects you and the landowner. For any property, your next move is to verify the exact boundaries. I use an app like OnX Hunt to see the parcel lines overlaid on a satellite map in real-time. You can also use a plat map and physically look for markers. As the Garrett guide notes, property pins of rebar or steel are often buried 6-12 inches deep. You can find them with your detector. Locating them removes all doubt about where you can and cannot be.
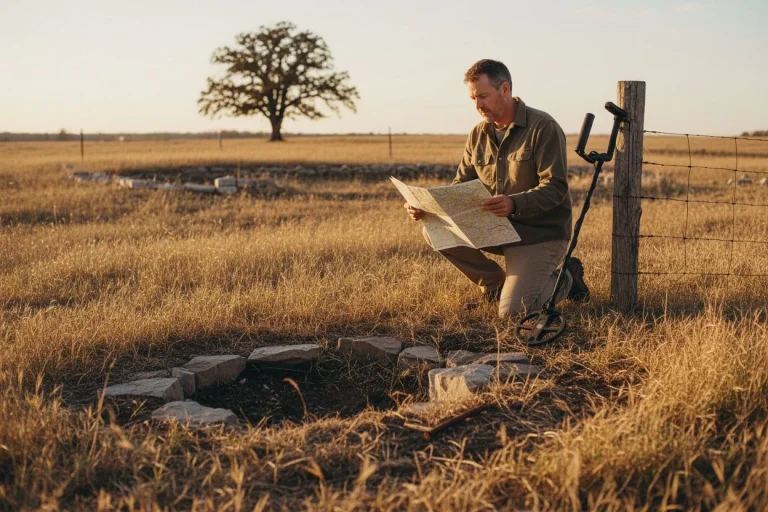
Matching Maps to the Actual Landscape
Now, pull out your annotated maps. Stand at the physical location of your “bullseye” from the digital scout—that flat terrace near the old creek bend. Does it match? Often, it will. But sometimes, modern changes alter the landscape. New drainage ditches, filled gullies, or fallen trees can change things. Your goal is to match at least two permanent features from your map to the ground. That could be a distinctive rock outcrop shown on the topo, the remains of a stone wall, or the old, gnarly oak tree at a property corner. This cross-referencing confirms you’re in the right historical “window.” It builds confidence. If nothing matches, you might be in the wrong field entirely (I’ve done it).
Conducting a Walk-Over Survey First
With permission secured and location confirmed, it’s time for a slow, detector-off walk. Look for the subtle clues:

- The “Pit and Mound” Microtopography: As Minelab’s research on trees highlights, look for the natural dips and bumps created where large trees have fallen. Roots pull up soil and artifacts. The resulting pit can trap items. These spots are natural collection points.
- Surface Scatter: Keep an eye out for any exposed glass, ceramics, or coal. A handful of broken bottle glass or a piece of thick, hand-painted pottery is a fantastic sign.
- Ground Hardness: Feel the soil with your boot. Is there a distinct, harder patch where a foundation or compacted pathway might be?
This is where joining a local metal detecting club pays dividends. The old-timers there have a lifetime of experience spotting these subtle ground clues that aren’t in any manual. They can teach you to see what you’re looking at.
This quiet observation sets the stage. You’ve translated lines on a map into a real, permitted, promising piece of land. Now you’re ready to turn the machine on and listen to what the history has to say.
Finding Clues in Depressions and Mounds

Get low. That’s the first rule of reading micro-terrain. Look across the ground with the sun at a low angle to your side. It casts long shadows that reveal every subtle dip and rise the map will never show. This is pure fieldcraft. My buddy Tom is a master—he can spot a filled-in cellar hole from 50 yards just by the lay of the land.
Here’s how to decode what you’re seeing. A long, linear depression snaking across a field is often an old wagon rut or farm road, worn down by generations of traffic. A distinct, rectangular depression? That’s your classic cellar hole, and it’s a prime target. A random, isolated mound is usually just a natural feature. But a line of them could be spoil from a dug property line or trench.
Then there are the stones. A single rock means nothing. A line of similarly sized stones, especially if they’re partially buried and aligned, almost always marks an old fence line or the foundation edge of a long-gone structure. I once followed a faint stone line in an overgrown field. It led me straight to the chimney fall of a 19th-century cabin.
Your best tool for this isn’t your detector—it’s a simple walking stick. Use it to probe suspicious depressions. The feel of hitting a buried stone line or the different resistance of backfilled soil tells its own story. This is the final visual sweep that tells you exactly where to start swinging.
Refining Your Metal Detecting Site Research with a Grid
This is where you finally turn on your machine, but with a battle plan. You’ve done the legwork. Now you translate those clues into a physical search pattern. You don’t just swing. You systematically sweep, prioritizing your zones based on your analysis. This lets you cover ground efficiently and leave nothing to chance. It’s the practical application of all your metal detecting site research.
For large, open areas, skip the time-consuming full grid. Instead, I use a pro technique from archaeological field surveys: the transect method. As outlined in the BAJR Guide 63, you mark a straight baseline and walk parallel lines across the area, like mowing a lawn. I use bright orange surveyor’s flags every 50 feet to keep my lines straight. This method is brutally efficient for scanning acres of field. It helps you quickly isolate “hot” zones without covering every single inch twice. For more on effective search patterns, check out our guide on metal detecting techniques.
Your site analysis now dictates your swing speed and coil height. The prime real estate gets a tight, slow grid. That’s the flat terrace by the cluster of daffodils, or the rectangular depression of the cellar hole. My coil stays low, overlap is nearly 100%, and I’m listening for the faintest whisper. Conversely, the rocky slope or the area with no micro-features just gets a scanning transect. I move faster here, covering ground to rule it out or, occasionally, stumble on a stray drop.
It’s a disciplined shift from explorer to executor. My buddy Mike will still joke, “Just turn it on and go!” But that’s how you miss the seated dime hiding six inches off the foundation line. The systematic sweep is what turns a promising site into a productive hunt.
Tracking Site Changes Over Seasons
Let me make a counterintuitive claim: winter is the best time to find new sites. Forget the cold—I hate the cold—but the bare trees and dormant landscape reveal secrets the other three seasons hide. This is when you plan your spring assaults. Seasonality is a critical part of ongoing metal detecting site research.
Here’s what to look for. In winter, the leaf-off exposes the land’s skeleton. From a distance, or even using binoculars from a public road, you can spot linear stone walls, foundation outlines, and subtle earthworks completely camouflaged in summer. I’ve found two cellar holes this way. I just scanned a distant woodline in January that looked like uniform green in June.
Spring growth tells its own story. Lush, dark green patches of grass or weeds often mark where soil is nutrient-rich. That’s frequently a sign of an old manure pile, compost heap, or—jackpot—a filled-in privy. Flowers are obvious clues, but pay attention to where the nettles and vigorous weeds are. Conversely, summer droughts can be a gift. Parched, cracked earth around old homesteads will often sink slightly over buried features. I’ve seen pottery shards and even a buckle get pushed to the surface as the soil contracts.
The lesson is that a site evolves. A spot that seemed barren in August might shout its history in April. I make a habit of revisiting my permissions in different seasons. The land is always talking; you just have to know when to listen. It’s how I found a stunning 1890s stone wall last February that my buddy Tom had walked past a dozen times in summer.
Common Site Analysis Questions Answered
You bet. Here are the most common questions I get after explaining this process.
What if I see a perfect clue (like a foundation) but it’s on private land?
This is where your detective work continues off the field. You must get permission. Never trespass. Start by identifying the current owner using your county’s online parcel viewer or an app like OnX Hunt. Then, use the research you’ve done as your “in” when you knock. Show a landowner a 1930s picture of their property with a barn that’s now gone. It proves you’re serious about history, not just digging random holes. I have a full guide on Deed Research and securing permissions that walks you through it step-by-step.
Do I need an expensive detector for site analysis to work?
Not at all. This is the core of my philosophy: research beats gear every time. A $250 detector at a well-analyzed, historical site will outperform a $1,500 machine in a random field. The clues you’re looking for are read with your eyes and your brain, not your coil. A solid beginner machine like the Nokta Simplex Ultra is more than enough to capitalize on a great location. Start there, learn the land, and upgrade later when you know exactly what you need. Your investment in metal detecting site research pays far greater dividends than a new machine.
How can I tell if a depression or mound is man-made and old?
Look for a cluster of clues. A single dip could be natural. But a rectangular depression lined with scattered, non-native fieldstone is almost certainly a cellar hole. Check for artifacts on the surface, especially along the edges after rain. Look for old glass, ceramic fragments, or square nails. Old mounds for trash or privies often have very dark, rich soil. They might be surrounded by patches of vigorous, non-native growth like daylilies. If it feels deliberately placed in relation to a flat terrace or old roadbed, trust your gut.
Mastering Land Reading for Better Finds
In the end, successful detecting isn’t about having the fanciest machine. It’s about becoming a student of the ground beneath your feet. We’ve walked through the process. From scouring historical maps at your desk to decoding the language of stones, slopes, and seasons in the field. This is the workflow that turns random swings into targeted recoveries.
The beautiful part is that this skill compounds. Every site you read teaches your eyes something new for the next one. That faint terrace you spotted last month helps you recognize a similar one this weekend. The cluster of daffodils that led to a Wheat cent tunes you into looking for other, subtler plant clues. You start to see the ghost of the old landscape beneath the modern one.
I’d love to hear about your first success with this approach. What was the first clue you spotted that led to a great find? Share your story in the comments below—it’s how we all learn.
Remember, the real treasure isn’t just the metal. It’s the story written in the land, waiting for someone who’s learned how to read it through dedicated metal detecting site research. Now get out there and listen.

My name is Paul and I am the founder of Detector For Metal, a dedicated resource for metal detecting enthusiasts seeking to uncover historical treasures and connect with the past using the latest technology. As a stay-at-home dad and family man, I’ve found metal detecting to be the perfect hobby that combines family adventure with historical learnings for the whole family.
As a father, I’m deeply committed to passing on this hobby to the next generation of detectorists, starting with my own children. I share advice on everything from metal detecting with kids to exploring the top 10 metal detecting sites you never thought about. My methodical approach to the hobby goes beyond the thrill of discovery—it’s about creating family traditions while preserving history and sharing the stories of those who came before us.