Table of Contents
Let’s get straight to it. Your detector’s operating frequency is its personality. That’s the number of signals it sends into the ground every second. This guide will help you find the best frequency for coin detecting in any situation. A low frequency is a deep-seeking bulldozer for big silver. A high frequency is a finicky artist for tiny gold. Chasing one perfect number is an old game. Modern detecting is about using the right tool for your specific dirt and target. Often, that means having multiple frequencies at your command.
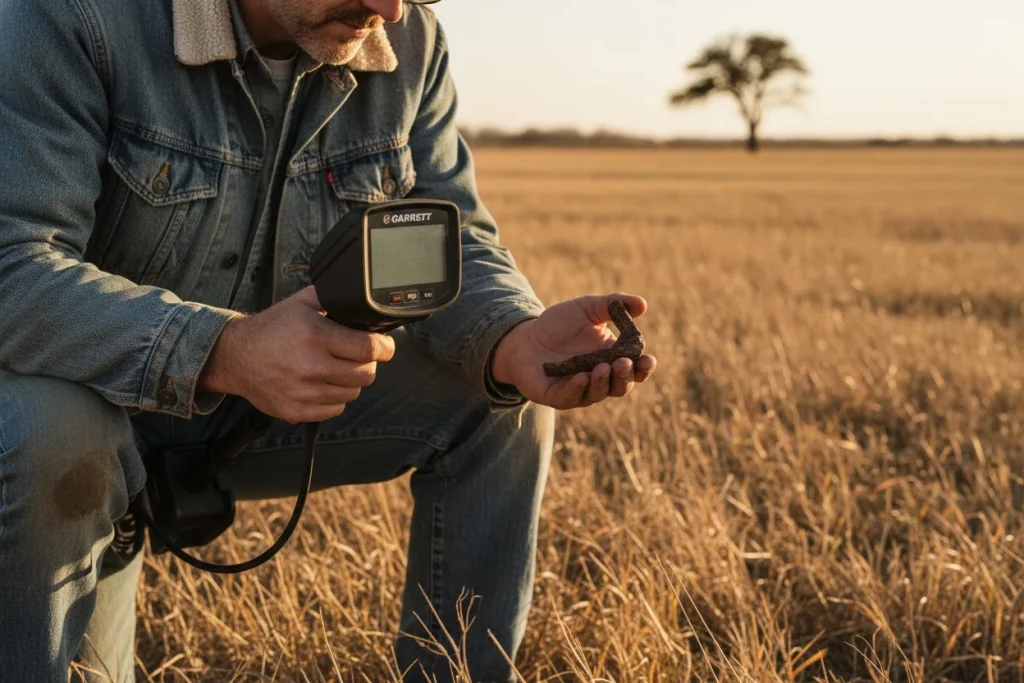
I found my first seated Liberty dime because I ignored my detector’s factory “coin” setting. It was an 1884 beauty. I’d spent a week at the local historical society. I learned a vacant lot near Auburn was a late-1800s train stop. An old-timer there mentioned the platform was gravel over a thick layer of local ironstone. Back then, my machine was set to a crisp 12 kHz. All I got was chatter, false signals, and frustration. On a hunch, I manually dropped it to 8 kHz. The next solid signal was that dime. It sang clear as a bell at seven inches down. That was the moment frequency stopped being a spec-sheet number. It started being a digging decision.

In simple terms, your detector’s frequency is how many thousands of times per second its coil transmits a signal. We measure it in kilohertz (kHz). A 12 kHz frequency means it’s pulsing 12,000 times a second. Most guides get bogged down in physics here. They compare wavelengths to radio stations. It’s confusing. It makes a crucial concept feel abstract.
Let’s fix that. This guide won’t just explain kHz—it will translate them. I’ll show you the old single-frequency rulebook. I’ll explain why it’s nearly obsolete. Then, I’ll break down how modern multi-frequency detectors let you rewrite the rules for your hunt. You’ll learn how to choose a setting. Don’t base it on generic advice. Base it on the specific history under your feet and the trash in your way.
Why Single-Frequency Detectors Are Fading Out
For years, detectorists lived by a simple rulebook. You picked one frequency that matched your primary target. Low frequencies (think 3-7 kHz) were your deep-seeking bulldozers for big silver and copper. High frequencies (18-40 kHz+) were your fine-tipped tweezers for tiny gold. This wasn’t marketing—it was basic physics. A lower frequency has a longer wavelength. It penetrates deeper for high-conductivity metals. A higher frequency has a shorter wavelength. It gets easily disrupted by soil but is hyper-sensitive to small, low-conductivity stuff.
My buddy Mike hunted with this mindset for a decade. His trusty single-frequency machine ran at 6.5 kHz. In the right ground, it was a cannon. I watched him pull a silver dollar from a staggering 14 inches in an old farm field. The depth made my jaw drop. That’s the power of a low frequency on a large, conductive target. As kellycodetectors.com notes, a dedicated 5 kHz frequency is built for these “deep target” scenarios. It’s ideal for heavy coins and large brass relics.

The old-school categorization was clear, if limiting:
- Low (3-10 kHz): The depth kings. Perfect for high-conductivity targets like silver coins, copper relics, and brass. You traded sensitivity for penetration.
- Mid (10-15 kHz): The “all-terrain” compromise. A 15 kHz frequency was the Swiss Army knife. It had decent depth on coins (8-10 inches) and okay sensitivity for a gold ring. It was the default recommendation for a reason.
- High (18-40 kHz+): The sensitivity specialists. As the guides state, a 40 kHz setting is the “king of small target sensitivity” for gold flakes or fine jewelry. But it’s easily confused by mineralized soil.
Here’s the problem Mike eventually ran into: the real world isn’t that tidy. His deep-seeking 6.5 kHz machine was deaf to small gold jewelry. It struggled terribly in the mineralized red dirt near the foothills. He was leaving good targets behind. His tool was excellent for one job, but ill-suited for others. This is the core limitation. It made the single-frequency rulebook obsolete. You were forced to choose your advantage before you even dug a plug.
How Multi-Frequency Technology Revolutionized Detecting
Capsule Summary: The old debate between depth and sensitivity ended with multi-frequency detectors. Instead of one “voice,” these machines use multiple frequencies at once—like a full conversation. They cut through mineralized soil. They deliver deep signals on coins and sharp sensitivity to small relics at the same time.
Stuck choosing between depth and sensitivity? What if you didn’t have to?
For years, I carried two detectors in my truck. I had my trusty single-frequency unit for deep coins in clean dirt. I also borrowed a high-frequency machine for chasing small brass relics at a known 1920s site. Juggling gear was a pain. Physics seemed to demand it. Then, around 2017, the game changed for good. Simultaneous Multi-Frequency (SMF) technology became widespread.
Understanding Simultaneous Multi-Frequency (SMF)
Forget switching between preset frequencies. As the technical guide on scribd.com explains, multi-frequency detectors transmit multiple frequencies simultaneously or in rapid sequence. Think of it this way: instead of shouting a single note into the ground (say, 7 kHz), your detector is now singing a full chord. It’s having a layered conversation with the soil. It gathers far more data with every sweep. This isn’t a minor tweak; it’s a fundamental shift in how the machine “sees” the world beneath your coil.
Overcoming Mineralized Ground with SMF
The real-world superpower of this tech is handling ground that drives single-frequency machines mad. I learned this the hard way at a site near Placerville. The soil was so hot with iron that my old detector chattered like a Geiger counter. Single-frequency units struggle here. As Garrett’s engineers note, they can’t keep a stable baseline in these conditions. They often mask good targets with false signals. An SMF detector is different. It uses its multiple frequencies to model the mineralization. It subtracts its effect in real-time. The result? A stable, quiet threshold where actual targets can sound off. It’s the difference between trying to hear a whisper in a roaring wind and being handed noise-canceling headphones.
Achieving Maximum Depth and Sensitivity

This is where the old rulebook gets torn up. With SMF, the trade-off between low-frequency depth and high-frequency sensitivity vanishes. A machine like the Minelab Equinox 900 can ping a deep, high-conductivity silver dime while staying hypersensitive to the low-conductive foil of a gold gilt button in the same swing. It synthesizes the best data from all its frequencies. You get a clearer target ID and a more honest signal. You’re no longer guessing which frequency might work best. You’re covering all bases from the first swing.
So, are you still wrestling with the choice? What if your next detector could simply be both?
What Is the Best Frequency for Coin Hunting?
Capsule Summary: The best frequency for coin hunting isn’t a single kHz number. It’s a weighted profile, usually in the 5-15 kHz range. It prioritizes mid-conductor response for copper and silver. Modern multi-frequency machines let you focus on this “sweet spot.” They keep high-frequency sensitivity in reserve to find thin, worn coins hiding in trash.
My “aha” moment came at a 1920s schoolhouse. I’d hunted it a dozen times. My Equinox gave a choppy, high-toned signal. I’d written it off as rusty fence wire. On a whim, I switched to a program that emphasized the higher frequencies in its multi-frequency mix. I re-scanned the same spot. The signal clarified into a crisp, repeatable high tone. Eight inches down was a paper-thin 1899 Indian Head cent. It was sitting right next to a square nail. The high-frequency component had seen the thin copper. The dominant lower frequencies had only registered the large iron.

This is the modern sweet spot. For coins, you want your detector’s frequency profile weighted toward the mid-to-low range (that 5-15 kHz band). Coins are primarily mid-conductors like copper and nickel, or high-conductors like silver. This range gives you stable depth and solid target IDs. As multiple guides note, this is the classic range for coin and relic hunting. It’s the foundation for the best frequency for coin detecting.
But having those high frequencies actively in the mix is your secret weapon. As Serious Detecting’s analysis shows, they provide sharp sensitivity. You need it to hear thin, worn coppers or to get better target separation in iron-littered sites. On a single-frequency machine, you’d have to choose one strength. On a multi-frequency detector, your “coin mode” is a sophisticated recipe. It blends frequencies to highlight the conductors you want. It uses speed and separation to filter out the junk.
So forget chasing one perfect kHz number. Your goal is to select or create a program optimized for mid-conductors. That’s where the coins live. The machine does the heavy lifting. It uses its simultaneous frequencies to give you depth and the clarity to find that worn cent hiding next to a nail. This is how you achieve the best frequency for coin detecting—by using technology that doesn’t force a single choice.
How Soil Mineralization Affects Your Detector’s Frequency

Capsule Summary: Mineralized ground creates constant “noise.” It drowns out faint target signals. High-frequency signals are especially vulnerable. They lead to a chattering, unstable detector. The fix is simple: manually lower your single frequency for stability. Or, trust a multi-frequency detector’s algorithms to cancel out the ground noise for you.
Let me paint you an embarrassing picture. I’m in the iron-rich hills near Auburn. I’m swinging my detector over what historical maps swore was a promising patch. Instead of sweet two-way signals, my machine is screaming at me. It’s a constant, erratic chatter. Every step: BEEP-beep-BEEP-chatter. It sounded less like a treasure detector and more like a Geiger counter in meltdown. I spent twenty minutes digging nothing but hot rocks and frustration.
That noise was ground mineralization. Tiny particles of iron (magnetite) or salt in the soil act like millions of tiny metal targets. To your detector, it’s just static. As the guide on metaldetector.com confirms, higher frequencies are more susceptible to this interference. Think of it like trying to hear a high-pitched whistle in a room full of radio static. The signal gets lost.
On a single-frequency machine, your move is manual. Lower your frequency setting. Drop from, say, 15 kHz down to 5 kHz. You use a longer wavelength that’s less aggravated by the tiny minerals. You trade some sensitivity for the stability you need to actually hear a target.
The modern solution is what saved my hunt that day. I switched my Equinox to its multi-frequency “Field” mode. I let it do its thing. As Garrett’s engineers explain, multi-frequency tech doesn’t just transmit multiple signals. Its brain actively analyzes and cancels out the mineralized ground signal in real-time. It silences the static so you can hear the whistle. The chatter stopped. Within five minutes, I had a clear, deep signal. It turned out to be a mid-1800s flat button.
So when the ground fights back, remember: you’re not losing your mind. Lower your single frequency for peace. Or, let your SMF detector’s ground balance do the arguing for you. Finding the best frequency for coin detecting often means quieting the ground first.
Choosing the Right Coil Size and Shape for Your Frequency
Capsule Summary: Think of your metal detector as a musician. The control box is the brain, but the coil is the instrument. Its size and shape change how your chosen frequency behaves. A large coil on a high-frequency setting is noisy and unstable. A smaller coil can make that same high frequency a precision tool for trashy parks.
It’s easy to get hypnotized by the numbers on your screen. You forget you’re swinging a physical object. Your coil isn’t just a plastic disc. It’s the antenna broadcasting and receiving those all-important signals. Its dimensions directly sculpt the electromagnetic field.
Here’s the practical rule of thumb I’ve lived by: A larger coil amplifies your frequency’s personality—for better and worse.
Take a big 15-inch coil. It throws a wide, deep field. It’s perfect for covering clean ground fast. But pair it with a high single-frequency setting (say, 18+ kHz), and you’re asking for trouble. You’re amplifying that frequency’s natural sensitivity to every tiny piece of ground mineralization and foil. It leads to a chattery, frustrating experience. It’s like using a megaphone in a library. You hear everything, and most of it is useless noise.
Conversely, a smaller 6-inch coil concentrates the field. This focus is a game-changer for high-frequency work in trashy spots. That concentrated field lets you poke a precise, high-frequency signal between nails and pull-tabs. You can isolate a thin dime. It tames the chaos. This is my go-to setup for poking around old home sites littered with iron.
For deep, clean relic fields, my ideal combo is the opposite. I use a large coil for maximum depth and coverage. I set the detector’s frequency profile biased low. This leverages the long wavelength for deep penetration on big, conductive targets. Think cannonballs or horse tack. The large coil’s stability keeps the machine quiet over mineralized soil.
The lesson is to stop thinking of your detector as just a control box. It’s a system. Your frequency choice and your coil selection are a conversation. Match them wisely for the ground you’re standing on. You turn a collection of parts into a precision hunting tool. This system approach is key to unlocking the best frequency for coin detecting in complex environments.
Optimal Frequency Settings for Common Hunting Scenarios
Stop guessing. Here’s exactly how to set up for your next hunt. Based on physics and a mountain of dug pull-tabs, these are my go-to starting points for four common scenarios. Use this as your quick-reference guide.
-
Park Coin Shooting (Modern & Old)
Mode: Multi-Frequency Park/Field Mode. This is your “easy button.”
Why: You need high-frequency sensitivity for thin, recent dimes. You also need low-frequency stability to punch down 8+ inches for silver. Multi-frequency handles varied ground conditions automatically. It’s the classic “best of both worlds.”
-
Cellar Hole & Deep Relic Site
Mode: Single Low Frequency (5-8 kHz) OR Multi with Low-Frequency Bias.
Why: You’re after big, deep, high-conductivity targets: axe heads, buttons, large coppers. As confirmed by sources like kellycodetectors.com, low frequencies provide the deepest penetration. A single low freq (like 5 kHz) gives max depth in clean soil. On a multi-freq machine, use a mode weighted low (like “Field 1” on an Equinox).
-
Trashy Urban Lot (Nail & Debris Fields)
Mode: Higher Single Frequency (12-15+ kHz) OR Fast Multi-Frequency Mode.
Why: Your enemy is target separation, not depth. You need a fast, precise signal to tell a coin from a nail. A higher single frequency offers a tighter field. Even better is a fast multi-frequency mode (like “Park 2”). As Serious Detecting notes, this sensitivity is key for picking small targets out of trash.
-
Saltwater Wet Sand & Surf
Mode: Multi-Frequency Beach Mode ONLY.
Why: Saltwater is highly conductive. It will scream at most single frequencies. Dedicated beach modes transmit specific frequency mixes. They’re designed to cancel out the salt signal while keeping sensitivity to targets. Never use a single-frequency mode here. You’ll get constant false signals.
Frequently Asked Questions About Detector Frequencies
Do I still need to think about frequency if I have a multi-frequency detector? Yes, absolutely. Think of multi-frequency (MF) as your automatic transmission. It handles the shifting for you on most hunts. But understanding the underlying frequencies lets you use the manual mode. On machines like the Minelab Equinox, you can often select a single frequency within a multi-frequency mode. Why would you? For target checking. A mixed signal in trash might be clarified by switching to a single high frequency (like 20 kHz) to check for small gold. Or, a low frequency (like 5 kHz) might reveal a large, deep copper item.
Is a higher kHz number always better? No, it’s a classic trade-off. A higher frequency (like 18+ kHz) gives you superior sensitivity to small, low-conductivity targets. But you pay for it. You get less effective depth on large objects and more chatter in mineralized ground. It’s a specialized tool. I use high single frequencies for poking through nail piles. I don’t use them for scanning a clean field for deep silver.
Can I find a gold ring with a low-frequency detector? You can, but with a big caveat about size. A large men’s class ring? No problem. It’s a big, conductive chunk of gold. My old 6.5 kHz machine would sing on those. But a delicate, thin ladies’ gold band or a fine gold chain? You’ll likely walk right over it. Low frequencies excel on high-conductivity targets. Small gold has low conductivity. That’s why dedicated gold machines crank the frequency up to 40 kHz or higher.
Key Takeaways for Your Next Metal Detecting Hunt
Forget memorizing kHz charts. The bottom line is this: choosing a frequency isn’t about your detector—it’s about your target and your dirt. Your machine’s brain is powerful, but you are its strategist. The right frequency setting is the final, critical piece of research you do before your first swing.
It brings me right back to that first seated Liberty dime. I didn’t find it because I had the most expensive detector. I found it because historical maps told me what to look for. Understanding frequency told my detector how to listen for them. I dropped my single-frequency machine down to 5 kHz to punch through the mineralized soil. That strategic choice turned a faint whisper into a clear signal. Research beats expensive gear, every time. Understanding frequency is simply another form of research.
So, on your next hunt, don’t just grab your detector and go. Take two minutes. Ask yourself: “What am I after, and what’s in my way?” Then, dial in the frequency strategy from Section 7. You are no longer just swinging a coil. You are conducting a search with intention. Now get out there and put that knowledge to work. Your next great find is waiting, and you’re finally equipped to hear it. The best frequency for coin detecting is the one you choose with purpose.

My name is Paul and I am the founder of Detector For Metal, a dedicated resource for metal detecting enthusiasts seeking to uncover historical treasures and connect with the past using the latest technology. As a stay-at-home dad and family man, I’ve found metal detecting to be the perfect hobby that combines family adventure with historical learnings for the whole family.
As a father, I’m deeply committed to passing on this hobby to the next generation of detectorists, starting with my own children. I share advice on everything from metal detecting with kids to exploring the top 10 metal detecting sites you never thought about. My methodical approach to the hobby goes beyond the thrill of discovery—it’s about creating family traditions while preserving history and sharing the stories of those who came before us.