I’ll never forget my first treasure hunting attempt in Georgia red clay. Fifteen minutes in with my brand-new detector, I wanted to throw the whole machine into the nearest creek.
Constant beeping, squeaking, and squawking – none of it real treasure. Every swing brought another false signal. Every hole revealed nothing but angry red dirt. My buddy Mike heard me cursing from across the field.
Welcome to metal detecting in mineralized soil. It’s the invisible challenge that separates weekend warriors from serious detectorists. If you’ve experienced that maddening chatter where your detector seems possessed, you’ve met high mineral content soil.
Here’s the good news: once you understand what’s happening and learn key techniques for dealing with mineralization metal detecting, these sites transform from frustrating obstacles to productive hunting grounds that others have abandoned.
- Why Metal Detecting in Mineralized Soil Creates False Signals
- Magnetic vs Conductive Mineralization: Detecting in Iron Rich Soil and Beach Sand
- How to Ground Balance Metal Detector: Your Most Important Weapon
- Best Metal Detector for Mineralized Soil: VLF vs Pulse Induction Comparison
- Metal Detector Settings for Mineralized Ground: Sensitivity, Discrimination, and Threshold
- DD vs Concentric Coils: Best Coil for Detecting in Mineralized Soil
- How to Reduce False Signals Metal Detecting: Essential Field Techniques
- Metal Detecting Hot Rocks: Identifying and Dealing with False Signals in Black Sand
- Treasure Hunting Advantage: Why Mineralized Soil Sites Produce Better Finds
- Mastering Metal Detecting in Mineralized Soil: Your Path to Success
- References
Why Metal Detecting in Mineralized Soil Creates False Signals
Every metal detector uses electromagnetic induction. Your transmitter creates an electromagnetic field that penetrates the ground. When this field hits something conductive, it creates tiny electrical currents (eddy currents) that generate magnetic fields your receiver picks up.
The problem with detecting in iron rich soil? It’s packed with iron minerals like magnetite, hematite, and maghemite. These respond to your detector’s field almost exactly like metal targets.[1]
Think of it like a rock concert. Your buried coin is whispering. The ground is shouting into a megaphone. Ground signals can be orders of magnitude stronger than target signals.
This is why that quarter you’d find at 10 inches in your backyard becomes invisible at 6 inches in high mineral content soil.
Magnetic vs Conductive Mineralization: Detecting in Iron Rich Soil and Beach Sand
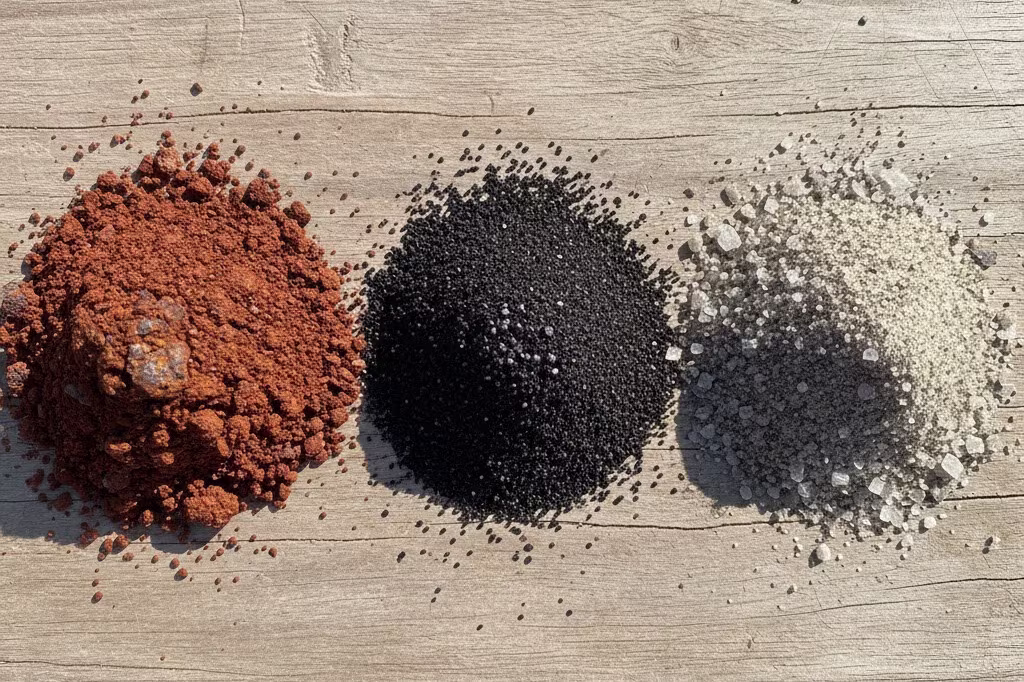
Magnetic (ferrous) mineralization comes from iron oxides creating red dirt across the American Southeast, black sand in gold country, and volcanic beaches. These minerals get magnetized easily and create brutal instability for VLF detectors.
Conductive (salt-based) mineralization challenges beach detecting. Dissolved mineral salts in moisture increase soil conductivity. You’ll find this in wet beach sand and alkali-rich desert soils.
Worst case? Volcanic beaches with saltwater where both types hit simultaneously.
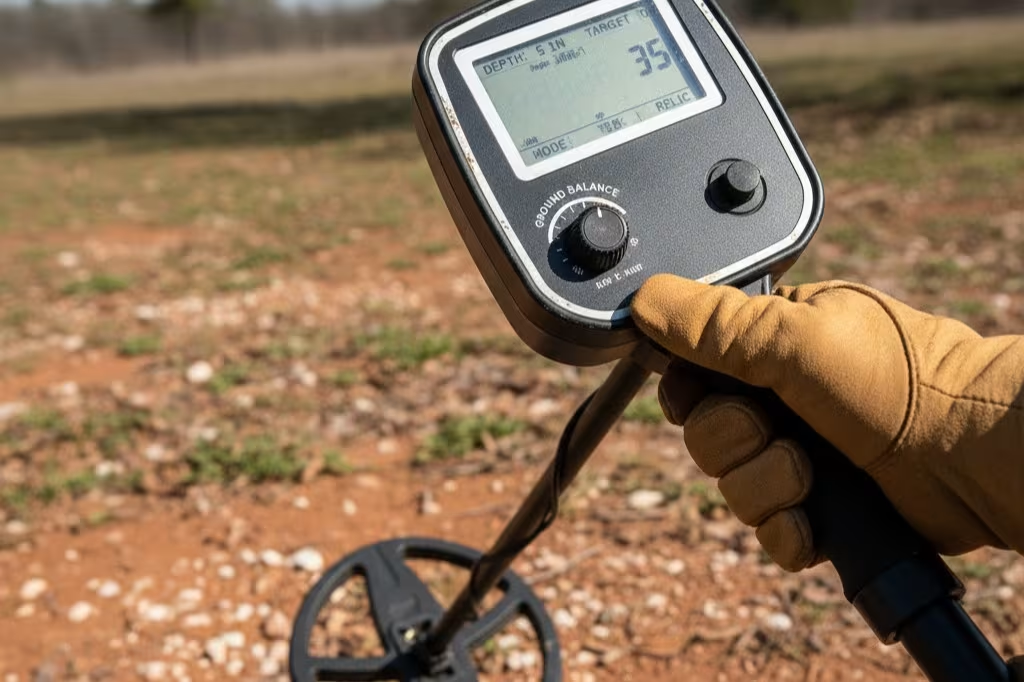
How to Ground Balance Metal Detector: Your Most Important Weapon
Ground balance is your primary weapon against mineralization. Think of it like noise-canceling headphones for your detector – it filters out mineral signals so you hear actual targets.[2]
Ground Balance Techniques: Automatic Ground Balance vs Manual
Automatic Ground Balance is convenient for moderately mineralized soil. The detector samples and sets balance automatically. In challenging conditions, you’ll want more control.
Manual Ground Balance gives precision control and performs better in difficult ground. The “pumping method” involves holding the coil 6-8 inches above ground, then pumping up and down while adjusting until audio goes quiet. It takes practice, but you’ll recover several inches of depth.
Tracking Ground Balance continuously adjusts as you hunt, automatically compensating for changing conditions. Great for variable mineralization, though sometimes overly aggressive.
Here’s the secret: you need to re-ground balance regularly. I rebalance every 15-20 minutes in heavily mineralized soil. Any time terrain or elevation changes significantly, rebalance. The ground isn’t uniform.
Best Metal Detector for Mineralized Soil: VLF vs Pulse Induction Comparison
Some technologies handle mineralized soil better than others. Understanding these differences helps you choose wisely.
VLF Detector Performance: Depth Loss in High Mineral Content Soil
VLF (Very Low Frequency) detectors are affordable and versatile in normal conditions. But in heavily mineralized soil, they struggle. Field testing shows 40-60% depth loss – from 10-12 inches down to just 4-8 inches on quarters.[3]
The best frequency for mineralized soil in VLF detectors runs lower (5-15 kHz), though gold prospectors may use higher frequencies despite challenges.
Multi-Frequency Detectors: Best Value for Detecting in Mineralized Ground
Multi-frequency detectors like Minelab’s Multi-IQ provide better mineralization handling than single-frequency VLF.[4] The Minelab Equinox series ($900-$1,500) has become popular because it handles challenging ground while keeping discrimination capabilities.
For most hunters hitting various sites, multi-frequency is the sweet spot.
Pulse Induction: Maximum Depth for Extreme Mineralization
Where VLF struggles to reach 6 inches, pulse induction maintains 15+ inch depths even in nasty ground.[5] But they offer limited discrimination, cost more ($2,500+), and are overkill for moderate mineralization.
If you’re targeting gold in hot ground exclusively, machines like the Minelab GPX 6000 ($5,500) justify their price.
Metal Detector Settings for Mineralized Ground: Sensitivity, Discrimination, and Threshold
Ground balance alone won’t save you if other settings are wrong.
Sensitivity: Drop to 40-70% rather than maxed out.[6] Yes, you lose depth, but you gain stability. Start at 50%, then increase gradually until chatter returns. That’s your ceiling.
Discrimination: Use less than in clean ground.[7] In extreme mineralization, running “wide open” with minimal discrimination often works better than aggressive filtering. Your ability to read signals matters more than automation.
Threshold Audio: Set a barely audible constant hum. If it goes silent or louder, your ground balance drifted.[8] Many beginners turn this off completely – big mistake.
Recovery Speed: In iron-contaminated sites, faster speeds help separate good targets from trash. But faster speeds reduce depth.
DD vs Concentric Coils: Best Coil for Detecting in Mineralized Soil
Understanding coil types saves endless frustration when detecting in high mineral content soil.
Concentric coils create cone-shaped fields great for depth in clean soil. But that large field captures more ground signal in mineralized conditions, causing instability.
DD (Double-D) coils create focused blade-shaped fields.[9] This provides superior ground noise rejection, more stable operation, and higher sensitivity capability in bad ground. Yes, DD coils have slightly less maximum depth in clean soil, but they significantly outperform concentrics in mineralized soil.
I switched to DD coils for Virginia treasure hunting years ago. Never looked back. The stability difference is night and day.
How to Reduce False Signals Metal Detecting: Essential Field Techniques
Even with perfect settings, your technique makes or breaks success when detecting in mineralized soil.
Slow Your Sweep: Take 3-4 seconds for a complete pass in mineralized soil, versus 2 seconds in good ground.[10] For small targets like gold nuggets, slow to 5 seconds. It feels counterintuitive, but slow and thorough beats fast and sloppy.
Consistent Coil Height: Keep your coil 1-2 inches above ground, level and parallel. Height changes create additional ground balance variations.
Overlap Sweeps: Overlap by at least 50%. DD coils allow 25% overlap, but concentrics need 50-75% for complete coverage.
Check Perpendicular: Check every target from 90 degrees to your original sweep. Genuine targets remain consistent, while ground anomalies often disappear.
Repeatable Signals: In mineralized ground, you’ll get one-time false signals. Hunt for targets giving consistent responses on multiple passes from different directions.
Metal Detecting Hot Rocks: Identifying and Dealing with False Signals in Black Sand

Hot rocks are individual rocks with higher mineralization than surrounding soil. They’re concentrated mineral pockets giving strong false signals, common when metal detecting in black sand and volcanic regions.
They’re especially frustrating when trying to find gold in mineralized soil because they occur where gold is found. Gold-bearing black sand concentrates both heavy gold particles and these highly mineralized rocks in the same places.
I once dug seventeen hot rocks in one hour on a California beach. Seventeen! My friend Lisa watched from her chair, laughing. She stopped laughing when I found a 1906 Barber dime right next to hot rock number eighteen.
Hot rocks produce repeatable signals with unusual target ID readings that jump around. With experience, you’ll recognize their sharp, aggressive audio signature – slightly different from metal targets. When in doubt, use your pinpointer to isolate the spot, then scratch the surface.
Treasure Hunting Advantage: Why Mineralized Soil Sites Produce Better Finds
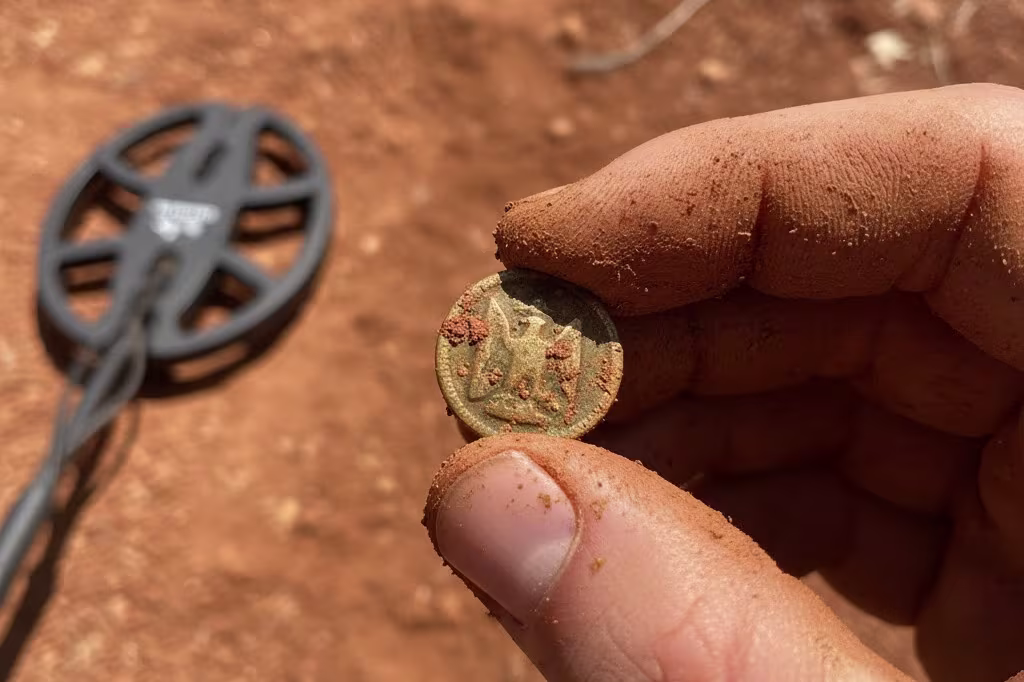
Here’s the silver lining: mineralized soil preserves targets others miss. Historical sites with difficult ground remain productive because casual detectorists avoid them. When you master detecting in high mineral content soil, you’re hunting sites 90% of others have abandoned.
Gold-bearing black sand when beach detecting concentrates nuggets and coins in the same gravity traps as magnetic minerals. Nature’s treasure sorting system working for you.
I’ve found Civil War buttons at moderate depths in Virginia red clay at sites hunted for decades. Why? Most couldn’t deal with the ground noise and moved on. Those who master metal detecting in mineralized soil have entire site categories largely to themselves.
My three best Civil War relics all came from sites other hunters called “worked out.” They weren’t. They were just too challenging.
Mastering Metal Detecting in Mineralized Soil: Your Path to Success
Metal detecting in mineralized soil demands technical understanding, proper equipment, and disciplined technique. But the fundamentals aren’t complicated:
- Ground balance to cancel mineral signals
- Adjust settings for stability over maximum depth
- Use DD coils for challenging conditions
- Slow your sweep speed
The depth penalty is real – VLF detectors lose 40-60% performance, dropping from 10-12 inches to 4-8 inches. But proper technique recovers several inches of that lost depth.
Whether learning how to detect in red dirt, tackling black sand beaches, or treasure hunting in iron-rich sites, the principles remain the same. Modern technology advances with multi-frequency processing and improved discrimination. But the “80/20 rule” holds: 80% operator expertise, 20% detector capability.
That Georgia red clay that nearly broke me? I’ve since recovered hundreds of Civil War artifacts from those fields. Same ground, same iron-rich soil, just different understanding of dealing with mineralization metal detecting.
The sites that challenge you most reward you best. Master metal detecting in mineralized soil, and you’ve unlocked treasure hunting grounds that’ll produce for years while others drive past looking for easier targets.
References
- “Recognizing High Mineralized Soil,” GoldXtra, accessed November 11, 2025, https://goldxtra.com/recognizing-high-mineralized-soil/
- “Ground Balance EXPLAINED! – Minelab Equinox metal detectors,” YouTube, accessed November 11, 2025, https://www.youtube.com/watch?v=dV3sSXLf7is
- “Comparing VLF and PI Metal Detectors in Hot, Mineralized Soil,” Kellyco Metal Detectors, accessed November 11, 2025, https://kellycodetectors.com/blog/comparing-vlf-and-pi-metal-detectors-in-hot-mineralized-soil/
- “Minelab vs. Garrett Metal Detectors: Which is Better in 2025?,” Pioneer Prospecting, accessed November 11, 2025, https://pioneerprospecting.ca/blogs/news/minelab-vs-garrett-metal-detectors-which-is-better-in-2025-ultimate-comparison-guide
- “The Difference Between VLF and PI Detectors: Which is Best for Gold?,” Destination Gold Detectors, accessed November 11, 2025, https://destinationgolddetectors.com/blogs/articles/the-difference-between-vlf-and-pi-detectors-which-is-best-for-gold
- “Metal Detector Sensitivity Settings Explained & Tips,” Joan Allen, accessed November 11, 2025, https://www.joanallen.co.uk/metal-detector-sensitivity-setting
- “What does Metal Detector Discrimination Mean?,” MEGA Locators, accessed November 11, 2025, https://megalocators.com/what-does-metal-detector-discrimination-mean/
- “Metal Detector Threshold Setting Explained,” Joan Allen, accessed November 11, 2025, https://www.joanallen.co.uk/metal-detector-threshold-setting
- “Understanding Minelab Coils: A Comprehensive Guide,” Minelab, accessed November 11, 2025, https://www.minelab.com/blog/article/a-crash-course-in-everything-coils
- “13 Metal Detector Settings You Should Know In 2025,” GoldXtra, accessed November 11, 2025, https://goldxtra.com/metal-detector-settings/

My name is Paul and I am the founder of Detector For Metal, a dedicated resource for metal detecting enthusiasts seeking to uncover historical treasures and connect with the past using the latest technology. As a stay-at-home dad and family man, I’ve found metal detecting to be the perfect hobby that combines family adventure with historical learnings for the whole family.
As a father, I’m deeply committed to passing on this hobby to the next generation of detectorists, starting with my own children. I share advice on everything from metal detecting with kids to exploring the top 10 metal detecting sites you never thought about. My methodical approach to the hobby goes beyond the thrill of discovery—it’s about creating family traditions while preserving history and sharing the stories of those who came before us.