Table of contents
- Why Old Buttons Are an Underrated Relic
- Start With the Shank, Not the Face
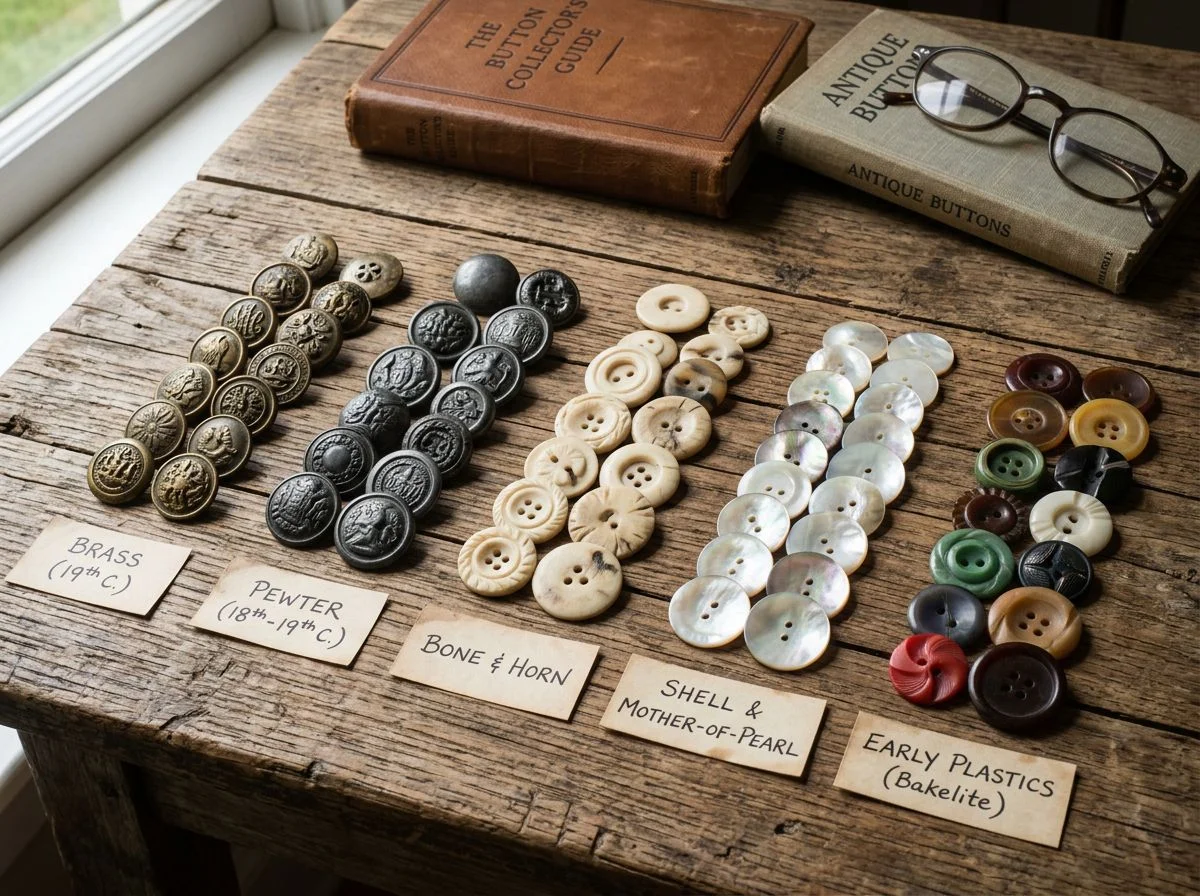
- What Button Materials Say About Their Age
- Identifying Old Buttons From the 18th Century
- Dating Military Buttons by Backmark and Build
- Your Button’s Birth Certificate
- The Small White Ones Everyone Skips
- Building a Button Dating Kit Worth Owning
- Common Button Dating Mistakes to Avoid
- Frequently Asked Questions About Identifying Old Buttons
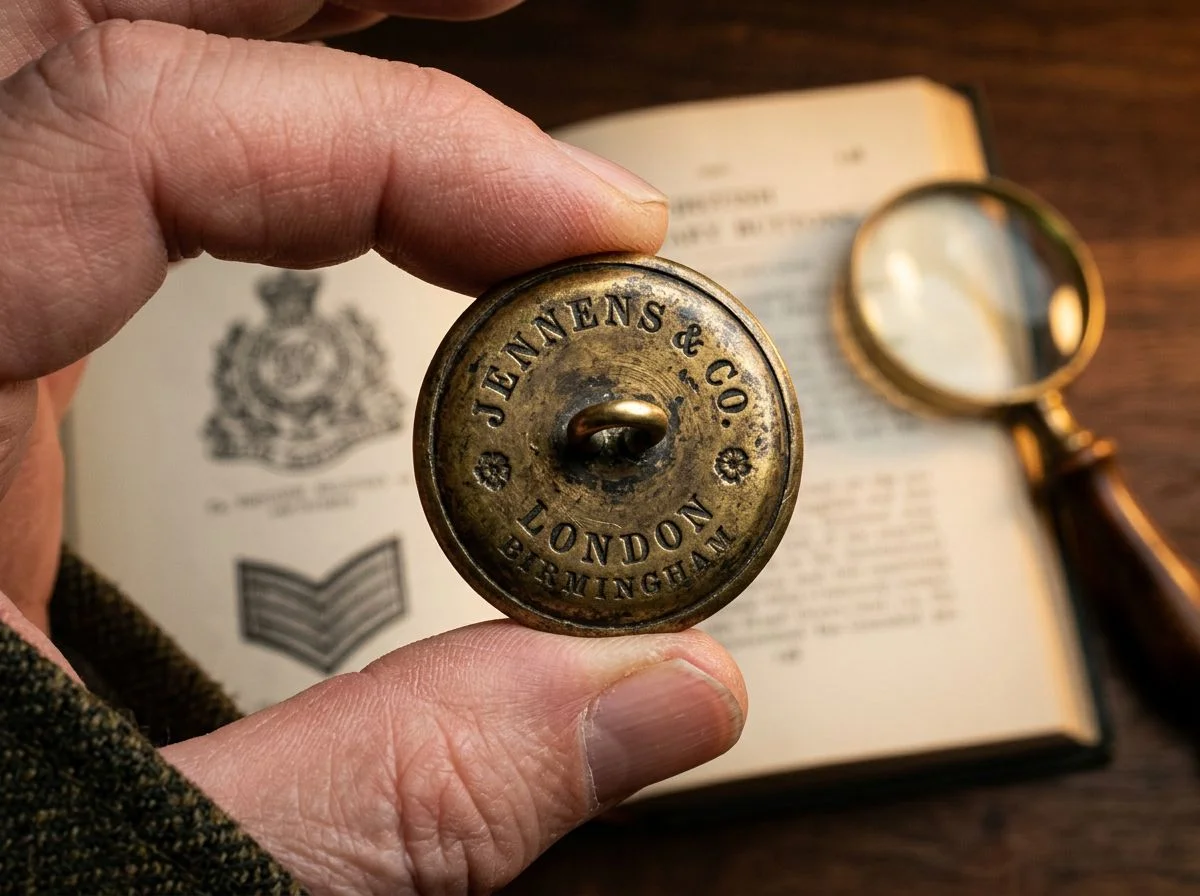
Dating a button starts with the shank, not the face. The way that little loop of metal was made changed a lot over two centuries. Those changes give you a tighter date range than almost any other relic you’ll pull from the ground.
Stanley J. Olsen nailed this back in 1963 with his paper “Dating Early Plain Buttons by Their Form,” published in American Antiquity. His argument was simple. Decorative face designs often stayed in production for decades. Shank construction, though, evolved fast as manufacturing improved. A fancy eagle on the front might span forty years. The way that shank was attached narrows things down quickly.
Here’s the sequence. Colonial-era buttons from the 18th century usually have shanks cast as one piece with the button body. Archaeologists call these integral shanks. By the early 1800s, you see “omega” shanks — a separate wire loop soldered to the back. Box shanks with raised rectangular housings show up on mid-19th-century military buttons, including plenty of Civil War examples. After 1918, buttons with shanks inset into holes become common.
Material gives you hard dates too. Hard rubber buttons can’t predate Goodyear’s 1841 vulcanization patent. Celluloid starts in 1869. If you dig a Prosser button — those little glass-like ceramic ones with the orange-peel texture on the back — you’re looking at post-1840 manufacture.
For military buttons specifically, Warren K. Tice’s Uniform Buttons of the United States 1776-1865 is the reference I reach for. Over 3,500
Why Old Buttons Are an Underrated Relic
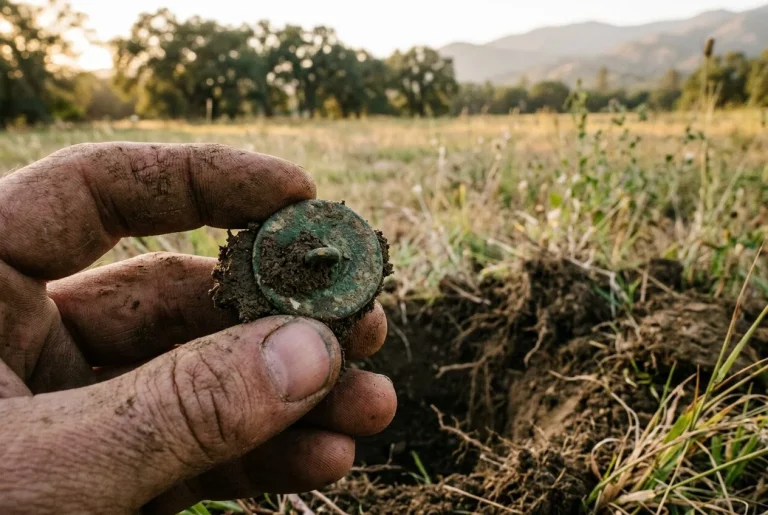
Buttons are the most underrated relic you’ll ever dig. They span 250+ years of American history. And a single well-dated button can anchor the age of an entire site faster than most coins ever will. Most detectorists don’t realize that until they hold the right one.
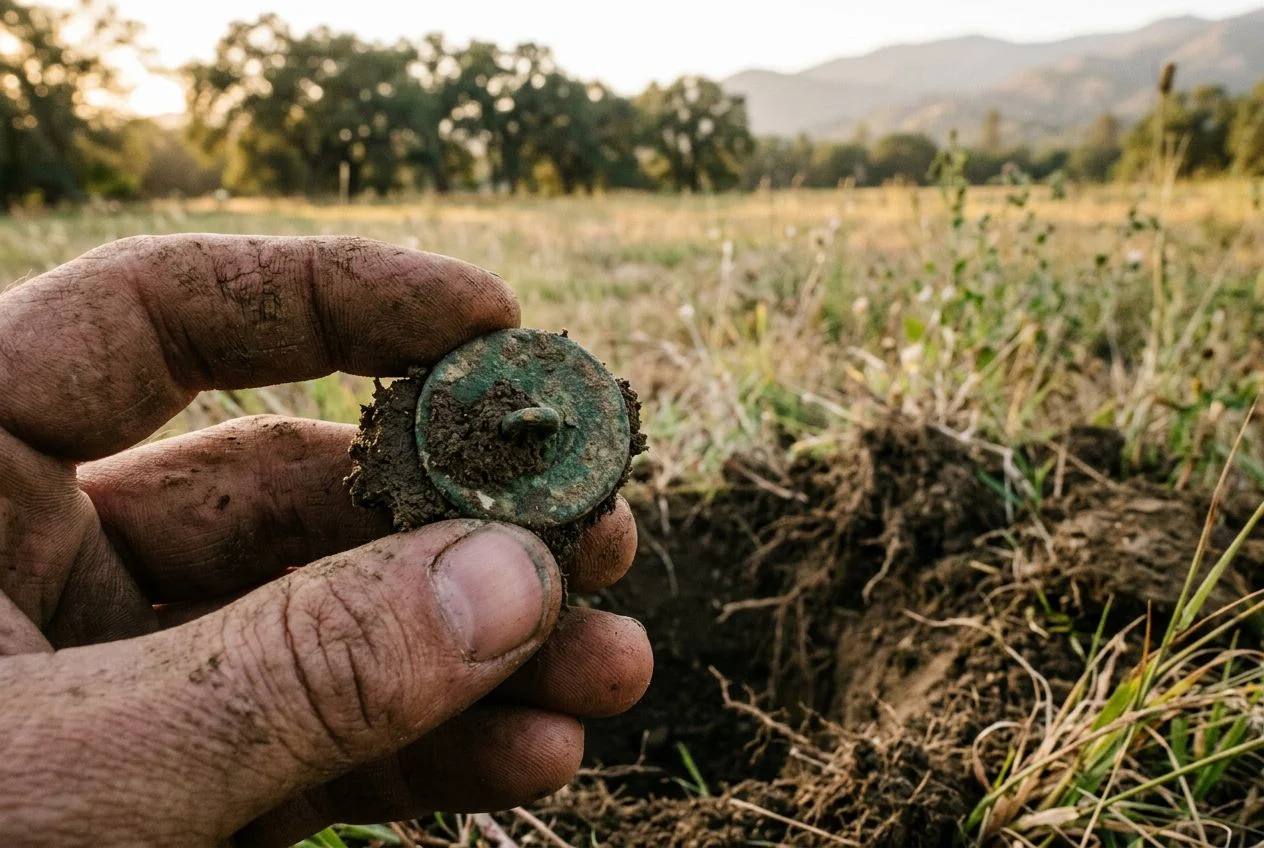
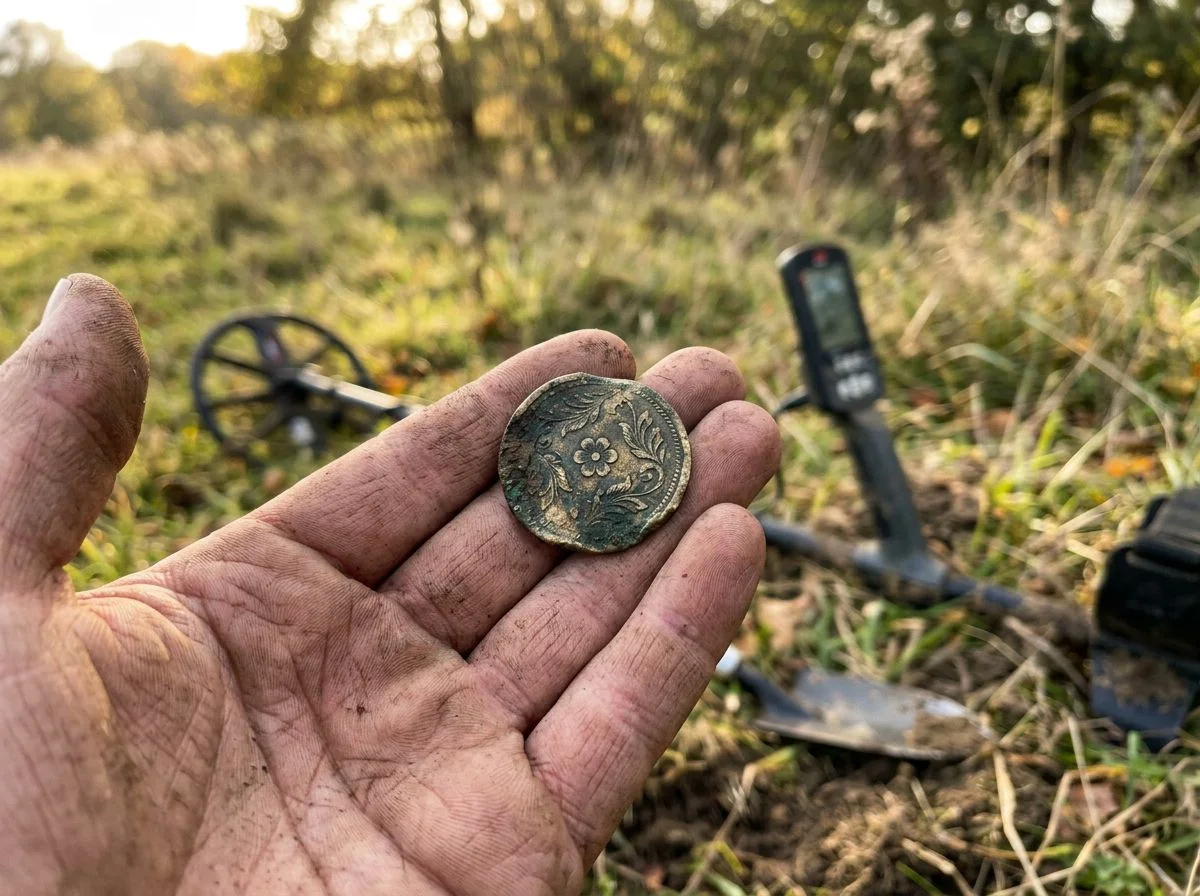
My first flat button changed how I see the hobby. I was working a farm field outside Placerville, digging the usual shotgun shells and can slaw. My Equinox 900 gave me a tight, high tone. About seven inches down, out came this thin, crusted green disc with a loop on the back. I almost tossed it in the pouch without thinking. But something about the weight felt wrong for a modern button — too light, too crude.
That night I cleaned it up and compared it to photos online. The shank was cast as one piece with the body. No seam, no solder. Then it hit me. This thing was made before the United States existed. Someone lost that button off a coat when George Washington was still alive. It sat in that field for two and a half centuries waiting for me to walk over it with a metal detector.
That’s the thing about buttons. A coin tells you when it was minted, sure. But a button tells you when someone was standing right there — living, working, losing things. Button manufacturing changed dramatically from the colonial era through the industrial revolution. So a single well-preserved example can date a site within a couple decades. No other common relic gives you that kind of precision for that length of time.
I’ve dug plenty of coins since then. I still get more excited about buttons. They’re the quiet storytellers of a site.
Start With the Shank, Not the Face
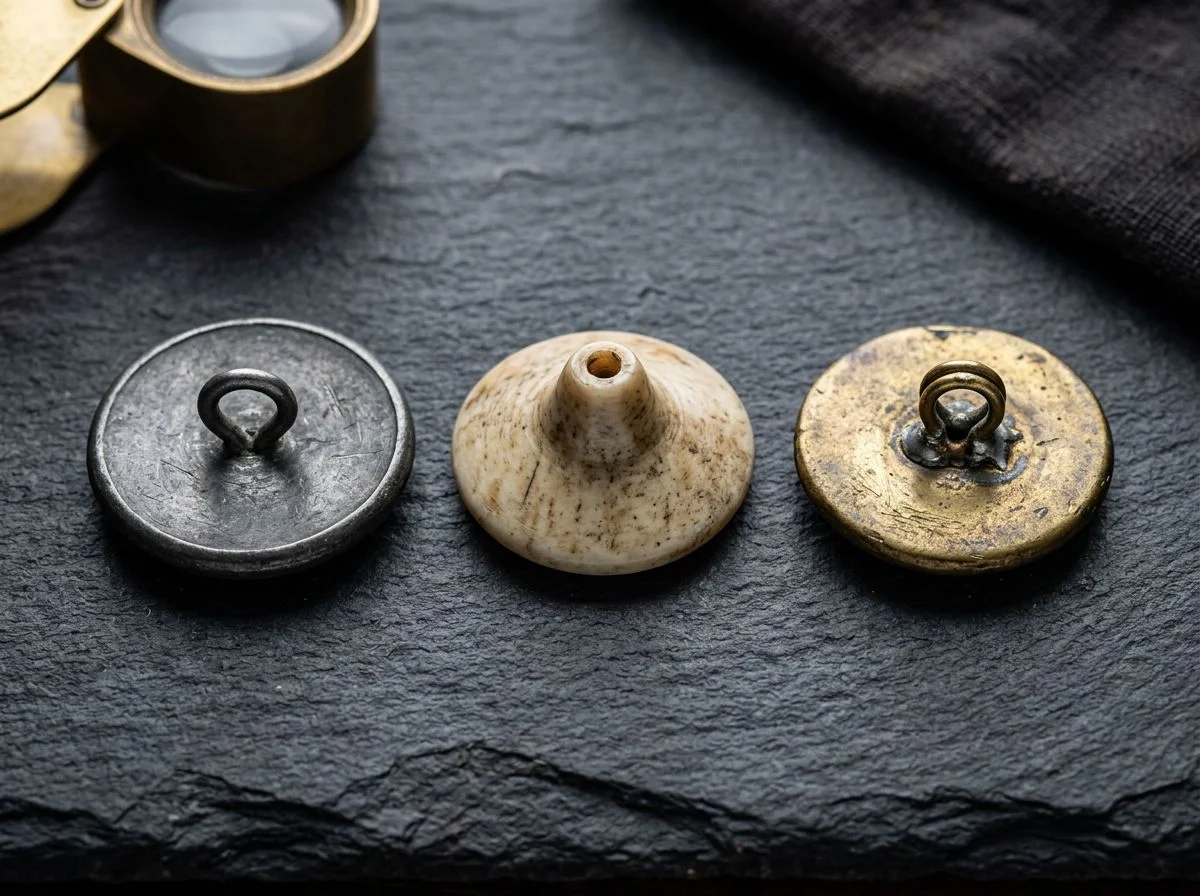
Flip the button over. The shank — that little loop of metal on the back — tells you more than any eagle, flower, or pattern on the front. Decorative face designs often stayed in production for decades. Shank technology changed fast, sometimes within a single generation.
Olsen made this point back in 1963. It’s still the foundation of button dating today. A fancy floral face on a brass button might have been stamped from the 1830s through the 1880s. That’s fifty years of overlap, which tells you almost nothing. But the shank? That narrows things down fast.
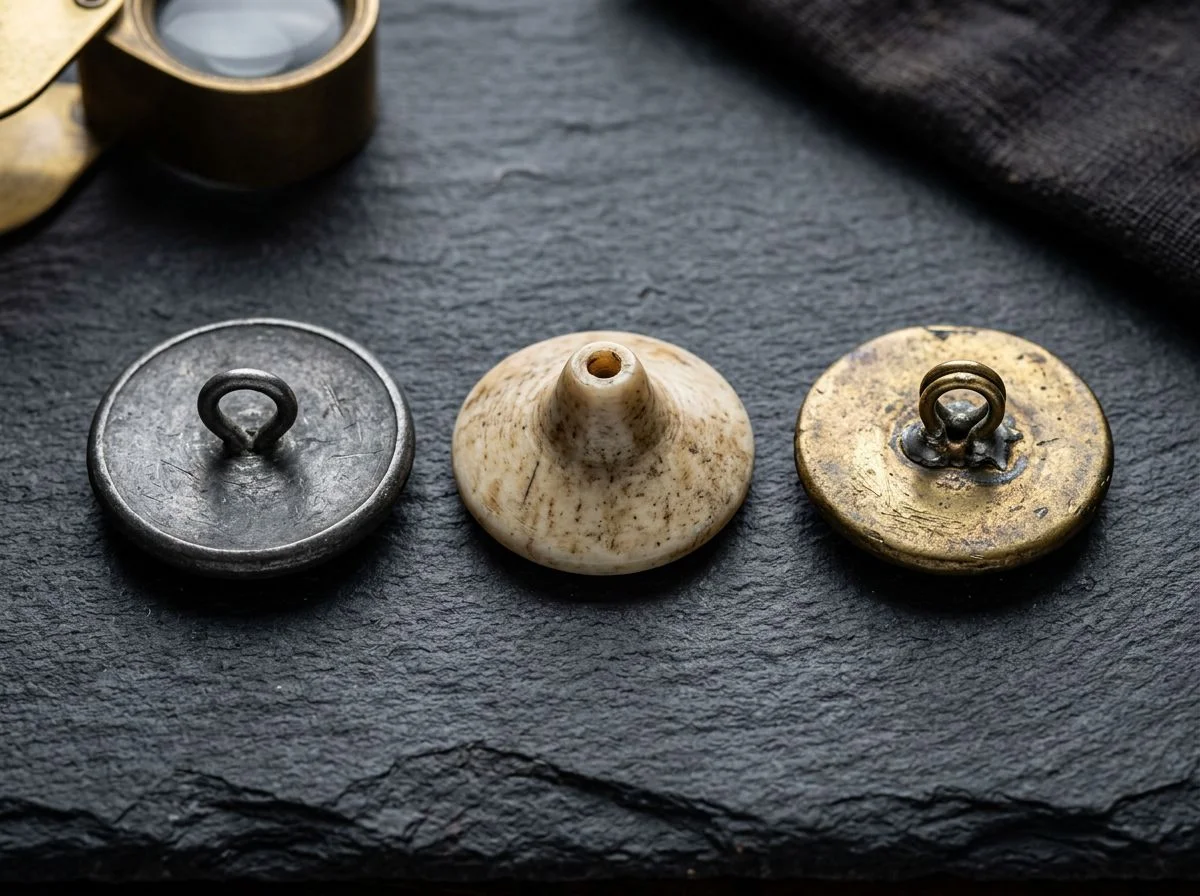
The oldest buttons you’ll dig have cast integral shanks. The loop and the button body were poured as one piece in a mold. That’s pre-1800 colonial technology, typical of pewter and brass buttons from the 18th century. No seam, no solder. If you find one of these, you’re holding something made before the United States existed.
By the mid-to-late 18th century, hand-manufacturers switched to alpha shanks. That’s a separate wire loop inserted through holes in the back and bent into place. It’s a subtle difference from the cast version. Once you’ve seen a few, you’ll spot it immediately. The wire is thinner, rounder, and clearly added after the body was cast.
The early 1800s brought machine production and the omega shank. It’s named because the wire loop looks like the Greek letter Ω when soldered flat against the back. This is the most common shank you’ll find on flat buttons from the first half of the 19th century. Scott Clark’s guide over at Detecting.us walks through the whole sequence with photos. It’s worth bookmarking if you dig buttons regularly.
Mid-1800s buttons — especially military ones — often have box shanks. That’s a raised rectangular housing with the loop inside. Civil War eagle buttons frequently show this style. If you pull a brass button with that distinctive box on the back, you’re almost certainly looking at something from the 1850s or 1860s.
After 1918, manufacturers switched to inset shanks — the loop pressed into a hole drilled in the button itself. No solder, no housing. These are modern buttons. They still show up at old sites, but they’re usually from later activity.
None of this requires a magnifying glass or special equipment. Just clean the back gently and look at how the loop attaches. You’ve already narrowed your date range to a few decades. The face can wait.
What Button Materials Say About Their Age
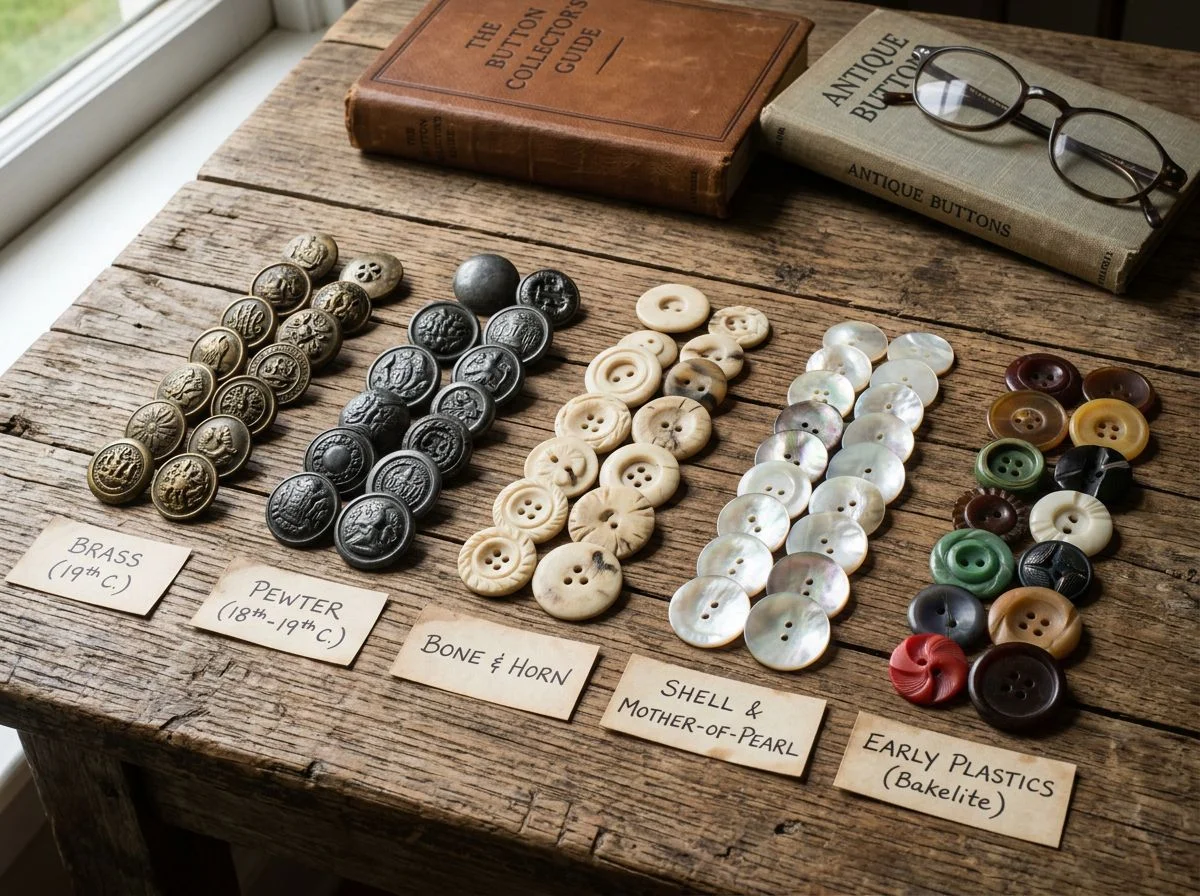
The material of a button is a built-in timestamp. Hard rubber means after 1851. Celluloid means after 1869. Bakelite means after 1907. Three materials that can instantly bracket a site’s occupation window before you even look at the shank.
Here’s why this works so well. Button manufacturers adopted new materials almost immediately after they became available. Every new material promised cheaper production or a better look. That means the invention dates function as hard floors. If you’re holding a hard rubber button, it physically could not have existed before Charles Goodyear patented his vulcanization process in 1851. The chemistry simply wasn’t there yet.
Celluloid buttons tell the same story. Invented in 1869, celluloid was the first synthetic plastic. Button makers jumped on it within a few years. It could be dyed, molded, and made to imitate expensive materials like ivory or tortoiseshell at a fraction of the cost. I’ve dug celluloid buttons from farm sites that look almost modern. Then you realize the material itself dates the site to the late 19th century at the earliest.
Bakelite is the one that catches people off guard. It feels so old and brittle in the hand that relic hunters sometimes assume it’s colonial. Nope. Bakelite didn’t exist until 1907. Buttons made from it are solidly 20th century. I’ve seen guys at club meetings proudly display a “colonial” button that turned out to be Bakelite from the 1920s. It happens more than anyone wants to admit.
And then there’s the Prosser button, the weird one. Those little white ceramic buttons with the orange-peel texture on the back? The Prosser process was patented in 1840. That means every single one of them postdates that year. Sprague made this point back in 2002. It’s still the fastest way to date those confusing “china” buttons that show up on mid-19th-century domestic sites.
Material won’t give you a single-year date. It will kill a bad theory fast, though. If the material shouldn’t exist yet, the button isn’t from the era you hoped. That’s the kind of reality check that saves you from embarrassing club meeting moments.
Identifying Old Buttons From the 18th Century
Colonial flat buttons are the oldest buttons you’re likely to recover. They’re hand-cast discs of brass, pewter, copper, or occasionally silver, typically dating from the 1720s through the 1790s. If you’ve dug one, you’re holding something that predates the Constitution.
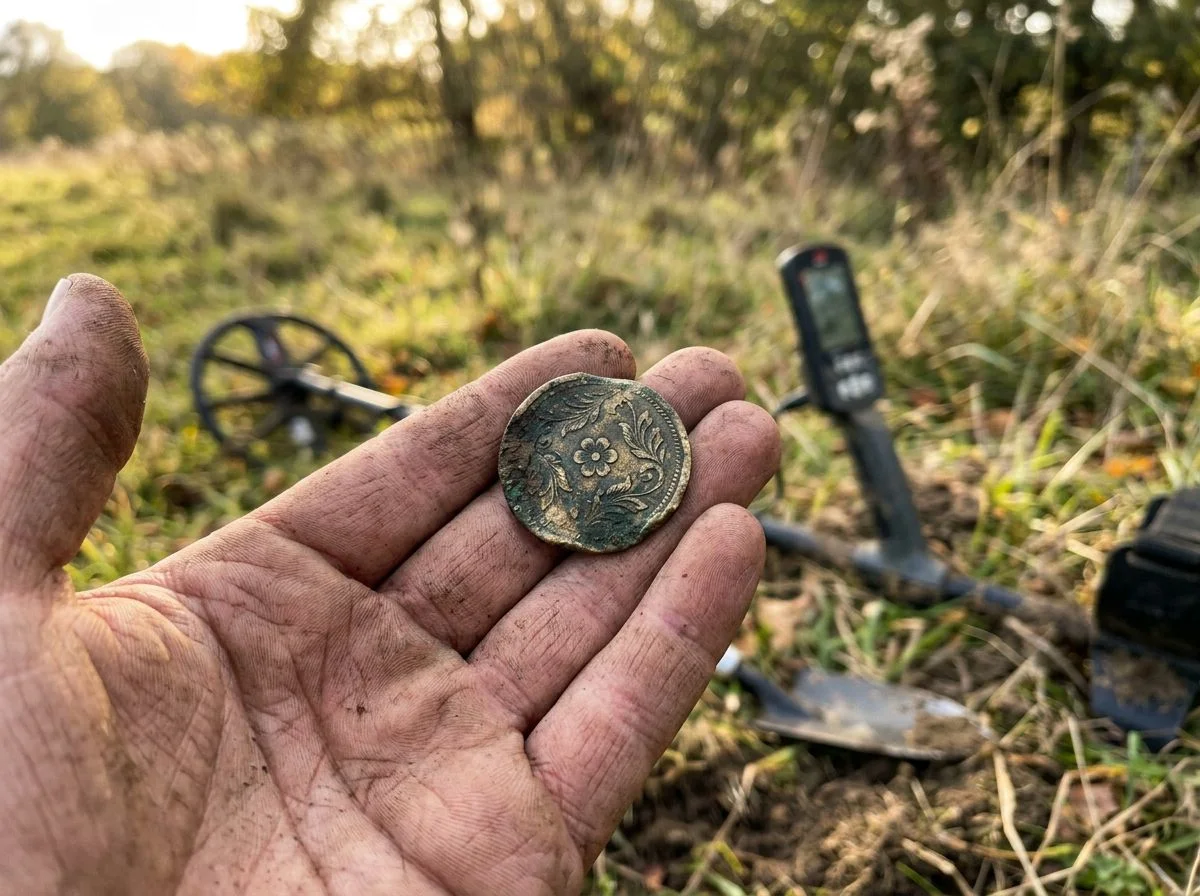
My first one came from a swimming hole outside Sacramento. Not exactly where you’d expect to find 18th-century anything. The signal was faint and scratchy — the kind most people would walk past. About seven inches down, out came this thin, crusted disc with a dark green patina. The little loop on the back looked almost melted into the body. I assumed it was some kind of broken modern snap. Then I brushed it off and saw the shank wasn’t soldered on. It was part of the button itself. Cast in one piece. That little disc had been poured into a mold before George Washington was president. I sat there on the creek bank for a solid five minutes just turning it over in my hand. My wife still brings that up whenever I get too excited about a pull-tab.
Here’s what separates a true colonial flat button from later 19th-century flat buttons. The early ones were hand-cast. The metal was melted and poured into a two-part mold. The shank was formed as part of that same pour. No separate wire, no solder joint. Look closely at the back and you’ll see slight irregularities — tiny pits from air bubbles in the mold. The shank feels thick and slightly crude compared to later machine-made versions. Scott Clark’s guide at Detecting.us has close-up photos of cast versus soldered shanks. The difference is obvious once you’ve seen them side by side.
The material matters too. Colonial flat buttons were handcrafted from brass, pewter, copper, and occasionally silver — metals that could be worked in a small shop or home forge. Pewter is the softest and most likely to be bent or broken when you dig it. Brass holds up better but develops that characteristic dark patina from two centuries of soil contact. If the button is brass and the shank is integral to the body, you’re almost certainly looking at pre-1800 manufacture. Olsen’s 1963 typology in American Antiquity established this as the foundational dating marker. It’s held up for sixty years.
One warning: don’t confuse a colonial flat button with a later machine-stamped flat button from the 1830s or 1840s. Those have shanks that were added after the face was stamped — usually an omega loop or a wire shank soldered to the back. The difference is subtle at first. Once you’ve handled a few cast examples, though, the
Dating Military Buttons by Backmark and Build
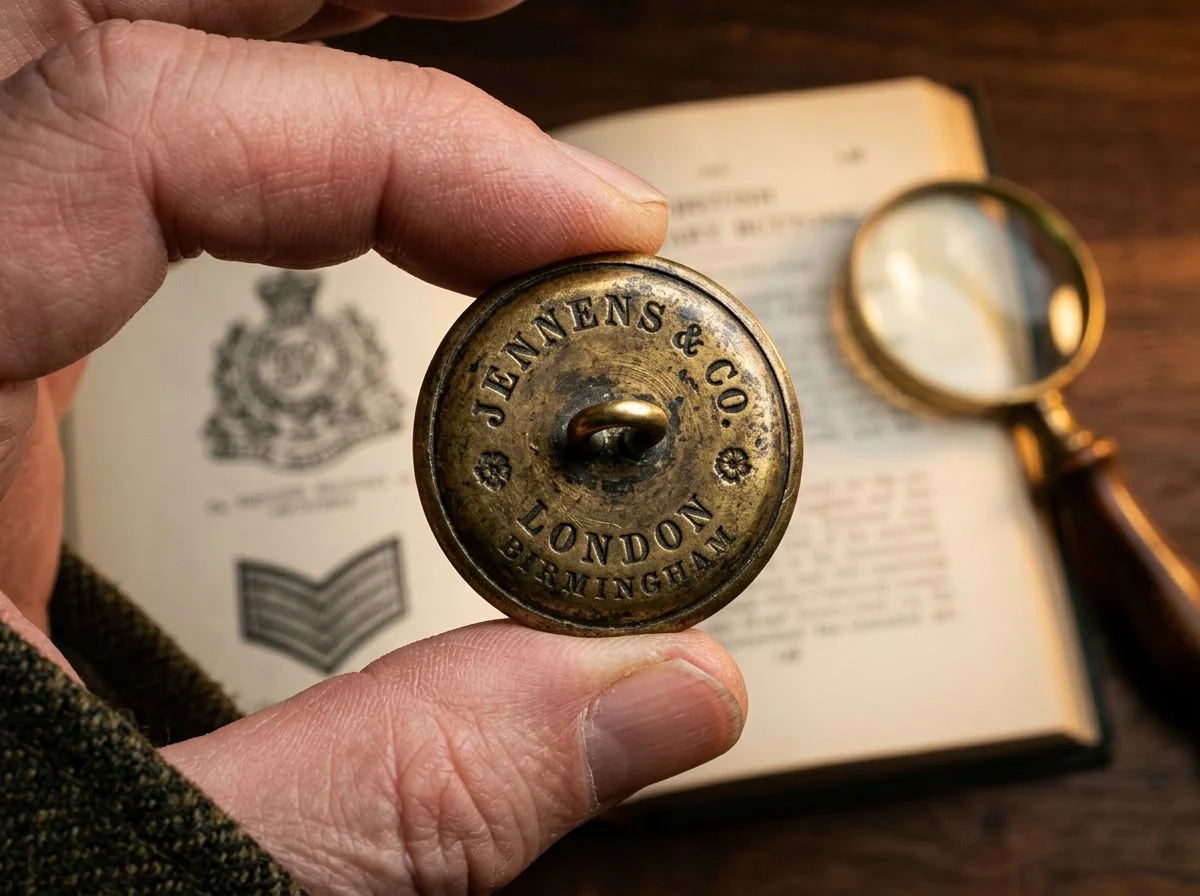
Military buttons carry their own dating system, and it’s written on the back. A brazed shank — soldered directly to the button’s reverse — signals 18th or 19th century manufacture. Two-piece construction with a crimped rim narrows it to 1813 through the 1830s. Staff buttons with that thin attached rim ran from the 1830s until 1902. And if you see a circular depression surrounding the shank, you’re holding a Civil War-era piece.
How do you tell a Revolutionary War button from a Civil War button when both have eagles? That’s the question every relic hunter asks eventually. The answer is almost never on the front. The eagle design stayed remarkably consistent for over a century. The military loved that emblem and saw no reason to change it. The back, though, tells you everything.
Let’s start with the brazed shank. WorthPoint’s guide to dating military buttons explains this clearly. A shank soldered or brazed onto the back indicates 18th or 19th century manufacture. Revolutionary War buttons were one-piece brass or pewter with that shank attached directly. They feel solid and heavy. The shank often breaks off, leaving a rough scar where it was attached. I’ve dug exactly one Revolutionary-era button in my life. The shank was long gone — just that telltale rough patch where it once sat.
Two-piece crimped construction is the next milestone. From 1813 through the 1830s, manufacturers stamped the face and back separately. Then they crimped the rim together around the edge. If you run your fingernail along the edge and feel a seam, you’ve got a two-piece button from that window. These are War of 1812 and early antebellum pieces.
Then come the staff buttons — the ones that confuse everyone. Used from the 1830s until 1902, these have a two-piece construction where the back is attached by a thin rim rather than a full crimp. They’re lighter. That thin rim is often the first thing to corrode away in the ground. I’ve pulled staff buttons that looked one-piece until I cleaned them and found the faint line where the rim had been.
And the circular depression? That’s your Civil War giveaway. Buttons from 1861 to 1865 typically show a recessed ring around the shank base. It’s a manufacturing artifact from how the shank was set into the back. Warren Tice’s massive reference book catalogs thousands of these variations with photographs. Once you’ve seen that depression, you’ll spot it instantly in the field.
For serious military button hunting, Alphaeus Albert’s “Record of American Uniform and Historical Buttons” remains the collector’s bible. The Albert numbers you hear guys reference at club meetings come from that book. It’s worth tracking down a copy if you hunt military sites regularly.
Your Button’s Birth Certificate
The backmark is the stamped writing on the back of a button. It’s the closest thing to a birth certificate you’ll find on a dug relic. Manufacturer names, city locations, and quality terms can narrow dates to specific decades. When a button has one, you’re holding something with a documented history.
Here’s the thing about backmarks: they’re advertising. Button makers stamped their names and locations onto the back of their products because they wanted repeat business. That vanity is now your best dating tool. A button marked “Scovill Mfg Co. Waterbury” tells you it came from a specific factory in Connecticut. That factory operated under that exact name during a known window. When the company changed names, merged, or moved, the backmark changed with it. Warren Tice’s reference book catalogs thousands of these marks with their corresponding date ranges. It’s the kind of resource that turns an afternoon of button cleaning into an evening of detective work.
The quality terms are where it gets really interesting. “Treble Gilt” and “Imperial Standard” weren’t just marketing fluff. They indicate specific manufacturing eras. “Treble Gilt” buttons with that exact phrasing were most common from roughly the 1820s through the 1850s. “Imperial Standard” tends to appear on buttons from the 1830s through the 1860s. I’ve dug buttons with both marks. The difference in patina alone tells you something about the alloys used. The gilt ones, even corroded, sometimes still show flecks of gold wash in the crevices of the design.
Here’s a practical tip from years of squinting at crusty backs. Clean the backmark area gently with a dry toothbrush before you try to read it. The letters are often shallow-stamped, and dirt packs into them. I’ve misidentified more than one button because I was reading a half-obscured mark. And if you find one with no backmark at all, don’t despair. Plenty of early 19th-century buttons were never marked, especially the cheaper ones. That absence is its own clue about the button’s quality tier and intended market.
The Small White Ones Everyone Skips
Those tiny white ceramic buttons you keep digging are Prosser buttons. They’re glass-like ceramic buttons manufactured using a patented process from 1840 onward. They’re so reliably dated that archaeologists use them as chronological markers for 19th-century sites. If you’re digging them, your site was active after 1840. Simple as that.
The manufacturing process is what makes these buttons so useful for dating. Richard Prosser patented his method in 1840. Every single one of these buttons — the smooth white ones, the tiny four-hole shirt buttons, the fancy colored varieties — postdates that year. Roderick Sprague’s work on Prosser button identification makes this point clearly. The process itself is the chronological anchor. Before 1840, these buttons simply didn’t exist.
Here’s how you identify one in the field. The top side is smooth and often glossy. Flip it over and the underside has a distinctive “orange peel” texture — a slightly dimpled, matte surface that’s unique to the Prosser manufacturing method. You’ll also see a visible seam running around the edge where the two halves of the mold met. Once you’ve seen it, you’ll never mistake a Prosser for a modern plastic button again.
The collector terminology is where these little buttons get genuinely fun. Button collectors — the serious ones, not us relic hunters — have named the fancy varieties with terms like calicoes, ginghams, igloos, bird cages, and pie crusts. Each name describes a specific decorative pattern pressed into the ceramic. I’ve dug a few calicoes over the years, mostly at late-1800s home sites. They’re genuinely pretty little things once the dirt’s off.
The real value here is site dating. When I’m working a new permission and start pulling Prosser buttons, I know immediately the site wasn’t occupied before the mid-19th century. No matter what the old maps suggest. That’s the kind of on-the-ground confirmation you can’t get from a plat book.
Building a Button Dating Kit Worth Owning
You don’t need a library to date buttons well. Three references will cover 95% of what you’ll ever dig. Albert’s Record for military buttons, Tice’s Uniform Buttons for the alphanumeric system, and Olsen’s 1963 paper for shank forms. Start there.
Let me talk you through each one. They serve different purposes, and you’ll reach for them in different situations.
Alphaeus Albert’s Record of American Uniform and Historical Buttons is the heavyweight. The Bicentennial Edition runs 511 pages and covers American uniform buttons from 1775 to 1976. Every branch of the military, state militias, political buttons — the works. This is the book you grab when you’ve dug an eagle button with a backmark you don’t recognize. You need to know if it’s Civil War or Spanish-American War. It’s not cheap these days. But it’s the kind of reference that pays for itself the first time you correctly identify a rare variant.
Warren Tice’s Uniform Buttons of the United States, 1776–1865 is my go-to for the alphanumeric system. At 520 pages with over 3,500 photographs, it’s exhaustive. The system Tice developed lets you cross-reference a button’s design, backmark, and construction to a specific alphanumeric code. Here’s how that works in practice. I dug a general service eagle button last spring with a backmark I couldn’t quite read. I cleaned it up and matched the face design and shank style to Tice’s photos. I had it narrowed to a specific manufacturer and date range in under five minutes. That’s the power of a good reference. It turns guesswork into a lookup.
Olsen’s 1963 paper in American Antiquity is only four pages long. But it’s the foundation everything else builds on. The shank
Common Button Dating Mistakes to Avoid
The biggest mistake I see — and I’ve made it plenty myself — is dating a button by its face design alone. Decorative motifs persisted for decades. Backmarks and shank construction changed constantly. Is that eagle button really Civil War, or is it a 1920s reproduction? Flip it over before you call it.
Face designs are seductive because they’re the first thing you see when the dirt comes off. An eagle with a shield looks military, so it must be Civil War, right? Not necessarily. That same general eagle motif appeared on buttons from the 1830s through the early 1900s. The face design tells you what the button was for. The back tells you when it was made. WorthPoint’s guide to dating military buttons makes this point clearly. Construction details and backmarks are your chronological anchors, not the pretty side.
Backmarks are where the real dating action happens. These little stamped marks on the button’s back — manufacturer names, city names, quality claims like “Treble Gilt” or “Imperial Standard” — changed frequently as companies came and went. A backmark reading “Scovill Mfg. Co. Waterbury” dates differently than “Scovill’s Waterbury” or “J.M.L. & W.H. Scovill.” Same company, different eras, different backmarks. Scott Clark’s shank dating guide walks through this in detail. The short version: learn to read the back before you trust the face.
Construction details are your third check. Post-WWI buttons have shanks inset into holes drilled in the back. That’s a manufacturing shortcut that didn’t exist before 1918. Tinned-iron backs with paper-clip-style shanks point to the early 19th century. These structural clues don’t lie the way face designs can. I’ve dug buttons with gorgeous eagle faces that turned out to be 1920s civilian fashion pieces, not military at all. The shank told the truth. The face was just decoration.
Frequently Asked Questions About Identifying Old Buttons
“How old is this button?” It’s the question I get more than any other. Usually with a photo texted to me at 9 p.m. The honest answer is always the same: flip it over. The back tells you more than the face ever will. With a few reference points, you can usually narrow it to a 20–30 year window in about five minutes.
So let me run through the questions I hear most, starting with that one.
“How old is this button?”
Start with the shank. Cast integral shanks — where the loop is molded as one piece with the button — generally put you before 1800. Alpha or wire shanks inserted through the back are 18th century. Omega shanks, that soldered wire loop you see on so many flat buttons, dominate the first half of the 1800s. If the shank is inset into a drilled hole, you’re looking at post-1918 manufacture. That single detail eliminates two centuries of possibilities before you even look at the face.
Material helps too. Hard rubber buttons can’t predate Charles Goodyear’s 1851 vulcanization patent. Celluloid starts in 1869. Bakelite doesn’t appear until after 1907. And those little “china” buttons with the orange-peel texture on the back? They’re Prosser buttons, and they don’t exist before 1840.
“Should I clean the buttons I dig?”
Gently, and usually less than you think. Dry brushing with a soft toothbrush gets most dirt off without damage. For brass buttons with heavy crust, a soak in warm soapy water and a wooden toothpick will loosen the grime without scratching the patina. Avoid anything abrasive. That green patina is protecting the metal underneath. Once it’s gone, it’s gone. I ruined a perfectly good 1830s flat button with overzealous cleaning early on. I still regret it.
“How do I preserve buttons long-term?”
Once they’re dry, store them somewhere stable. A coin flip or small archival box works fine. The main enemy is moisture. If you dug them from a wet site, let them dry slowly at room temperature for a few days before sealing them up. A light coat of Renaissance wax can help stabilize flaky patina. Honestly, most dug buttons do fine with just a clean, dry home.

My name is Paul and I am the founder of Detector For Metal, a dedicated resource for metal detecting enthusiasts seeking to uncover historical treasures and connect with the past using the latest technology. As a stay-at-home dad and family man, I’ve found metal detecting to be the perfect hobby that combines family adventure with historical learnings for the whole family.
As a father, I’m deeply committed to passing on this hobby to the next generation of detectorists, starting with my own children. I share advice on everything from metal detecting with kids to exploring the top 10 metal detecting sites you never thought about. My methodical approach to the hobby goes beyond the thrill of discovery—it’s about creating family traditions while preserving history and sharing the stories of those who came before us.