Table of contents
- Why Your Trunk Setup Matters More Than Your Detector
- Temperature, Moisture, and Vibration Rules
- What Actually Needs to Live in Your Trunk
- A Complete Trunk Setup for Under $50
- Securing Your Detector Without the Rattle
- Storing Your Digger Without Trunk Damage
- Adapting Metal Detecting Gear Storage to Terrain
- Power Management for an Always-Ready Trunk
- How to Know Your Setup Actually Works
- Common Questions About Trunk Setups
- Your Metal Detecting Gear Storage Is Never Finished
The short version: separate your detector from your tools, keep everything in grab-and-go containers, and protect the control box from temperature swings. Do that, and you’ll be swinging within five minutes of parking instead of untangling headphone cords from a shovel handle. Good metal detecting gear storage isn’t about buying organizers—it’s about building a system that removes every excuse not to hunt.
Here’s the thing I learned the hard way — your trunk setup isn’t about looking organized. It’s about removing every excuse not to detect. When the gear is ready, the hunts happen.
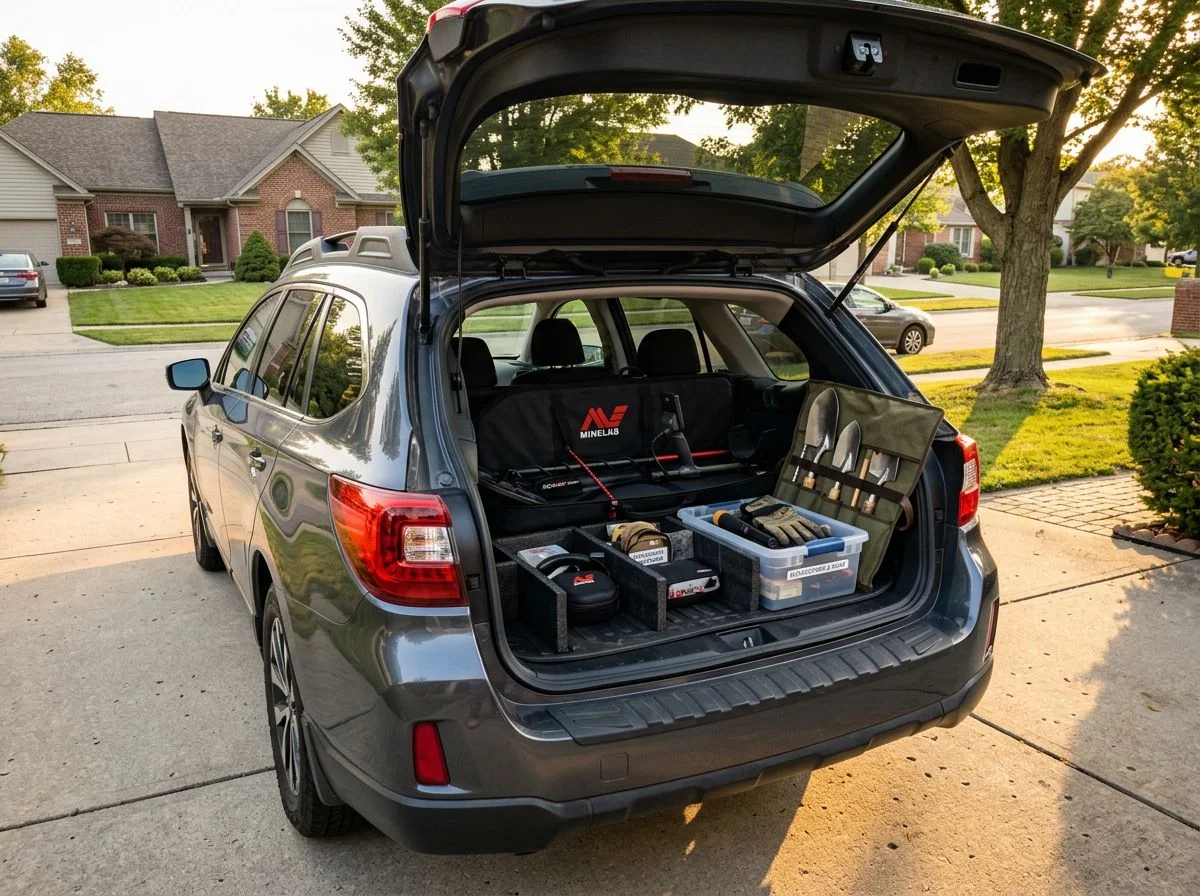
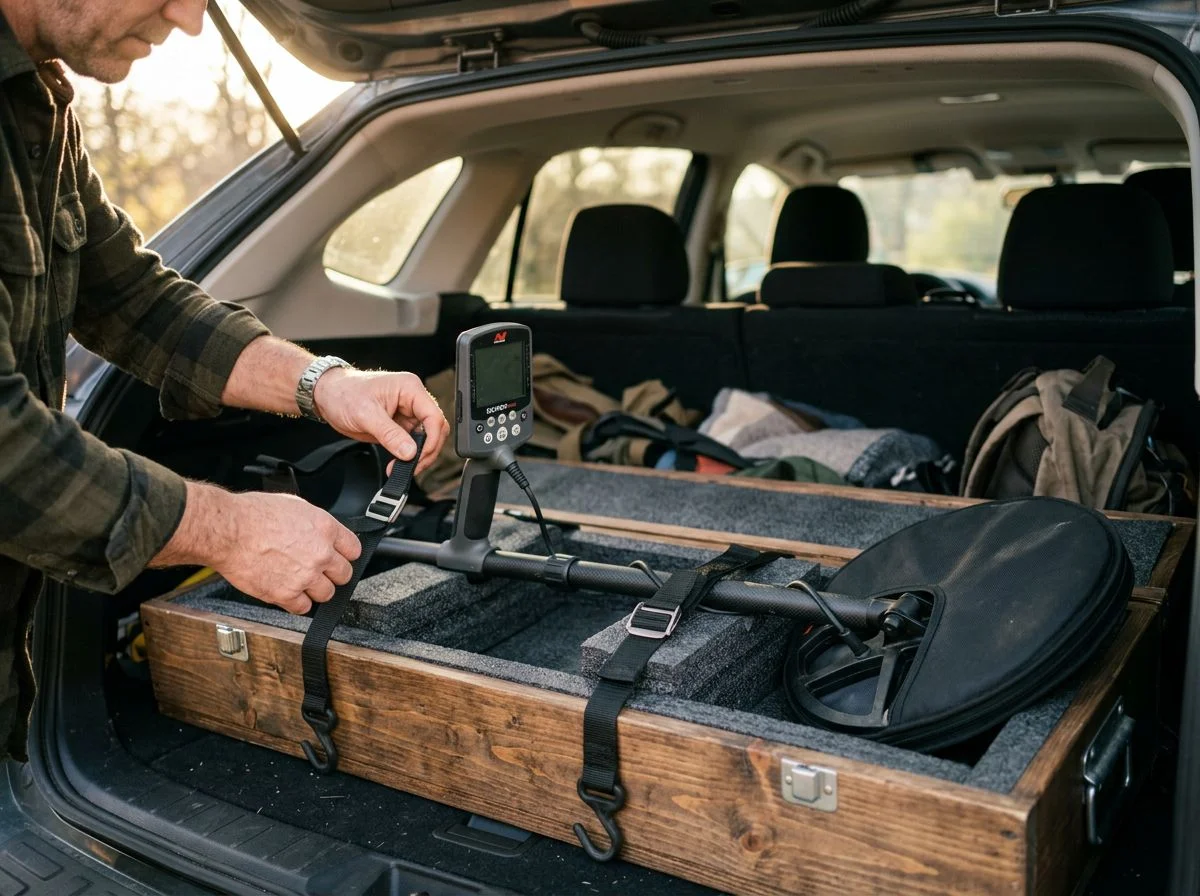
Start with the detector itself. A padded carry bag is the everyday solution. It lets you break the rig down with coils and chargers in side pockets. My Equinox 900 lives in one, collapsed and ready. That forum trick about marking your shaft with a silver sharpie for quick setup? Genius. I did it after spending ten minutes fiddling with length adjustments at a curb strip.
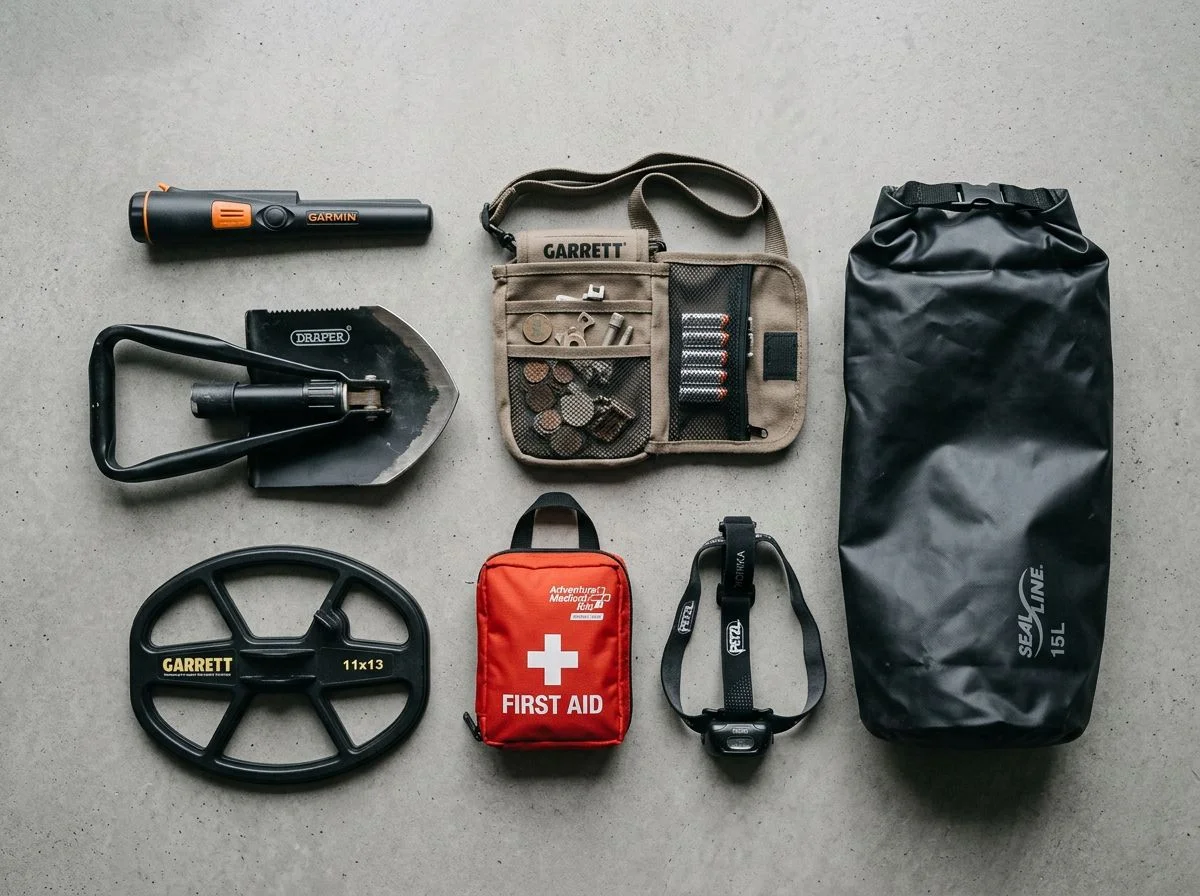
Tools go in a separate container. One detectorist on the Friendly Metal Detecting Forum swears by a large waterproof toolbox. Grab one box, your detector, and your digger, and you’re gone. I use a similar system. My digger, pinpointer, finds pouch, spare batteries, and gloves all live in one box that never leaves the trunk.
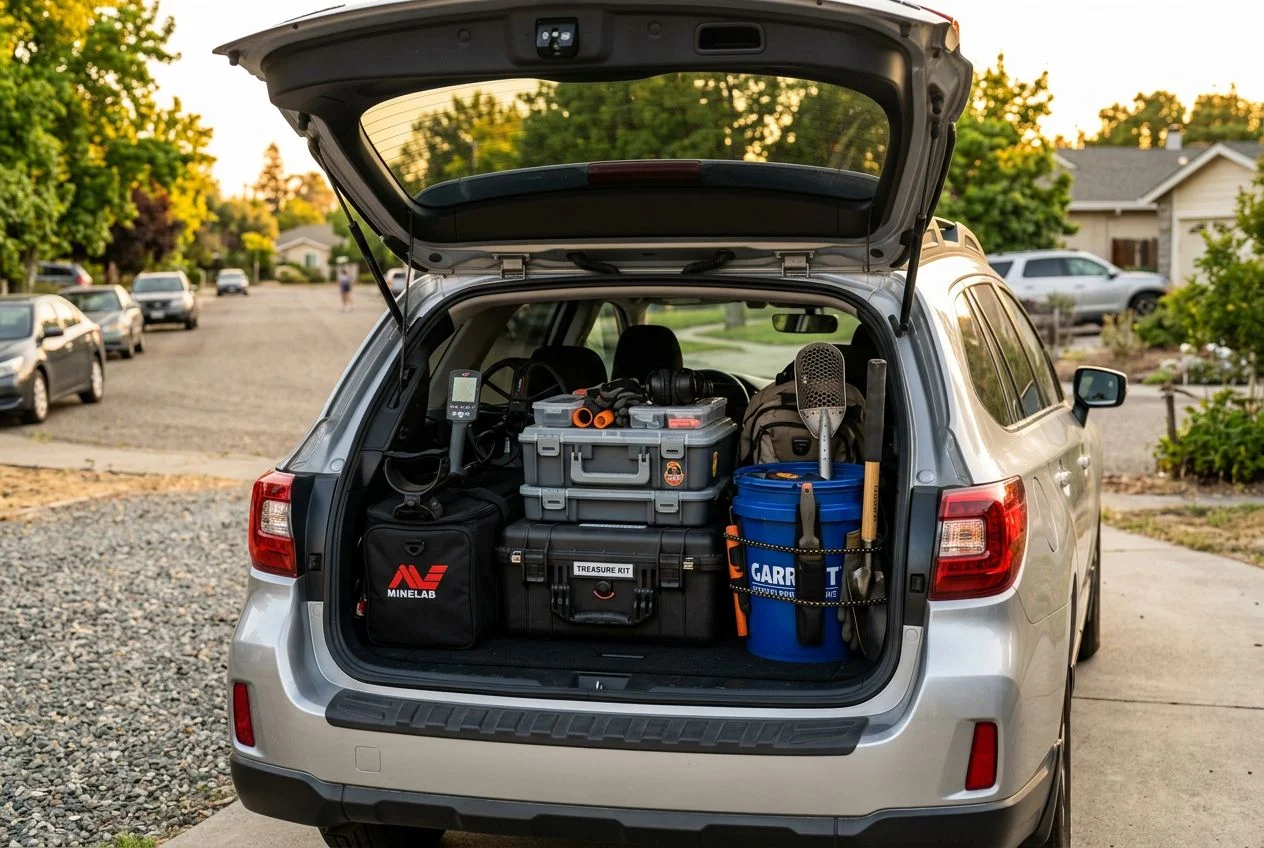
For the truly budget-minded, there’s the 5-gallon bucket approach. Tool wrap on the outside, pill bottles for finds, flagging tape on a carabiner, and a lid that doubles as a seat. My buddy Mike runs this setup and honestly, it works better than it has any right to.
The key is that everything has a home. When you get back from a hunt, gear goes back in its spot. That way, the next hunt starts the moment you decide to go.
Why Your Trunk Setup Matters More Than Your Detector
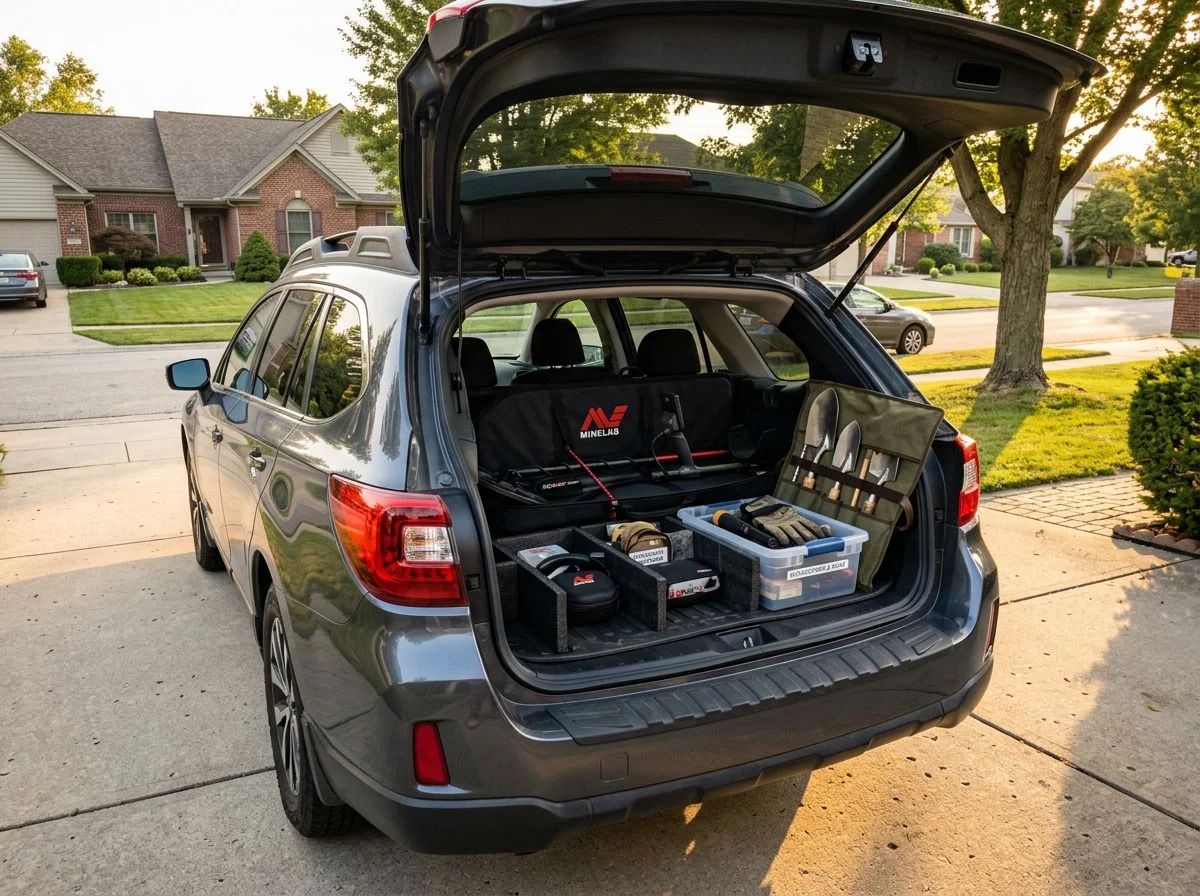
A $1,500 detector buried under groceries might as well be a paperweight. Your trunk setup determines whether you actually hunt. A ten-minute gear excavation kills the spontaneity that makes detecting happen in the first place. Solid metal detecting gear storage is what keeps you swinging instead of digging through a trunk full of chaos.
Last spring, I pulled into a curb strip I’d been eyeing for weeks. Old neighborhood, houses from the 1920s, sidewalk tear-out in progress. Prime hunting. I popped the trunk and stared at the aftermath of a Costco run. The coil was wedged under a flat of LaCroix. The shaft was tangled in reusable bags. My digger sat somewhere beneath a bag of potting soil my wife had asked me to pick up three days prior. By the time I excavated everything, the construction crew had finished for the day and fenced off the site.
And that’s just the missed-hunt cost. The equipment cost is worse. Garrett’s owner manual is explicit. Extreme trunk temperatures can severely damage the sensitive electronics in your control box. A Sacramento summer turns a trunk into a 140°F oven. Winter does the opposite. That’s why forum users report pulling batteries out of detectors before deep freezes hit. The control box isn’t waterproof either. A damp digger tossed on top of it after a rain hunt is asking for corrosion.
The point isn’t that you need a fancy storage system. It’s that a deliberate one — even a bucket and some paracord — removes every excuse not to detect. When the gear is ready, the hunts happen.
Temperature, Moisture, and Vibration Rules
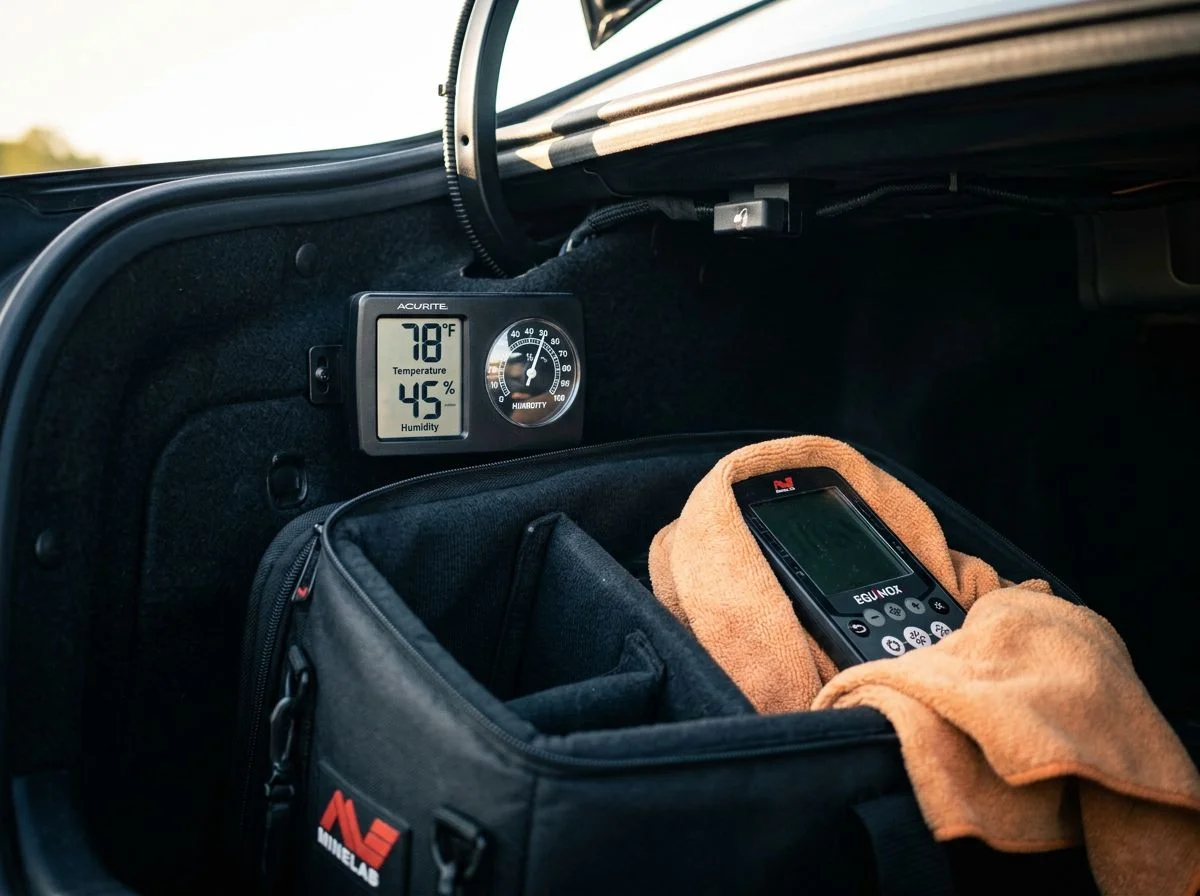
Your trunk is a hostile environment for electronics, plain and simple. Three threats live back there — temperature, moisture, and vibration. Each one can quietly kill your detector if you don’t plan around them. The good news? Protecting against all three doesn’t require a $300 hard case. Smart metal detecting gear storage starts with understanding these threats.
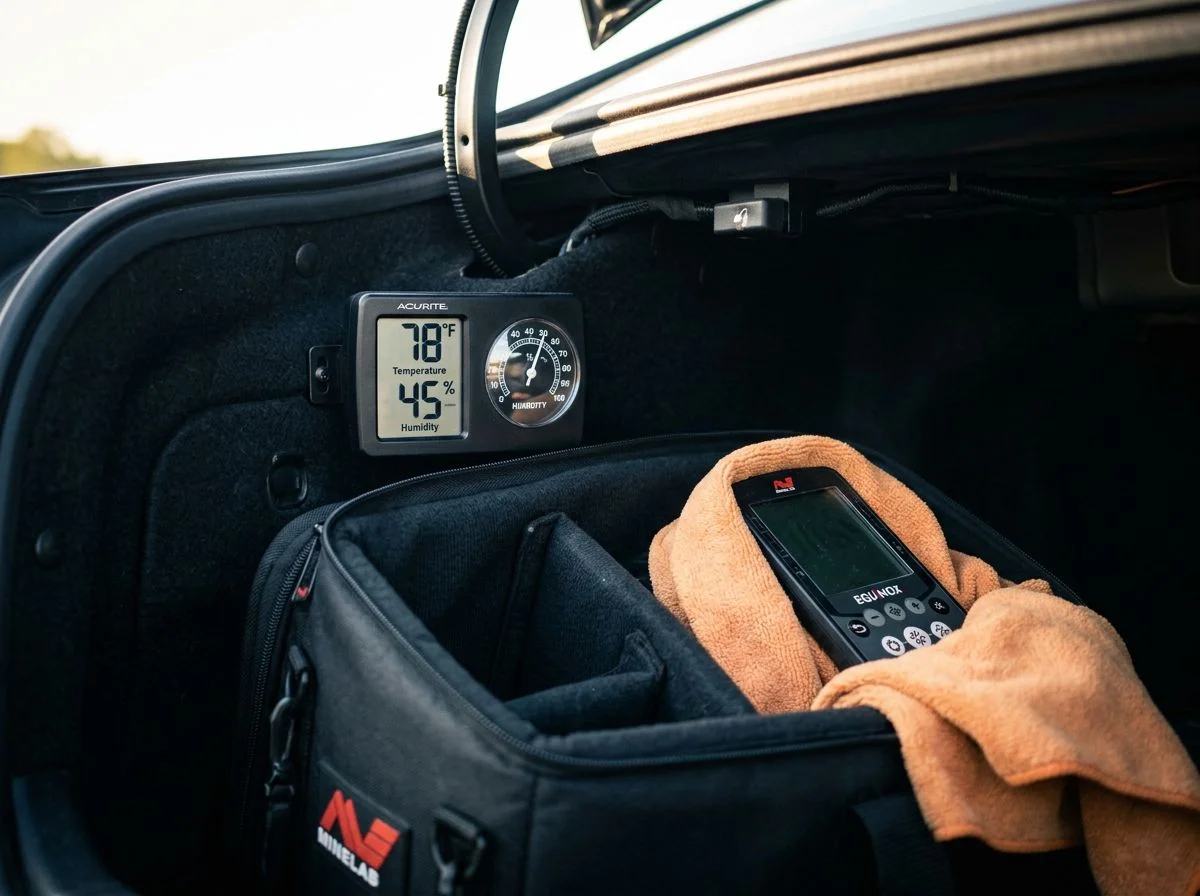
Here’s the counterintuitive part most people don’t realize. Your trunk is often hotter than the outside air, even on mild days. That 72°F spring afternoon feels perfect for detecting. But the greenhouse effect inside a sealed trunk can push temperatures 20–30 degrees higher. On a Sacramento summer day when it’s 95°F outside, your trunk is easily hitting 130–140°F. Garrett’s owner manual doesn’t mince words. Extreme heat and cold can severely damage the sensitive electronics in your control box. Solder joints weaken. LCD screens degrade. Battery contacts corrode faster.
And here’s the thing. Forum users report leaving detectors in vehicles year-round with mixed results. Some guys swear their rigs have lived in trunks for years without issue. Others have fried a control box after one brutal August. The difference usually comes down to whether they followed the basic rules — and whether they got lucky.
Moisture is the sneakier killer. Garrett explicitly states the control box is not waterproof and must be protected from heavy rain. That sounds obvious until you toss a rain-soaked digger and muddy gloves into the trunk on top of your detector after a hunt. The moisture evaporates, condenses inside the trunk, and settles right into your electronics. Corrosion doesn’t announce itself. It just slowly degrades connections until one day your detector won’t power on.
Vibration is the one nobody thinks about. Every pothole, speed bump, and gravel road sends micro-impacts through your coil connections and battery contacts. Over months of driving, those connections loosen. A padded carry bag absorbs most of that shock. That’s why it’s worth the investment even if you never fly with your detector.
The solution isn’t complicated. Keep the control box out of direct sunlight. Remove batteries during extreme seasons. Separate wet gear from electronics. Do those three things and your detector will outlast your enthusiasm.
What Actually Needs to Live in Your Trunk
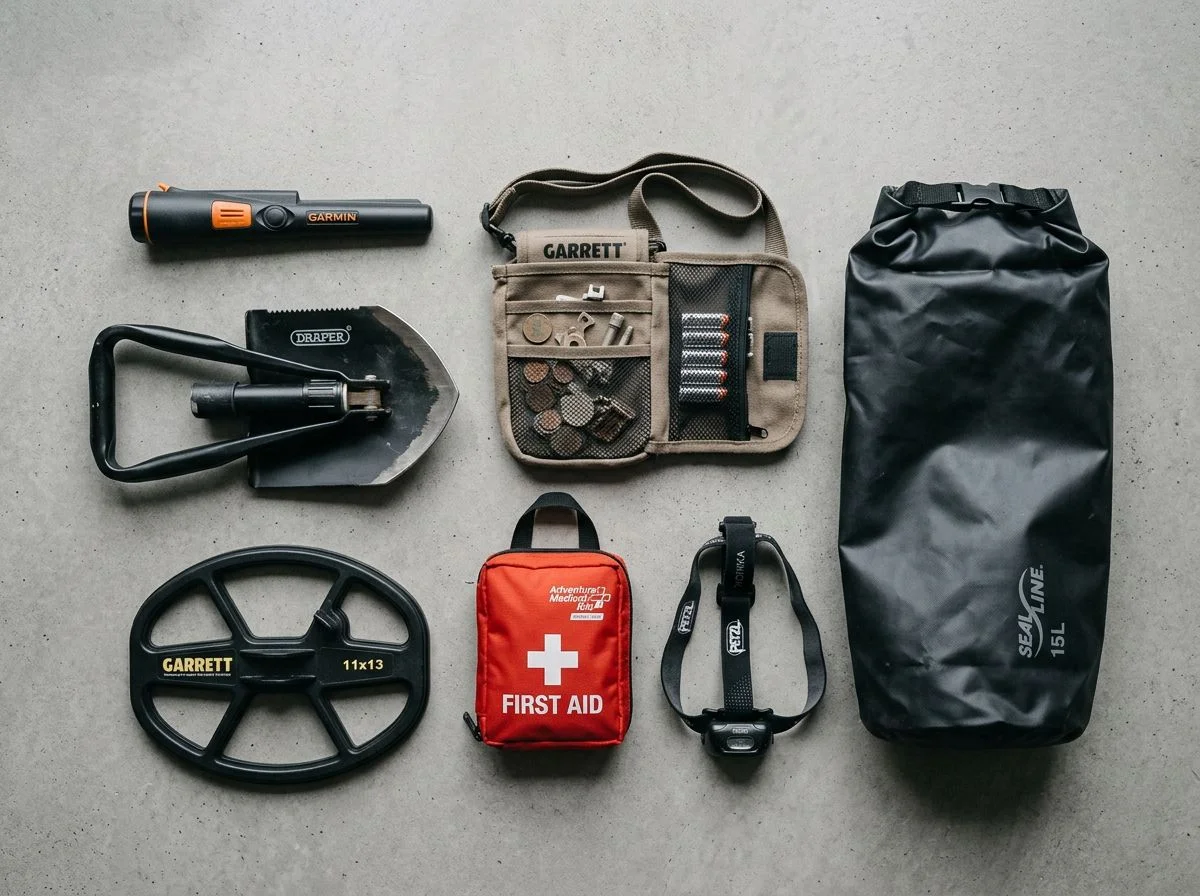
Three things earn permanent trunk residency. Your detector (broken down or in a padded bag), your digger, and a small grab-bag of essentials — spare batteries, pinpointer, gloves, and a finds pouch. That’s it. Everything else is pack-per-hunt. Good metal detecting gear storage means a permanent base layer, not a rolling garage.
When was the last time you arrived at a site and realized your pinpointer battery was dead? I’ve done it twice. Both times I stood there holding a screaming detector with no way to zero in on the target without carving a crater. Now the grab-bag has a 9-volt and a pair of AAs in a ziplock at all times. Cheap insurance.
The detector itself should never be loose in the trunk. A padded soft bag is the everyday solution — broken down, coil separated, control box protected from the vibrations I mentioned earlier. My Equinox 900 lives in its Minelab bag, collapsed and ready. I can be swinging in under five minutes.
The digger stays because it’s the one tool you’ll never remember to pack. Mine’s a Lesche, and it’s been in the trunk for six years straight. A waterproof toolbox keeps it from rattling against everything else.
Eric Reed’s “battle rattle” setup on Kellyco adjusts by terrain, weather, and hiking distance. But his core kit never leaves the vehicle. That’s the principle: a permanent base layer, then trip-specific additions. Plowed field? Add the big coil. Beach? Add the sand scoop. But you’re never starting from zero.
A Complete Trunk Setup for Under $50
You can build a complete grab-and-go trunk setup for under $30. All you need is a free 5-gallon paint bucket, a Milwaukee tool wrap, and a Leaktite lid. One Redditor’s version of this rig has become my favorite budget build I’ve seen. I’ve copied most of it. This is metal detecting gear storage at its simplest and most effective.
The genius part is the pill bottles stuffed with cotton balls for coin and ring finds. Three or four empty prescription bottles, each packed with a cotton ball, sit inside the bucket. When you pull a Mercury dime or an Indian Head penny, you drop it in the bottle and screw the cap on. The cotton keeps it from rattling against anything else. No scratched coins, no lost finds rolling around the trunk floor. I’ve been doing this for two seasons now. I haven’t dinged a single coin since.
The bucket itself is the storage hub. A Milwaukee tool wrap slides over the outside. It gives you pockets for brushes — nylon and brass — plus a Leatherman, paracord, and a few rolls of surveyor’s flagging tape clipped to the handle with a carabiner. Those dollar-store bamboo skewers the Redditor mentioned? They’re perfect for probing soft ground or cleaning crud out of coin details without scratching anything.
The Leaktite lid is the sleeper upgrade. It snaps on tight to keep moisture and dust out of the bucket. It’s also rated to hold your weight. I’ve sat on mine during lunch breaks more times than I can count. When you’re three hours into a farm field hunt and your legs are shot, a seat that costs $8 and lives in your trunk is a small miracle.
Total cost breakdown: bucket free from any paint store, Milwaukee tool wrap around $15, Leaktite lid around $8, pill bottles free from your medicine cabinet, cotton balls a couple bucks at any drugstore, brushes and skewers under $5 combined. You’re out the door for under $30. The whole thing just lives in the trunk next to your detector bag.
Is it as pretty as a $300 hard case? Hell no. But it deploys in about ten seconds, it’s organized, and it cost less than a tank of gas.
Securing Your Detector Without the Rattle
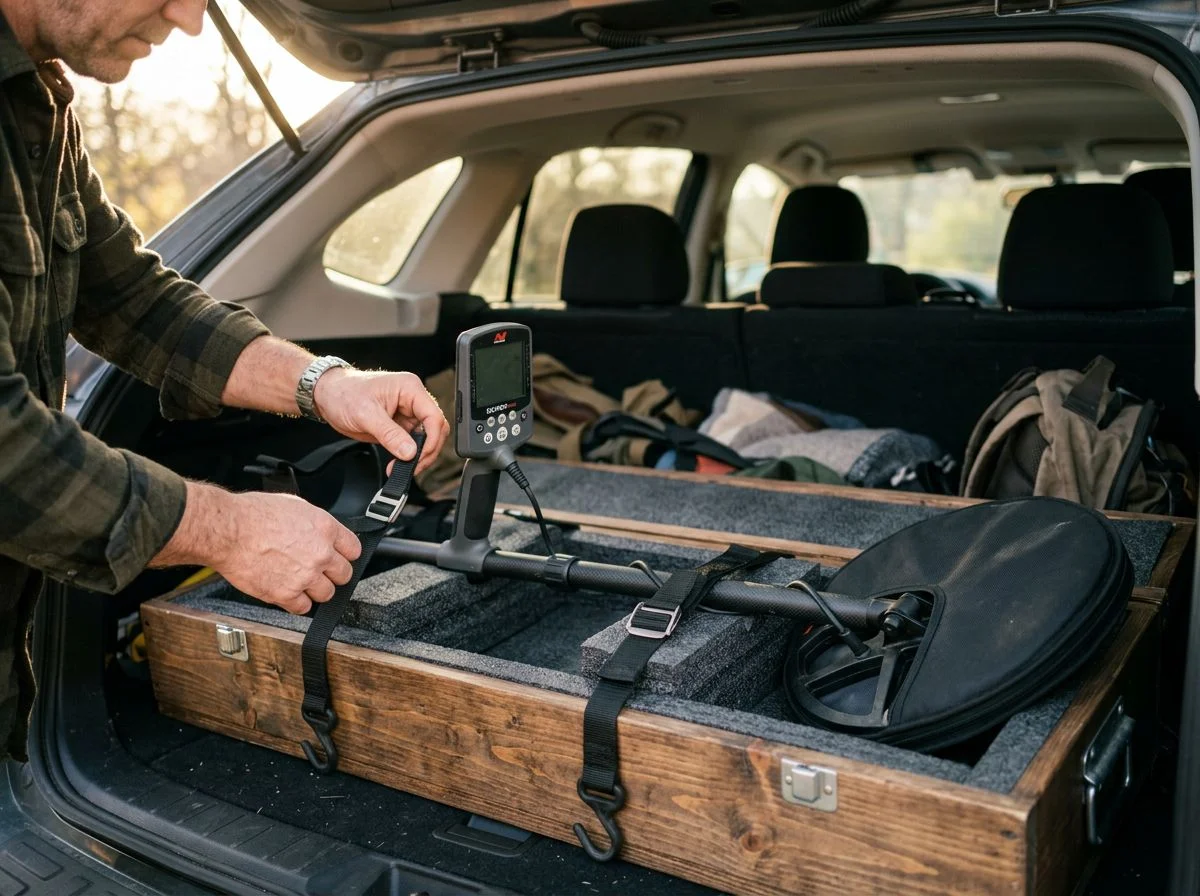
A loose detector in your trunk is a $900 mistake waiting to happen. The fix isn’t fancy. It’s a rail system with sliding hooks that keeps everything off the floor and locked in place. One forum user’s Walmart setup nails it. Proper metal detecting gear storage means nothing slides, nothing rattles, nothing breaks.
I learned this lesson the expensive way. Years ago, I had my Garrett AT Pro in a soft bag but not secured to anything. Every left turn, every speed bump — that bag slid across the trunk floor like a hockey puck. By the time I got to a site, I’d spent the whole drive listening to thumps and bangs. I kept wondering if my coil was getting cracked against the wheel well. Nothing broke, thank god, but the anxiety alone made me fix the problem that weekend.
The solution came from a forum post by JNimons that I’ve since copied almost exactly. He bought a simple rail with detachable sliding hooks from Walmart — the kind meant for garage tool storage — and mounted it along one side of his trunk. His Equinox 800 and Deus 2 hang from those hooks, fully assembled. His pack and shovels hang on adjacent hooks. Above the rail, he mounted a power strip so everything charges in place. Nothing touches the floor. Nothing slides. Nothing rattles.
If you’ve got a truck bed instead of a trunk, the Milwaukee Packout long-handle tool holder (model 48-22-8348) at $27.04 does the same job. It’s designed to grip shovel handles and long tools. It holds a detector shaft just as well. Mount it to the bed rail and your rig stays put even on washboard roads.
The key is that everything hangs — nothing rests. A detector lying flat on a rubber mat is still subject to vibration. A detector hanging from a hook is isolated from it. That’s the difference between gear that survives five years of trunk life and gear that develops mysterious connection issues after two.
Storing Your Digger Without Trunk Damage
A T-handle shovel is the hardest thing to store in a vehicle. It’s long, heavy, and has a pointy end that wants to destroy everything near it. The fix is simple: secure it vertically against a fixed anchor point so it can’t slide, rattle, or stab your spare tire. Good metal detecting gear storage handles the awkward stuff first.
We’ve all been there. You toss the shovel in the trunk and slam the lid. For the next 40 miles you listen to it rattling against the spare tire like a metronome from hell. Every left turn, it slides. Every pothole, it bangs. By the time you park, you’re half-convinced the blade has sawed through your jumper cables and is working on the wheel well.
The cheapest fix I’ve seen comes from a Reddit thread where someone asked exactly this question — how to secure a T-handle shovel in a pickup with jump seats. User matrix20085 suggested a temporary DIY solution that costs almost nothing. Paracord and Harbor Freight cable cuff organizers, model 57134. You knot the paracord through the cuffs. Tie the top to your seat headrest shank and the bottom to the seat bolts. The shovel stands vertically against the seat back, held snug at two points. It doesn’t move. It doesn’t rattle. When you need it, you pop the cuffs and it’s out in two seconds.
I’ve done a version of this in my own car using a couple of gear ties, and it works. The key is two anchor points — one near the top of the shaft, one near the blade. One point lets it swing. Two points lock it down. If you want something more permanent, the same Redditor recommended the Milwaukee Packout long-handle tool holder for truck beds. But honestly, the paracord and cuff setup handles most situations for under ten bucks.
Adapting Metal Detecting Gear Storage to Terrain
No — and if you do, you’re either hauling dead weight or showing up unprepared. The smart move is a modular base layer that stays in your trunk permanently. Plus a small swap-in kit you adjust per hunt. Effective metal detecting gear storage adapts to where you’re hunting. Eric Reed of Reawakening History distills this perfectly. He adjusts his vehicle loadout trip-by-trip based on three factors — terrain (plowed fields, woods, hills), weather (mid-summer heat to freezing), and hiking distance from where he parks to where he swings.
Terrain changes what digs with you. A plowed field needs a full-size shovel and maybe a finds pouch with room for iron relics. Woods? A hand digger and a smaller coil. You’re weaving through underbrush and don’t want a long-handled shovel snagging every branch. Hills mean water. I always toss an extra bottle in when there’s elevation gain, even if the forecast says mild.
Weather is the one that bites people. Mid-summer heat means extra water, a hat, and — this is the part everyone forgets — a place to put wet gear afterward. Freezing temps mean spare batteries (cold kills them fast), hand warmers, and a thermos. My buddy Mike learned the battery lesson the hard way at a frozen farm field in January. Dead pinpointer twenty minutes in. He now keeps a spare 9-volt taped inside his glove box year-round.
Distance is the real decider. A curb strip after school pickup? Grabbing the detector and pinpointer is enough. But a three-mile hike into a permission field means every ounce counts. That’s where a grab-and-go bucket setup shines. One forum user built a 5-gallon bucket kit with everything sealed under a lid that doubles as a seat. Toss it in, and you’re gone.
The point isn’t to pack for every scenario. It’s to know which scenario you’re driving into before you leave the driveway.
Power Management for an Always-Ready Trunk
A dead pinpointer battery is the #1 reason detectorists cut hunts short. The fix isn’t buying more batteries. It’s building a charging station into your trunk so everything tops off between trips without you thinking about it. Smart metal detecting gear storage includes power management.
Think about the last time you bailed on a hunt early. Was it the weather? The site? Or was it that sinking moment when your pinpointer started chirping weak, then went silent? I’ve been there. You’re 45 minutes into a promising permission and the detector’s singing. Suddenly you’re digging blind because your pinpointer gave up. Digging blind is miserable. You end up waving handfuls of dirt over the coil like you’re performing some kind of ritual. Half the time you give up on the deep targets entirely.
The solution is embarrassingly simple. Forum user JNimons mounted a power strip above the storage rail in his gear area. His detectors, pinpointer, and radios all charge in place. Nothing gets unplugged, nothing gets forgotten, and everything’s ready when he grabs it. That’s the whole trick. Charging has to happen where the gear lives, not wherever you happen to remember to plug it in.
I did a version of this in my trunk using a cheap power strip zip-tied to the side of a milk crate. The pinpointer dock, the detector’s USB charging cable, and a spare 9-volt charger all live there permanently. When I get home from a hunt, the gear goes back in the crate. The strip gets plugged into an extension cord I run from the garage. By morning, everything’s topped off.
One warning from Garrett’s own manual: remove batteries from detectors during long-term storage, especially in extreme temperatures. Charging circuits and lithium cells don’t love a 140°F trunk in July. So the rule is simple. Charge in place, but pull batteries if the rig’s sitting for more than a week or two. My setup stays plugged in year-round, but the batteries come out in deep winter and peak summer. Cheap insurance against a dead control box.
How to Know Your Setup Actually Works
A good trunk setup passes one simple test. From trunk closed to first swing, you’re under five minutes. If you’re still fumbling with shaft locks at minute seven, your organization needs work — not more gear. That’s the real measure of effective metal detecting gear storage.
Here’s the test. Park somewhere unremarkable. Close the trunk. Start a timer. Open the trunk, assemble your detector, grab your digger and pinpointer, close the trunk, and start swinging. That’s it.
The first time I tried this, I hit six and a half minutes. The problem wasn’t the detector. It was digging through a duffel bag for my pinpointer, then realizing my digger had slid under the passenger seat. Classic.
The fix came from two places. First, Facebook user Eric Kimminau’s silver sharpie trick. Mark your collapsing shaft sections with a line where they lock into place. Instead of guessing the right extension length every time, you slide each section until the marks align, lock, and go. It saves maybe 20 seconds per assembly. Those seconds add up when you’re standing in a cold parking lot.
Second, the “grab three items” principle. Your detector, your digger, your pinpointer. Everything else — finds pouch, water, spare batteries — lives in a grab-and-go container you can toss in the trunk or carry separately. One Redditor’s 5-gallon bucket setup nails this. Detector in one hand, bucket in the other, done.
Run the test once a season. You’ll find the bottleneck fast.
Common Questions About Trunk Setups
Do I need a hard case? Only if you’re flying or your rig lives behind the seat of a work truck. For everyday trunk duty, a padded soft bag handles the job fine. It breaks down, absorbs vibration, and stashes coils and chargers in side pockets. This is the foundation of practical metal detecting gear storage.
How many detectors can you realistically keep in a vehicle? More than you’d think. Forum user robby4570 lives full-time in a 35-foot RV and travels with four detectors laid out on his bed. He keeps his Surf PI in a climate-controlled storage unit in Panama City Beach. That’s the extreme end, but it proves the point. The constraint isn’t space. It’s temperature and moisture management.
Will leaving my detector in the trunk damage it? In summer heat or winter deep freezes, yes. Garrett’s manual is explicit that extreme trunk temperatures can severely damage the control box. The workaround most detectorists settle on: pull the batteries during extreme seasons and keep the control box dry. Your coil can handle rain; your electronics can’t.
What’s the simplest setup that actually works? Forum user NHTim keeps all his gear in his car trunk using a three-foot-long carrying bag for assorted accessories. The detector stays separate and intact. One bag, one detector, done. No custom rack required.
Do I need a power strip back there? If your pinpointer dies mid-hunt even once, yes. Mounting a strip where your gear lives means charging happens automatically. It stops being something you remember at midnight before a morning hunt. That’s the difference between leaving the house ready and leaving the house hoping.
Your Metal Detecting Gear Storage Is Never Finished
No, it isn’t — and that’s the point. Your trunk setup is a living system, not a one-time project. It evolves with your gear, your hunting style, and every mistake you make along the way. Metal detecting gear storage is a practice, not a purchase.
I started ten years ago with a milk crate and a prayer. The crate held everything — detector broken down, digger, pinpointer, spare batteries, a half-eaten granola bar from who knows when. It worked, sort of. Until I’d arrive at a site and spend ten minutes untangling my headphone cord from the Lesche. Then came the duffel bag era, which was somehow worse. Everything in one soft pile, nothing findable.
Now it’s modular. Detector in its own padded bag. A dedicated grab bucket for the core three. A charging station mounted where I can see the little green lights. Each change came from a specific failure — a dead pinpointer, a buried digger, a coil bouncing loose on a gravel road. Eric Reed’s “battle rattle” philosophy nails it. His configuration was distilled from years of lessons-learned, including unexpected equipment failures and getting lost in several hundred acres of wilderness. That’s the real credential. Not buying the right organizer, but surviving the wrong ones.
So run the five-minute test, fix what’s broken, and expect to do it again next season. Your trunk setup will never be finished because you won’t be either.

My name is Paul and I am the founder of Detector For Metal, a dedicated resource for metal detecting enthusiasts seeking to uncover historical treasures and connect with the past using the latest technology. As a stay-at-home dad and family man, I’ve found metal detecting to be the perfect hobby that combines family adventure with historical learnings for the whole family.
As a father, I’m deeply committed to passing on this hobby to the next generation of detectorists, starting with my own children. I share advice on everything from metal detecting with kids to exploring the top 10 metal detecting sites you never thought about. My methodical approach to the hobby goes beyond the thrill of discovery—it’s about creating family traditions while preserving history and sharing the stories of those who came before us.