Table of Contents
You pull a seated Liberty dime from a forgotten swimming hole. Six months later, you can’t remember which hole, or the exact date, or who tipped you off. That story? Gone. Without documentation, a remarkable find becomes just another coin in a box — stripped of the history that made it worth digging in the first place. The good news: you can adopt museum-level documentation for free, and this article shows you exactly how.
I’ve got a confession. When I first started metal detecting — way back with a beat-up Garrett ACE 250 and more enthusiasm than sense — I treated every find like a trophy. I’d pull a rusty buckle from a farm field, admire it in the palm of my hand, toss it in a shoebox, and move on. The shoebox filled up fast. The stories? They evaporated even faster.
I still remember one afternoon in particular. I was hunting an old swimming hole outside Sacramento — a spot a buddy from the local historical society had mentioned in passing. The kind of place where kids had been splashing around since the 1920s. On my third visit, I got a solid hit at about six inches. Out came a 1916-D Mercury dime. Not in pristine shape, but the date was clear and that “D” mint mark made my heart skip. I took a quick photo on my flip phone, pocketed the dime, and went home.
Six months later, a friend asked me where I’d found it. I opened my mouth to answer — and nothing came out. Was it the spot near the old train tracks? The one behind the abandoned gas station? I had no record, no notes, no anything. The farmer who’d given me permission? Couldn’t remember his name. The exact date? Guesswork. That dime became just another silver coin in a box, with zero context.
Sound familiar? If you’ve been detecting for more than a few months, you’ve got your own version of that story. Maybe it’s a Civil War button you can’t remember which field it came from, or a silver ring whose find spot is now a blur. It happens to all of us. The State Historical Society of Iowa puts it bluntly: never rely on memory. They recommend writing down the “who, what, and when” immediately, while the details are fresh (source 1). I wish someone had told me that ten years ago.
Here’s the thing — you don’t need a museum budget to fix this. You can adopt the same documentation methods that professional curators use, for exactly zero dollars. Over the next few sections, I’ll walk you through free digital cataloging tools, safe physical labeling techniques, how to write a simple provenance for each find, and a backup strategy so you never lose that data. By the end, you’ll have a system that turns your shoebox of coins and relics into a real, searchable collection — complete with the stories that make each piece matter.
If you’re curious about the broader mindset behind this approach, I covered the philosophy in The Hidden Historian Mindset: Documenting Metal Detecting Finds. But for now, let’s start with the why — before you forget another dime’s home.
Why Provenance Matters When Documenting Finds

Provenance — the chain of custody from ground to display case — gives every find its historical value. Without it, even a rare coin is just metal. Recording who gave you permission, where you dug, and when preserves the story that makes the find worth far more than its market price.
I still wince when I think about that seated Liberty dime. It was my first, pulled from a farm field outside Sacramento about three years into detecting. The farmer had waved me on with a gruff “go ahead, just shut the gates,” and I was so excited I never asked his name. I took a blurry photo, dropped the dime in a pouch, and moved on. Three years later, when I tried to revisit that field — the farmer had sold the land, the soil had been turned, and all I could say was “somewhere near the river.” The coin was still in my box. The story was gone. That dime’s market value? Maybe twenty-five bucks. Its historical value — the connection to a specific family farm, the spot where a cowboy lost his pocket change in 1878 — that evaporated because I didn’t write down a name.
Museum curators call it provenance, and it’s non-negotiable for them. The State Historical Society of Iowa’s collection guide insists you capture the “who, what, and when” immediately — especially the oral history when the donor (or, in our case, the landowner) is still present. That conversation is a primary source you can never re-create. Similarly, the Research Arsenal’s cataloging guide lists provenance as an essential data point — because without origin, a find is just an orphaned object.
Provenance is what turns a box of old stuff into a collection with meaning. It’s the story that makes that corroded button more interesting than a modern gold ring, and it’s the reason I now start every hunt by writing the landowner’s name, the GPS coordinates, and the date in my field notebook — long before I even turn on the detector. That habit connects directly to the research I do before a trip, like pulling Sanborn maps to reconstruct old property lines. Every find has two values: market price and historical significance. Documentation protects the latter, and that’s the one that lasts.
Build a Free Digital Catalog to Record Your Finds
A proper digital catalog transforms a box of unconnected finds into a searchable, meaningful collection — and it costs exactly zero dollars to start. The trick is choosing a platform that matches how your brain actually works, then setting up fields that capture everything you’ll need six months or six years from now. I’ve tried every system under the sun, and the free tools have consistently outperformed paid apps for what detectorists actually need.

Which Platform Is Best for Recording Finds?
I started with a spiral notebook. Then a single Google Sheet. Then I graduated to a relational database without realizing that’s what I was doing.
For the first year, that notebook worked fine — until I wanted to find every coin I’d pulled from plowed fields in 2021. The notebook was organized by date, not by location or find type. I spent two hours flipping pages before I gave up.
Google Sheets is where I tell every new detectorist to start. It’s free, searchable, and lives in the cloud so you can update it from your phone while you’re still in the field. Create columns for date, location, find type, depth, approximate value, and notes. That’s enough to capture 90% of what matters.
When you outgrow sheets — when you want to link specific finds to specific permissions or reference the exact spot on a property — Airtable’s free tier gives you relational capabilities. I can click on a find and see every other item pulled from that same field, or filter by detector model to see which machine performs best on old homestead sites. It sounds fancy, but the learning curve is about twenty minutes.
Start with a simple Google Sheet today. You can upgrade to Airtable later if you need relationships between finds and locations.
Essential Data Fields for Documenting Your Finds
Museum standards are actually simpler than you’d think. Source 5 explains that every object needs a unique accession number — a permanent identifier that follows that find forever. I use a simple system: the date I catalogued it plus a three-digit sequence. 20260412-001. Simple, unambiguous, and it prevents two finds from sharing an ID.
Source 2 recommends tracking catalog number, name, description, origin, and current location. I add a sixth field — “condition” — because that rusted buckle might look worse next year.
The description field is where most people drop the ball. Source 3 warns against only recording “Indian Head penny” and calling it done. A good description answers: What is it? What’s visible about its condition? Can you read any markings? Does it show wear patterns that suggest how it was used?
That’s where Secret Tricks for Dating Worn-Out Coins becomes invaluable — knowing how to identify a no-date Buffalo nickel by die characteristics or rim profile lets you fill in the description with specifics that turn a generic entry into a real record.
Photograph Your Finds Without Spending a Dime
Source 3 emphasizes that high-quality photos matter as much as the written record. A blurry phone shot of a corroded button tells you nothing six months later.
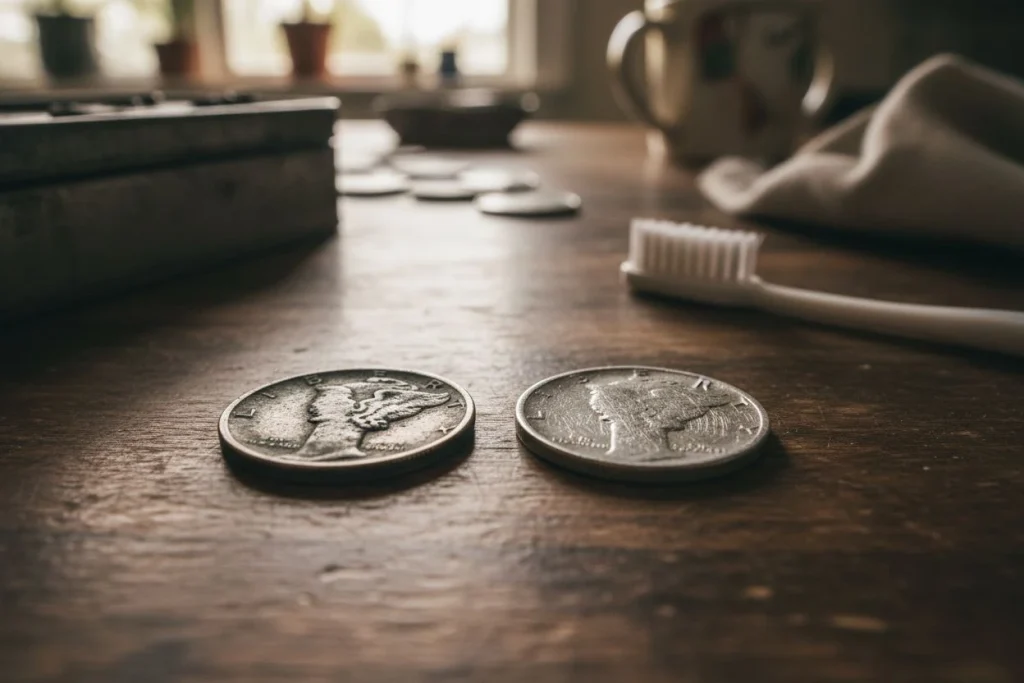
You don’t need a macro lens or a lightbox. Natural window light on an overcast day gives you soft, even illumination that reveals detail without harsh shadows. Place a ruler or a common coin next to the find for scale — I use a quarter because everyone knows its size. Set the whole thing on a plain white piece of paper or a neutral cloth. That’s it.
I take two shots per find: one showing the full context with the scale object, and one close-up of any visible markings or details. Both are free. Both take thirty seconds. Both save you from staring at a photo six years later wondering if that speck is a mint mark or a corrosion pit.
Shoot everything before you clean the item. The patina and dirt tell their own story, and you can always take a second photo after conservation.
Label Your Finds Safely on a Budget

Final verdict: do not mark the object itself.
That’s not a recommendation. That’s something I learned the hard way. About ten years into detecting, I thought I’d be clever — I labeled an 1890s Indian Head cent with permanent marker on a thin acetone coat. Eight months later, the patina around that spot had lifted into a dull, splotchy gray. I’d ruined a perfectly good coin trying to be organized. The lesson stuck.
The professional standard is simple: put the catalog number on the tag, not the object. Museums use archival pens (I use Pigma Micron, about eight bucks for a pack) on acid-free Tyvek tags. Tyvek is that impossibly tough, fibrous material you find in mailing envelopes — peel the label off an express mail package and cut it into quarter-inch strips. Free, archival, waterproof, and you can write on it with a Pigma Micron without bleeding through.
Cut a small slit in the tag, thread it onto the coin with unbleached cotton string (no synthetics, they can off-gas), and write your accession number — say, 2025.01.01 — on the tag. That number points back to your spreadsheet or Airtable entry, where the full record lives. The object itself stays unmarked and pristine.
Source 5 spells this out: use clearly visible, permanent ink where possible, but if marking directly damages the object, attach a permanent label instead. Source 4 advises “reversibility” — never do anything you cannot undo. Punching holes, laminating, or sticking labels onto surfaces violates that principle. A tag on a string? Fully reversible.
Here’s the full order of operations for a new find:
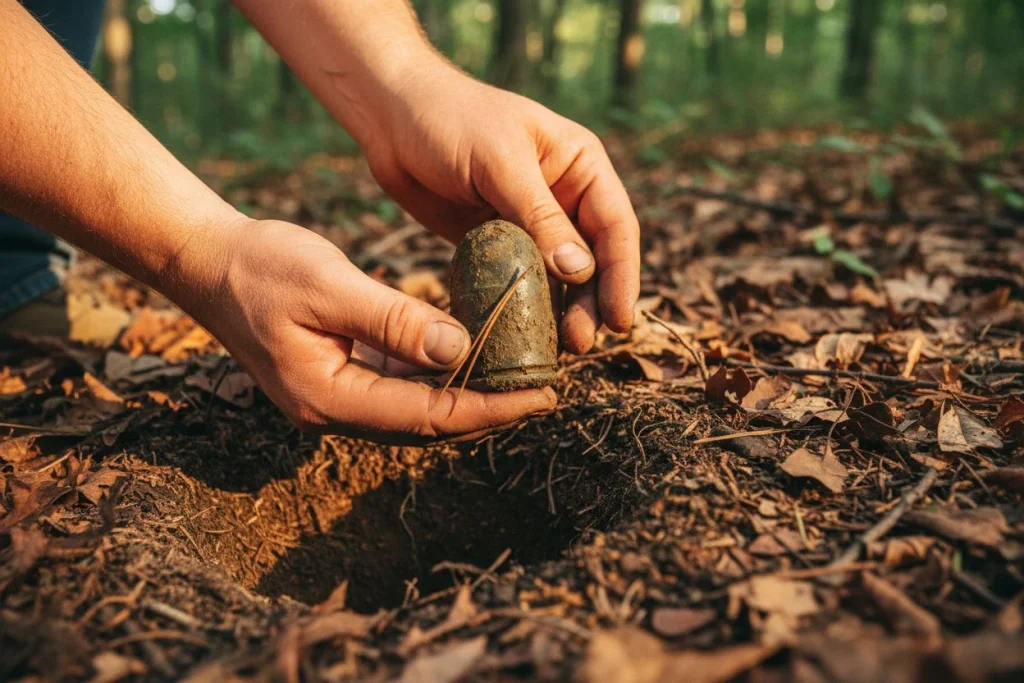
- Photograph it in situ (dirty, untouched).
- Bag it with a slip of paper noting the basic provenance (date, site, permission holder).
- At home, clean only if necessary — How to Clean Old Coins Found Metal Detecting will walk you through that. But don’t clean before you’ve assigned the catalog number; the number goes with the find from the moment it leaves the ground.
- Write your accession number on an archival tag and attach it.
Cost of entry? Zero dollars if you have a mailing envelope with a Tyvek label and borrow a pen. The value isn’t in the materials — it’s in knowing exactly which find is which, with a system that doesn’t damage a single piece of history.
Create a Grab-and-Go Binder for Emergencies
The 3-2-1 backup rule applies to your find records too: keep three copies on two different media, with one offsite. A printed binder in a fireproof safe ensures your documentation survives a hard drive crash or house fire.

I’ll be honest—I learned this one the hard way. A few years back, my laptop took a swim when my son knocked a water bottle onto my backpack. I’d been sloppy about cloud backups, and I lost a year’s worth of location notes and photos. Never again.
The professional standard is the 3-2-1 backup rule: three copies of your data, stored on two different types of media, with one copy kept offsite. For your find catalog, that looks like this:
- Copy 1 – Your primary digital file (Google Sheet, Airtable, or Notion database). This lives on your computer and you update it regularly.
- Copy 2 – A cloud backup (Google Drive, Dropbox, or iCloud). Free for most hobbyists and automatically syncs.
- Copy 3 – A physical binder with printed photos, accession numbers, and provenance notes. Keep this in a fireproof safe or a waterproof document bag.
That binder is your insurance policy. When the power’s out or your hard drive crashes, you still have the critical data. Print a fresh copy every few months and stash it separate from your finds.
Source 4 warns against storing collections in basements, attics, or garages where temperature swings and humidity wreck paper and electronics. If you’re keeping that binder at home, put it in a climate-controlled room, preferably on an upper floor away from flood risk.
As Source 6 puts it, “good collection management is good preservation care.” A little planning now saves heartbreak later.
Print your catalog today and put it in a fireproof safe or a waterproof document bag. You’ll sleep better knowing your find stories aren’t tied to a single hard drive.
For more on building a legal trail for your sites, check out our guide on Master Legal Metal Detecting Historic Site Documentation.
How to Write Provenance Narratives for Your Finds?

The difference between a pile of old objects and a curated collection is the story you attach to each find. Provenance isn’t a stuffy museum term—it’s the chain of custody from the ground to your display case, and it’s free to record if you do it the moment you dig.
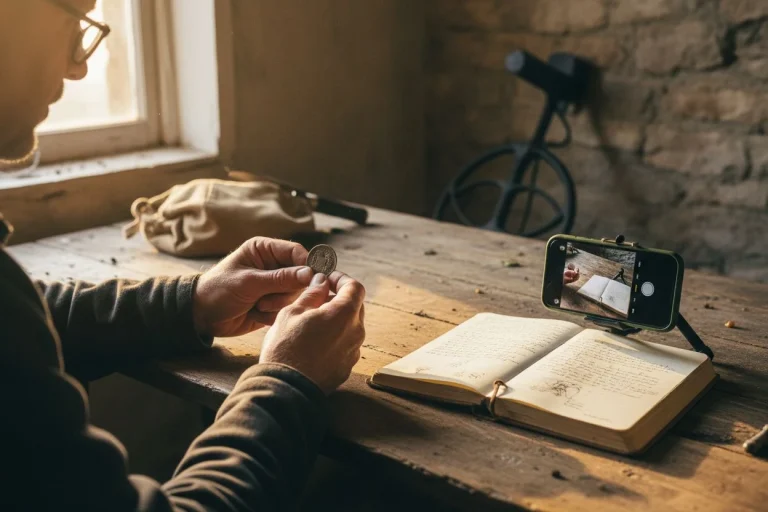
My most valued find is a corroded brass button from a forgotten railroad camp near Auburn. It’s worthless by any appraiser’s standard—the face is pitted and the shank is snapped off. But I know exactly where it came from because I spent an afternoon talking to an 87-year-old former conductor who described the camp’s layout, the workers who wore those buttons, and the 1887 payroll dispute that shut the siding down. I wrote every detail on a note card before I even cleaned the button. That oral history, as Source 1 stresses, “forms the basis for future interpretation.” Without it, the button is just another lump of patinated brass.
This is exactly what Source 3 means when it frames cataloging as “an opportunity to rediscover the collection.” The act of writing down why something matters forces you to see it anew. I’ve started treating every significant find like a miniature research project. Here’s the simple provenance template I use (it takes five minutes):
- Found by: Paul Edgerton
- Date: [exact date]
- Location: [specific site name or coordinates]
- Detector model: [Garrett AT Pro / Minelab Equinox 900 / etc.]
- Owner of land: [name of farmer, homeowner, or public agency]
- Circumstances: [how you got permission, what research led you there – e.g., “interviewed former conductor at historical society, who pointed to this vanished camp”]
- Subsequent history: [any cleaning, conservation, display method – e.g., “dry brushed, stored in archival coin flip”]
That template only records facts. To make your collection sing, add a Statement of Significance – two or three sentences that answer the question “Why does this object matter?” For that button, mine reads:
This brass button was worn by a Chinese laborer at the Auburn railroad camp (1885–1887). It is the only surviving physical evidence of that community, whose members were erased from local records after the camp closed. The button’s location came from an oral history conducted with former conductor Henry Murdock in 2021, preserved in this catalog.
Building a narrative doesn’t require fancy software. It just requires the discipline to stop swinging for ten minutes and write. That one card is worth more than a thousand more generic Indian Head pennies with no story. Your library research is what leads you to the site; this writing is what makes the find immortal.
Use Controlled Vocabularies for Accurate Dating
Your metal detecting notes are only as good as the words you use to describe your finds. Call something “a cool old belt thing” today, and next year you’ll waste an hour trying to figure out what you meant. Controlled vocabularies—standardized categories and terms—turn a pile of scribbles into a searchable archive. Same logic as learning your detector’s target ID language: consistent terminology makes everything easier.
I learned this the hard way. My early notebooks are full of entries like “old copper thing from the 1800s” and “some sort of fastener.” Now I use “19th Century” (never “1800s”), “Buckle” (never “old belt thing”), and dates always formatted as YYYY-MM-DD. Source 1 advises recording every possible search term for an object (“pants/trousers/slacks”) to improve findability, but warns that a physical filing system can only be organized one way. That means you have to pick a primary term and stick with it.
Pick three or four categories (e.g., Coin, Token, Button, Relic) and stick to them forever. Your future self will thank you.
To make it dead simple, I’ve put together a small downloadable reference list of common metal detecting find types with my preferred terms—grab it at the end of this article. Use it as your cheat sheet, and you’ll never have to decode your own handwriting again.
Start Today to Preserve Your Finds Legacy
Good collection management is good preservation care—Source 6 says it plainly, and I believe it. The most important factor isn’t the software you choose or the quality of your labels. It’s simply having a system in place, as Source 2 reminds us.
You’ve got the three pillars now: a digital catalog with consistent fields, archival labeling that won’t damage your finds, and provenance narratives that turn objects into stories. That’s the framework. The only missing piece is the first entry.
Pick the find on your desk right now. Give it a number. Write down where you found it and why it matters. That’s it. You’re a curator now.
This is the hidden historian mindset—treating every pull-tab and silver dime alike as data points in a collection only you can complete. I log new finds during my kids’ nap time. It takes ten minutes, and every time I scroll through my catalog, I get to relive the hunt. Start today. Your future self—and your finds—will thank you.

My name is Paul and I am the founder of Detector For Metal, a dedicated resource for metal detecting enthusiasts seeking to uncover historical treasures and connect with the past using the latest technology. As a stay-at-home dad and family man, I’ve found metal detecting to be the perfect hobby that combines family adventure with historical learnings for the whole family.
As a father, I’m deeply committed to passing on this hobby to the next generation of detectorists, starting with my own children. I share advice on everything from metal detecting with kids to exploring the top 10 metal detecting sites you never thought about. My methodical approach to the hobby goes beyond the thrill of discovery—it’s about creating family traditions while preserving history and sharing the stories of those who came before us.