Table of Contents
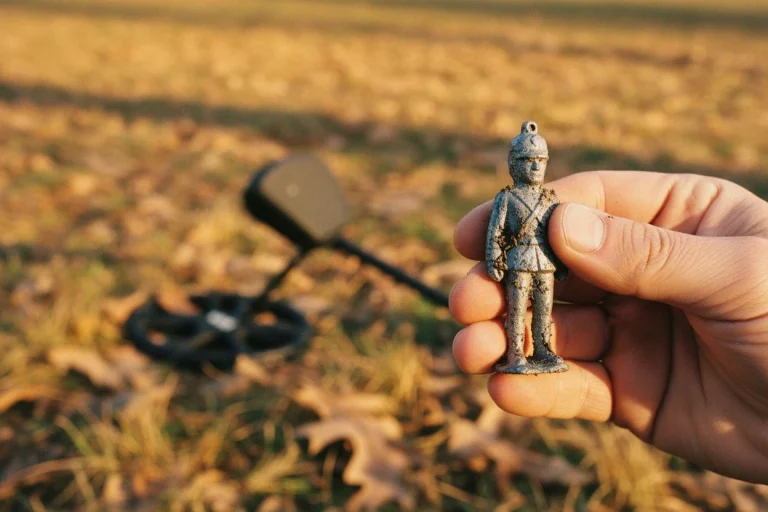
When you pull a small lead soldier from the soil, you’re holding more than a lost toy — you’re holding a snapshot of manufacturing history. That tiny hole in the bottom tells you it’s hollow‑cast, a technique invented in 1893 that made detailed lead soldiers affordable and widespread. Kids lost them at picnics, farmsteads, and play spots, which is exactly where we find them today.
I remember the first time I dug one at an 1890s picnic grove outside Sacramento. The Equinox 900 sang a sweet 25 VDI, and six inches down lay a cavalryman in faded blue paint. I turned it over and spotted a small hole in the base. At first I thought it was damage. Then I remembered reading about William Britain’s hollow‑casting patent from 1893. That hole was the pour hole — where excess molten lead had been drained after the mold filled. It meant my soldier was light, detailed, and mass‑produced for kids who could afford a penny.
Hollow‑cast figures dominated the lead toy market for decades. They were cheaper to make, easier to ship, and much more detailed than solid‑cast predecessors. Kids carried them to parks, schoolyards, and family outings — and dropped them in tall grass, under porch steps, and along creek banks. Production only slowed in the 1960s as health concerns about lead mounted and plastic soldiers took over.
That’s why detectorists find them everywhere: picnic groves, old farmsteads, abandoned fairgrounds. The same lightweight design that made them popular also made them easy to lose. Every hollow‑cast soldier I’ve found came from a site with heavy foot traffic — exactly where a child would have been playing.
If you want to learn more about documenting your finds’ provenance — where and how they came out of the ground — check out The Hidden Historian Mindset. It’s the difference between a curio and a documented artifact.
How to Tell Solid‑Cast from Hollow‑Cast Lead Toy Soldiers
 distinguishes hollow-cast from solid-cast lead soldiers.")
That tiny hole in the base of your lead soldier isn’t damage — it’s a manufacturing fingerprint that tells you exactly what you’re holding. Hollow‑cast figures are lighter, more detailed, and far more common for detectorists, while solid‑cast soldiers are heavier, rarer, and typically older. Knowing the difference changes how you handle, clean, and preserve your find.
The first time I flipped over a hollow‑cast cavalryman and saw that tiny pour hole, I knew exactly what I had — and that knowledge meant I didn’t try to “fix” it by filling what I thought was a casting defect. Let me save you the same confusion.
Here’s how to tell them apart in the field:
- Weight. Hollow‑cast figures are noticeably light for their size — the molten lead was poured into a mold, swirled to coat the walls, and the excess drained out. Solid‑cast figures are dense and heavy, often twice the weight of a similarly sized hollow‑cast piece.
- Pour hole. Flip the base. A small, circular hole (sometimes two) means hollow‑cast. No hole means solid‑cast, which was poured full and cooled as one piece.
- Sound. Tap it gently against your fingernail. Hollow‑cast rings briefly; solid‑cast thuds — the metal is thick throughout.
- Paint remnants. Most hollow‑cast toy soldiers were painted in bright uniform colors — red coats, blue trousers, black boots. Solid‑cast figures (especially 18th–19th century) often show little to no paint, or just faint traces of hand‑applied color.
The hollow‑cast method, patented by William Britain in 1893, dominated until the 1960s, which makes those figures the ones you’ll most likely dig up at old picnic groves and farmsteads. Solid‑cast figures are older and rarer — I’ve found exactly two in twelve years of detecting.
And here’s the thing: that “lead” was rarely pure. Most toy soldiers were cast from a lead‑tin alloy — essentially pewter — which is softer and more prone to surface corrosion than pure lead. If you spot white, powdery patches, that’s lead rot starting. Handling it wrong now means losing detail forever.
Identify first. Act second. That pour hole isn’t a flaw — it’s the first clue to your soldier’s whole story.
What Should You Do When You Dig Up a Lead Toy Soldier?
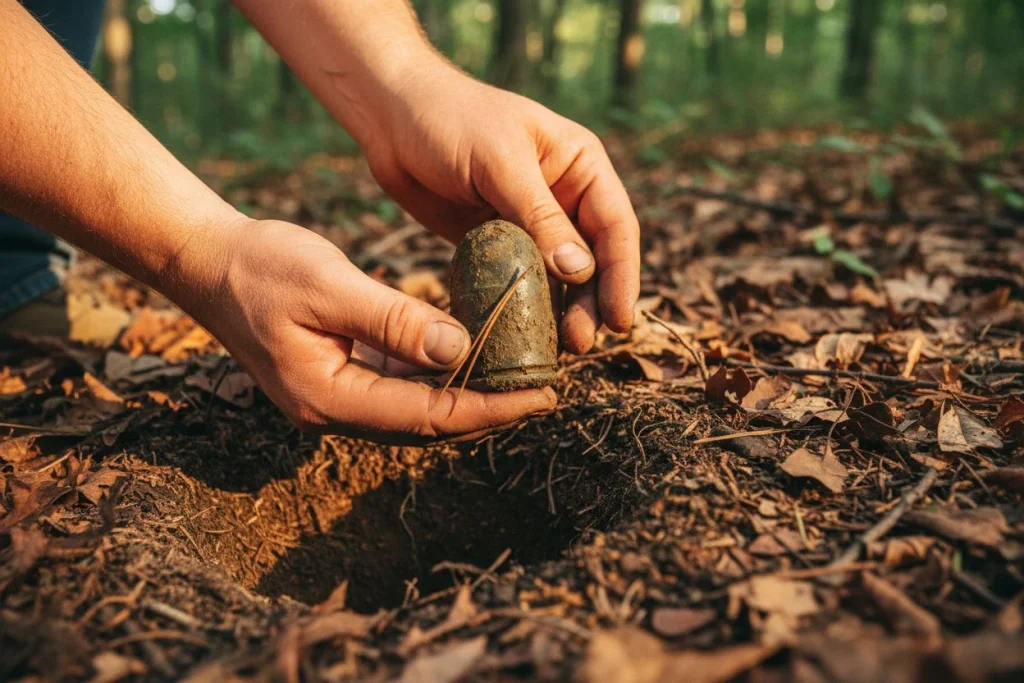
That moment when dirt falls away to reveal a tiny gray soldier or a flattened bullet — your next sixty seconds determine whether it survives as a collectible artifact or crumbles into a pile of dust and disappointment. Stop the dig, switch to soft tools, and get it into a padded container before your instincts tell you to rub it clean.
I once watched a guy at a club hunt pull a .58‑caliber Minié ball from a Virginia farm field and, before anyone could stop him, scrub it between his thumb and a handful of sand. “Getting the crud off,” he said. Ten seconds later the surface markings — the ring, the base impression, everything that made that bullet identifiable — were gone. Just shiny lead. Worth maybe a dollar instead of the ten it would have been. Don’t be that guy. I’ve made that mistake myself, once, on a musket ball, and I still wince when I think about it.

Here’s the step‑by‑step I follow every time now, and I keep the supplies in a dedicated pouch so I don’t have to fumble:
- Stop digging. Don’t flick the relic out of the hole with your digging knife. If it’s still in the plug, gently flip the plug over and let the find rest in the dirt.
- Use a soft brush — a cheap paintbrush or a detail brush from the hobby store — to whisk away loose soil. Do not rub, do not use your fingers. “Finger rubbing” can damage delicate surfaces, especially on soft lead (Source 6).
- Get it into a padded container. I carry nitrile gloves and a few ziplock bags in my finds pouch. Put on the gloves (lead oxide is toxic, and you don’t want that dust on your hands), then place the relic in a bag with a folded tissue or a wad of paper towel. That residual soil clinging to it? Leave it — it actually helps protect the surface during transport (Source 3).
- Mark the location. Snap a GPS coordinate on your phone or take a photo of the hole with a coin for scale. I use a free app called GPS Essentials, but even a pin on Google Maps works. You’ll want that location later if you ever need to document the find or return to the spot for more context (Source 3).
- Wash your hands as soon as you’re done — or at least use a wet wipe. Lead dust is no joke, especially around kids.
I never dig a lead relic without gloves anymore. That Minié ball lesson was enough for me. Now I just reach for the nitrile, seal it up, and move on to the next signal, knowing the little guy is safe for the ride home.
For more on careful recovery techniques, check out my guide on Proper Metal Detecting Recovery Techniques — especially the section on working with fragile targets. And if you want to read more about the clues in abandoned sites that lead to these finds, Secret Clues in Abandoned Sites covers the research side.
How to Spot Lead Rot on Toy Soldiers

Lead rot is the silent killer of dug relics. Chemically, it’s a corrosion layer called lead carbonate that forms when moisture reacts with the metal’s surface over time. You spot it as a white, chalky powder or a crusty, flaking layer that looks almost like frost. Left unchecked, it spreads to other artifacts stored nearby — and it will continue eating away at the lead until the detail is gone and the piece crumbles.
I once opened a bag of lead soldiers I’d left in a damp garage for a week – the surface had turned chalky white. That’s lead rot, and it can spread to other artifacts if you don’t act fast. I nearly lost a whole cavalry unit I’d dug at the same old picnic grove. The good news? Lead is generally stable (Source 5), and if you catch rot early, you can stop it cold.
Here’s the protocol that’s saved my collection more than once:
Isolate immediately. The moment you see white powder on a relic, get it away from everything else. I bag each suspect piece in its own ziplock — no exceptions. Lead carbonate can transfer to adjacent artifacts, especially in humid storage containers.
Do NOT scrub. Your first instinct will be to brush that white stuff off. Don’t. Scrubbing abrades the soft lead surface and can remove original markings, paint remnants, or the fine detail that makes a soldier identifiable (Source 4). You’ll also release toxic lead dust into the air — and if that toy was painted, lead‑based paint is a serious health concern (Source 5). Wear nitrile gloves.
Dry it out. Place the sealed bag with a silica gel pack in a climate‑controlled room for 48–72 hours. The goal is to pull residual moisture out of the corrosion layer. And believe me, I know the temptation to use a hairdryer — don’t. Heat causes lead to expand and contract unevenly, which can crack the surface.
For advanced cases where the rot has penetrated deep, professional conservation is the right call. Some stubborn concretions on shipwreck lead are removed with air scribes (Source 4), but field relics rarely need that level of intervention. Stabilization is usually enough — stop the moisture, and the chemical reaction stops with it.
The halo effect that rust imparts on iron relics can actually help with detection signals (read about ghost signals). But with lead? That same chemical change is your enemy. Clean coins are tough enough to preserve (different methods here) — lead requires a whole separate playbook. Play it smart, and those little soldiers will last another hundred years.
Safe Cleaning Methods for Lead Toy Soldiers
The golden rule for cleaning soft metal relics: Less is more. Aggressive scrubbing, harsh chemicals, or metal tools will destroy the surface detail and patina that took a century or more to form. Your goal is stabilization, not restoration.
A friend once polished a lead button with steel wool — he now has a shiny button with no detail and a patina that took 150 years to form, gone in 30 seconds. Learn from his mistake. Lead is incredibly soft, roughly the same hardness as your fingernail, which means anything abrasive will scratch and remove material. The “do no harm” approach starts with the gentlest method possible and only escalates if absolutely necessary.
Here’s the step‑by‑step I use for every lead relic, from toy soldiers to musket balls:
Step 1: Dry brush. Use a soft toothbrush or a fine artist’s brush to remove loose dirt and dust. Do this over a paper towel so you can see what’s coming off — and so you can collect any lead dust safely. Don’t press hard. You’re just whisking away the surface crud.
Step 2: Distilled water soak. Fill a small container with distilled water (tap water contains minerals that can leave deposits) and submerge the relic for 15–30 minutes. This rehydrates and softens any caked‑on soil. Exception: If the relic has visible paint remnants — common on toy soldiers — skip the soak entirely. Water can lift remaining paint and cause flaking.
Step 3: Soft toothbrush. Use a dedicated soft toothbrush (not your family’s) in the distilled water. Gently work the bristles into crevices and details. For hollow‑cast soldiers, pay attention to the pouring hole and any mold lines. The goal is to remove soil, not to make the metal shine.
Step 4: Air dry. Place the relic on a paper towel or a soft cloth in a well‑ventilated area. Let it dry completely for 24–48 hours. Don’t use heat, direct sunlight, or a hairdryer — rapid drying can cause stress cracks in the lead.
Step 5: Polish only as a last resort. If the surface has a chalky white corrosion (lead rot) that didn’t respond to the water soak, you may need to stabilize it. Fine abrasives like jeweler’s rouge or rottenstone can be used sparingly on a soft cloth — but test on an inconspicuous area first. If the item doesn’t respond well to these gentle methods, take it to a professional conservator. It’s better to have a slightly dull relic than one ruined by amateur polishing.
Keep in mind the contrast with coin cleaning: coins are typically harder metal alloys like copper, silver, or nickel that can tolerate more aggressive methods. Lead is a different beast entirely. I cover coin cleaning in How to Clean Old Coins, and the processes are almost reversed — coins often need more intervention, while lead relics need less.
Imperfect but original is always better than shiny but destroyed.
What Is the Best Storage for Lead Toy Soldiers?
The key to preserving lead toys long‑term is controlling each artifact’s personal environment. Store items individually in a non‑reactive container with a silica gel packet, keep them in a cool dark drawer, and never seal them airtight without moisture control — or you’ll trap the very humidity that causes lead rot.
I used to toss all my finds in a cardboard shoebox. Then I found a lead soldier with a glued‑on tuft of cotton from a storage box – the humidity had migrated, and the soldier started corroding. Now I use individual containers with silica gel. That lesson cost me a perfectly detailed cavalryman, but it taught me something I’ll never forget: the container you choose is as important as the relic itself.
Here’s the storage system that’s kept my collection stable for years:
1. Separate everything. Lead artifacts shouldn’t touch each other. Mechanical damage — scratches, dents, paint flaking — happens when items rub together in a drawer or bag. I place each relic in its own small zip‑lock bag or a compartmentalized plastic box. If you’re storing in bulk, use acid‑free tissue between layers. Source 6 specifically warns that storing metalwork together without individual packing leads to damage.
2. Control the moisture. Humidity is the enemy of lead. Even in a climate‑controlled house, seasonal changes can push moisture into storage drawers. A single silica gel packet inside each bag actively absorbs that ambient moisture. I buy them in bulk and recharge them in a low oven every few months. Crucially, never seal a relic in an airtight container without silica gel — that traps the moisture already present and accelerates lead rot. Source 3 emphasizes humidity control to prevent corrosion.
3. Avoid reactive materials. PVC plastics and cardboard off‑gas acids that can dull lead surfaces over years. I use polypropylene boxes or simple zip‑locks (food‑grade, non‑PVC). For delicate items with paint remnants, I wrap them in acid‑free tissue before bagging. That extra layer cushions the surface and buffers humidity.
4. Know where your relic came from. This is where documentation intersects storage. When you store a lead soldier, note the site and date on the bag. If you’ve used Sanborn maps to identify an old picnic grove, that context adds value — and helps you prioritize which relics get the best storage conditions. Documenting your finds isn’t just for show; it’s part of preservation.
5. Quarantine suspect pieces. I keep a separate “observation bin” for any relic showing white powder or chalkiness. Lead rot can spread to adjacent artifacts, so until I’m sure a piece is stable, it stays isolated. Silica gel in that bin, kept in a cool dark drawer, and checked monthly.
Final rule: cool and dark wins. A closet or nightstand drawer (not a garage or attic) gives you stable temperatures and no UV exposure. My collection fits in a single drawer — and I know every soldier is safe for the next generation.
When to Preserve vs Restore a Lead Toy Soldier
The answer: Stabilize the relic in its current condition — never repaint, reconstruct, or “improve” it. Museum conservators follow a “do no harm” principle: they only stop active decay. Once you alter a find’s original surface or structure, you destroy its historical evidence and its collector value.
I once met a guy who found a hollow‑cast British soldier with a broken arm. He meant well — he glued it back on with super glue. Within a year the glue had reacted with the lead, creating a green crust that ate into the metal. Now that soldier’s value is zero, and its history is buried under a chemical mess he can’t reverse.
That’s the difference between preservation and restoration. Preservation stops the clock: you remove harmful dirt, control humidity, and stabilize active corrosion. Restoration tries to turn back the clock — and it almost always fails on antique lead. Repainting a soldier, even with “matching” colors, destroys the original patina. That patina is a record of the item’s age, burial conditions, and authenticity. Once it’s gone, the figure becomes a modern replica.
Museum conservators never repaint a lead artifact without extensive documentation — and even then, only for display purposes. For detectorists, the rule is simpler: if you want to display a find, leave it as‑is. If you absolutely must glue a loose part, use a reversible adhesive like Paraloid B‑72. It stays stable and can be removed later without damaging the metal.
Document every choice you make. The photo of the soldier with the broken arm, taken before you stored it, may be more valuable than the glued repair. The Hidden Historian Mindset applies here: record first, alter second — if at all.
Safe Handling of Lead Toy Soldiers for Detectorists
The thrill of pulling a 100‑year‑old lead soldier from the ground fades fast if you don’t think about what’s actually on your fingers. Lead is toxic. The gorgeous white or gray patina you see? That’s oxidized lead, and it can be absorbed through your skin. The right handling habits keep you safe without slowing down the excitement.
Why Lead Rot Is Dangerous for Your Collection
The Canadian Conservation Institute notes that lead‑based paint on old toys is a significant hazard. If you handle oxidized lead without gloves, you’re absorbing it through your skin. I learned this the hard way after a day of cleaning a handful of dug soldiers — my fingertips ended up with a faint metallic taste, a classic sign of lead exposure. That sobered me up fast. Now I treat every lead relic like a hazardous material, not a prize.
Field to Home Safety Steps for Lead Relics
Here’s the short list I keep in my detecting bag:
- Wear nitrile gloves when handling. I keep a box in my truck. When I pull a lead target, I don’t touch it with bare fingers. No exceptions.
- Wash hands immediately after handling. Soap and water for at least 20 seconds. If you’re out in the field without a sink, use wet wipes until you get home.
- Never eat, drink, or smoke while handling lead. That lead dust can transfer from your hands to your mouth easier than you think.
- Do not sand, grind, or blow on lead relics. Lead rot produces fine airborne dust that you absolutely do not want to inhale. If you see white powder, do not blow it off — use a soft brush while wearing a mask.
- Store lead finds away from living areas. Keep them in a dedicated drawer or cabinet, not on the kitchen counter. Kids and pets should never have access to uncleaned lead artifacts. If you’re beach metal detecting with kids, keep lead finds separate and wash everyone’s hands before snack time.
Keep Children Away from Lead Relics
I let my kids hold clean, sealed lead soldiers in display cases, but never freshly dug relics. The lead oxide and flaking paint are too risky for small hands that end up in mouths. Teach your family to admire the history — safely.
How Old Are Lead Toy Soldiers Found Detecting?
Here are the questions I see most often in our detecting club.
1. Can I clean lead relics with vinegar or lemon juice? No — please don’t. Vinegar and lemon juice are acids that react with the lead oxide patina, eating into the metal and creating a crusty green corrosion that can’t be reversed. I’ve watched perfectly good soldiers get ruined this way. Stick to gentle cleaning with a soft toothbrush and water, and only if absolutely needed.
2. How do I know if my find is lead versus pewter? Lead is dense and heavy for its size. The patina is usually a soft gray or white‑gray, and the metal is noticeably soft — you can dent it with a fingernail. Pewter tends to be slightly harder, with a more silvery shine when fresh. If you tap a lead figure, it gives a dull thud; pewter rings a little brighter. When in doubt, check the weight — if it feels oddly heavy for such a tiny soldier, it’s almost certainly lead.
3. What if I find a painted soldier — should I remove the paint? Absolutely not. The original paint is part of the artifact’s history and collector value. Even if it’s flaking, leave it alone. Removing paint destroys the evidence of age and authentic detail. If the paint is actively chipping, you can stabilize it with a light coat of reversible conservation wax, but never scrub or repaint.
4. My lead soldier is broken — should I glue it back together? Not with super glue or epoxy — those react with lead and create a crusty mess. If you must attach a loose arm or leg, use a reversible adhesive like Paraloid B‑72 (available from conservation suppliers). It’s stable and can be undone later without damaging the metal. Even better: store the broken pieces together in a separate bag until you’re sure you want to commit.
5. Is it safe to let my kids handle lead relics? The short answer: no. Lead is toxic, especially the oxidized patina found on dug relics. Fine white powder can transfer to hands and then to mouths. If you want to display a lead soldier in your living room, it’s perfectly safe as long as it’s enclosed in a sealed display case or encapsulated. But let the little ones admire it through glass — and when you handle it yourself, wear nitrile gloves.
If your soldier has any markings or a partial date, you can sometimes narrow down its age using the same techniques we use on worn coins. Secret Tricks for Dating Worn‑Out Coins might help you pin down that British hollow‑cast from a 1910 catalog.
Being a Responsible Steward of Lead Relics
That lead soldier in your hand isn’t a trophy — it’s a time capsule. How you handle it determines whether that story lives another hundred years or crumbles into dust. Preservation isn’t just about keeping your finds pretty. Every fragment you stabilize and document adds to both its historical significance and its monetary value for future collectors or museums.
So here’s the bottom line: be the detectorist future archaeologists thank. Document your finds, photograph them in situ, and share them with local historical societies. A three‑line Facebook post isn’t enough — write down where you dug it, what the context was, and any known site history. That provenance is what turns a corroded soldier from “cool junk” into a genuine historical artifact.
Your job isn’t to make it look new — it’s to make sure that story survives for the next 100 years. Keep researching those forgotten sites, keep digging ethically, and keep sharing what you learn with our community.
Happy hunting, and may your next dig be a tiny bit of history worth saving.

My name is Paul and I am the founder of Detector For Metal, a dedicated resource for metal detecting enthusiasts seeking to uncover historical treasures and connect with the past using the latest technology. As a stay-at-home dad and family man, I’ve found metal detecting to be the perfect hobby that combines family adventure with historical learnings for the whole family.
As a father, I’m deeply committed to passing on this hobby to the next generation of detectorists, starting with my own children. I share advice on everything from metal detecting with kids to exploring the top 10 metal detecting sites you never thought about. My methodical approach to the hobby goes beyond the thrill of discovery—it’s about creating family traditions while preserving history and sharing the stories of those who came before us.